Fitting in with the Seasonal Trends: Best Nail Art for Fall!

Call us crazy, but we love fun seasonal nail art so much that we’re absolutely the friend in the group who changes our nails every week, just to make sure we can fit as many themed and relevant holiday manicures into the month as possible. That’s why we’re always on the lookout for new tutorials and have been keeping our eyes peeled for fall nail art inspiration lately!

Just in case you love the idea of giving yourself a few cute fall themed manicures this autumn just as much as we do, if not more, here are 15 of the cutest ideas we’ve come across so far in our search.

1. Thanksgiving inspired manicure

VIEW IN GALLERY

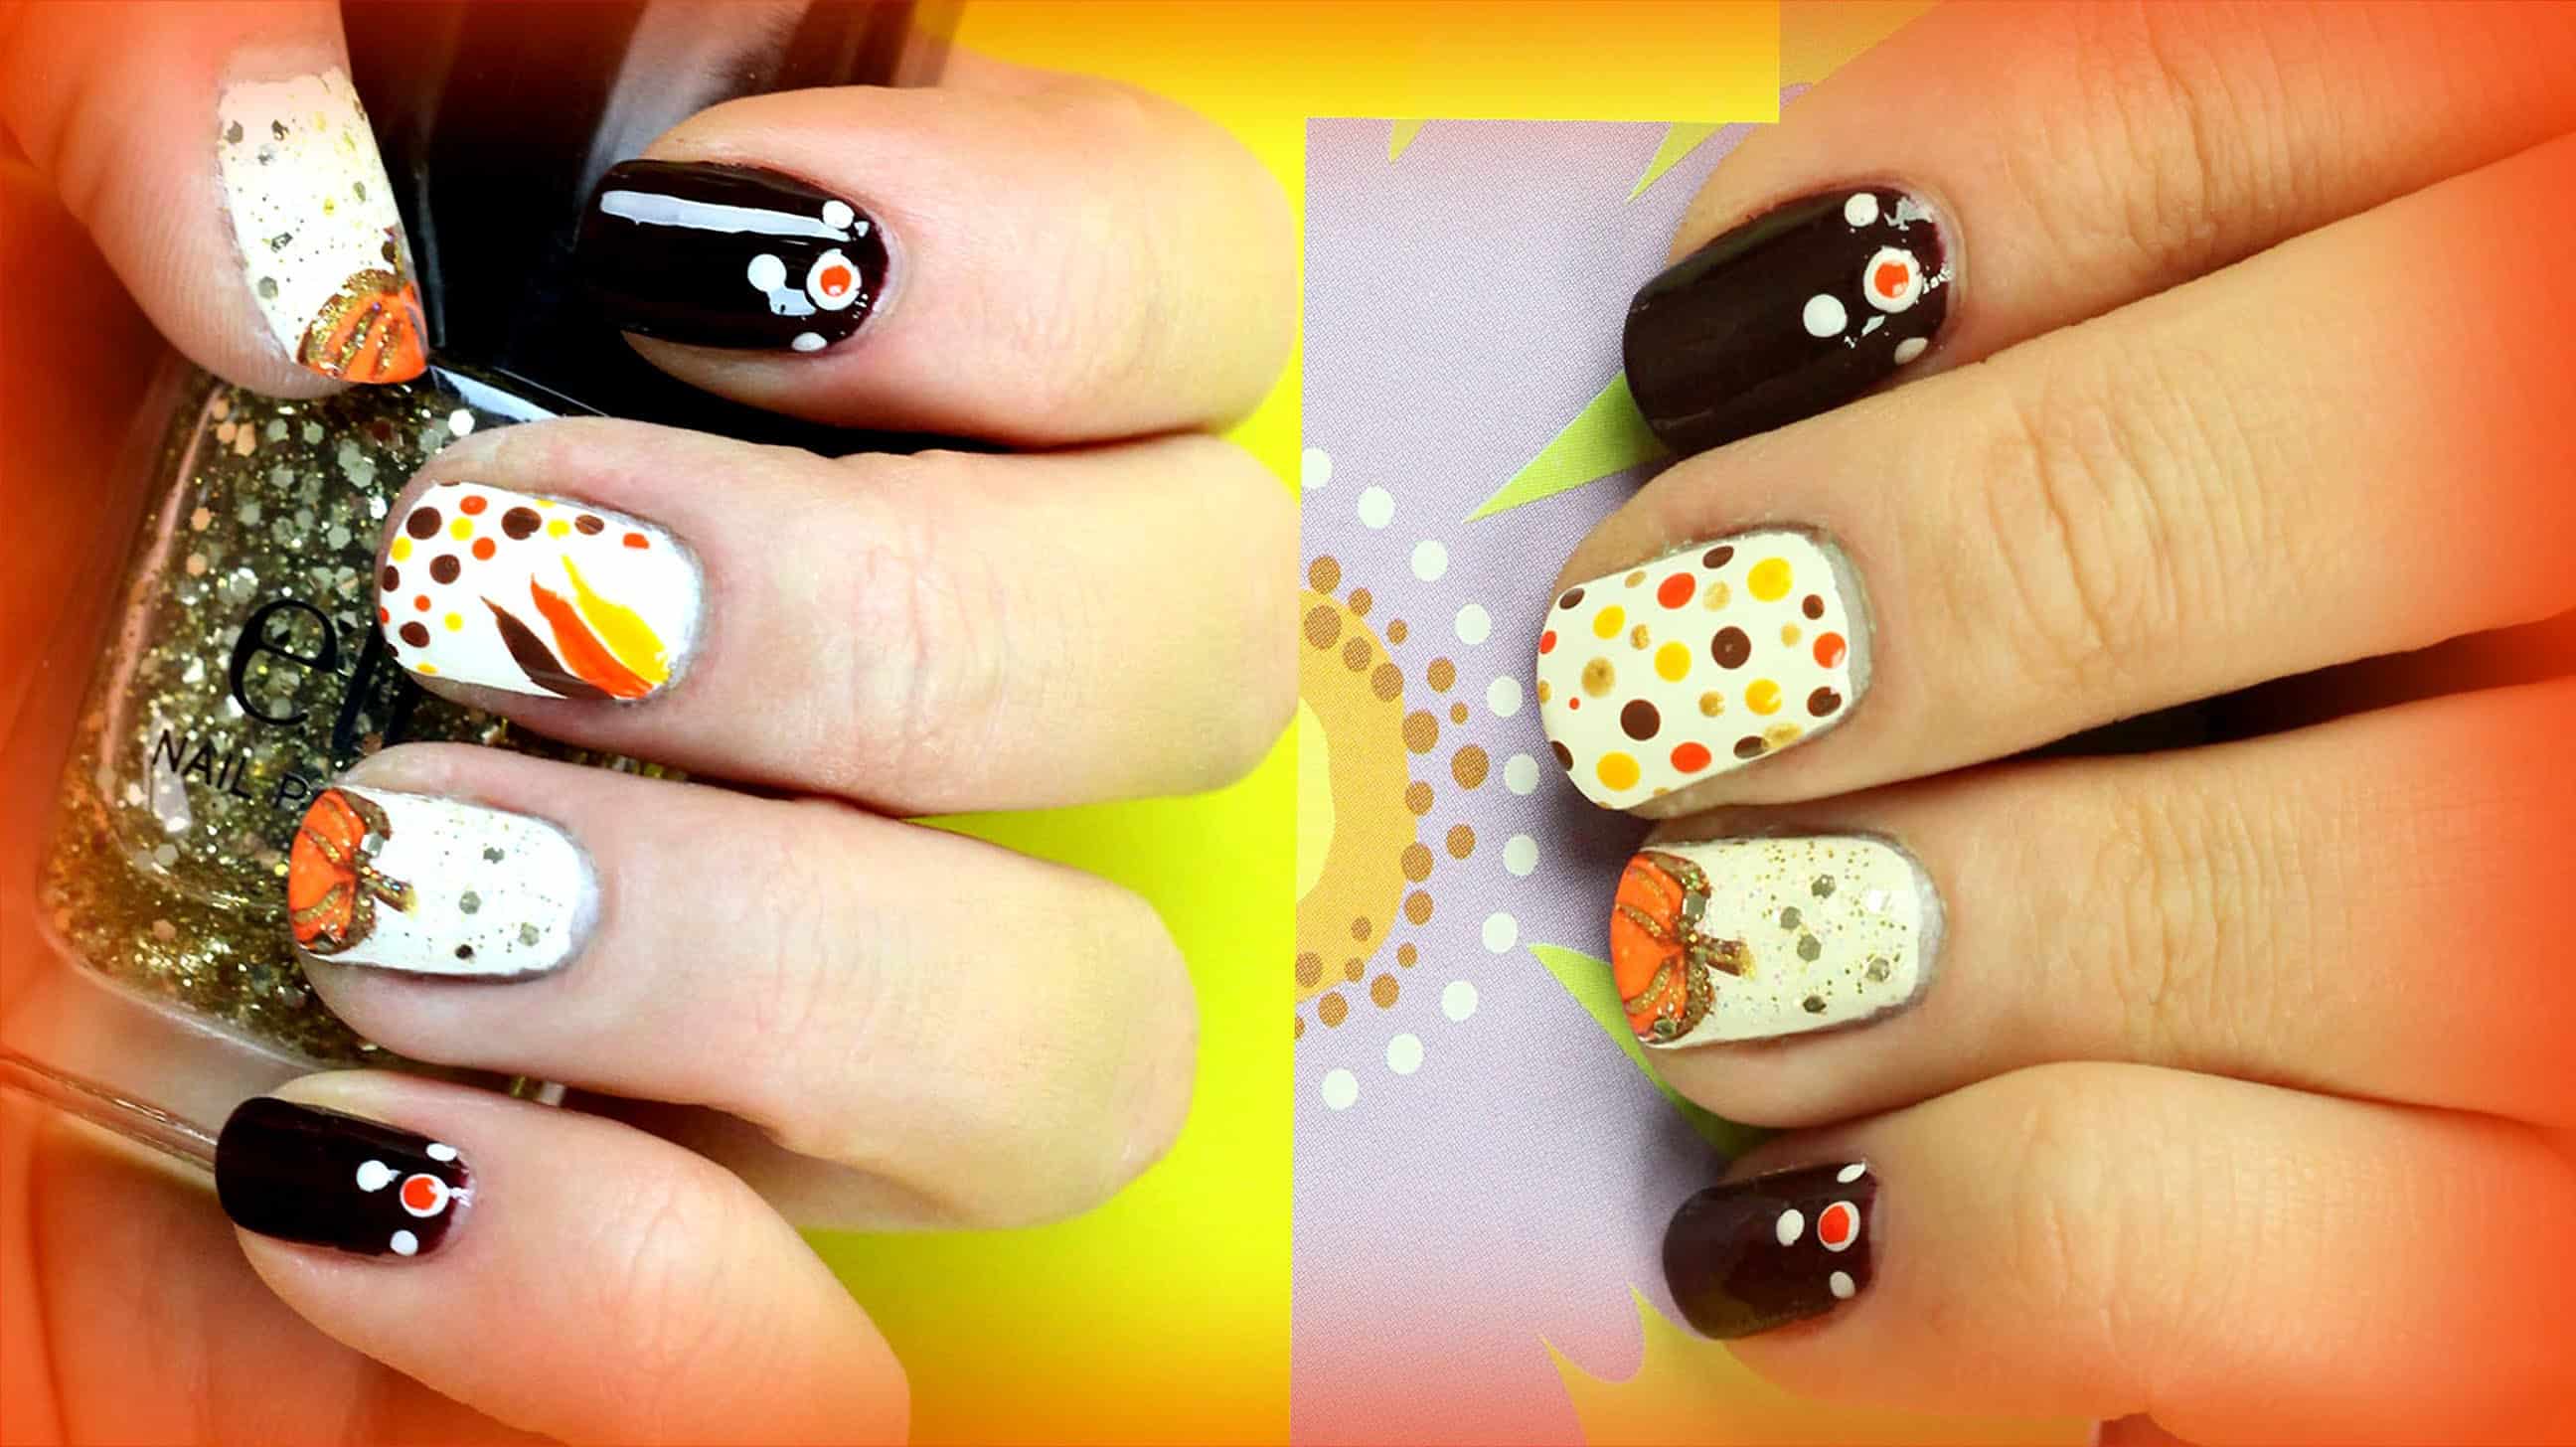
Whether you celebrate Thanksgiving, harvest, or neither of those things and you really just like pumpkins and fall colours, here’s a cute idea that’s quite simple to do! Check out how Sasha’s World TV made this design with some careful dotting and outlining.

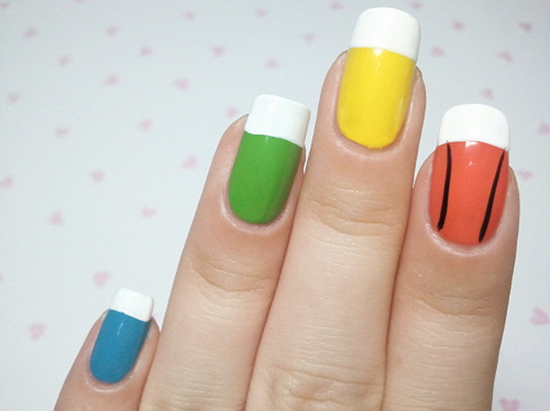
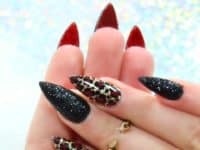
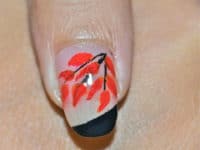
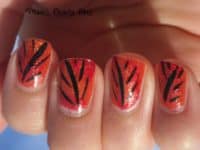
2. Glitter and black stripes fall leaf nails

VIEW IN GALLERY

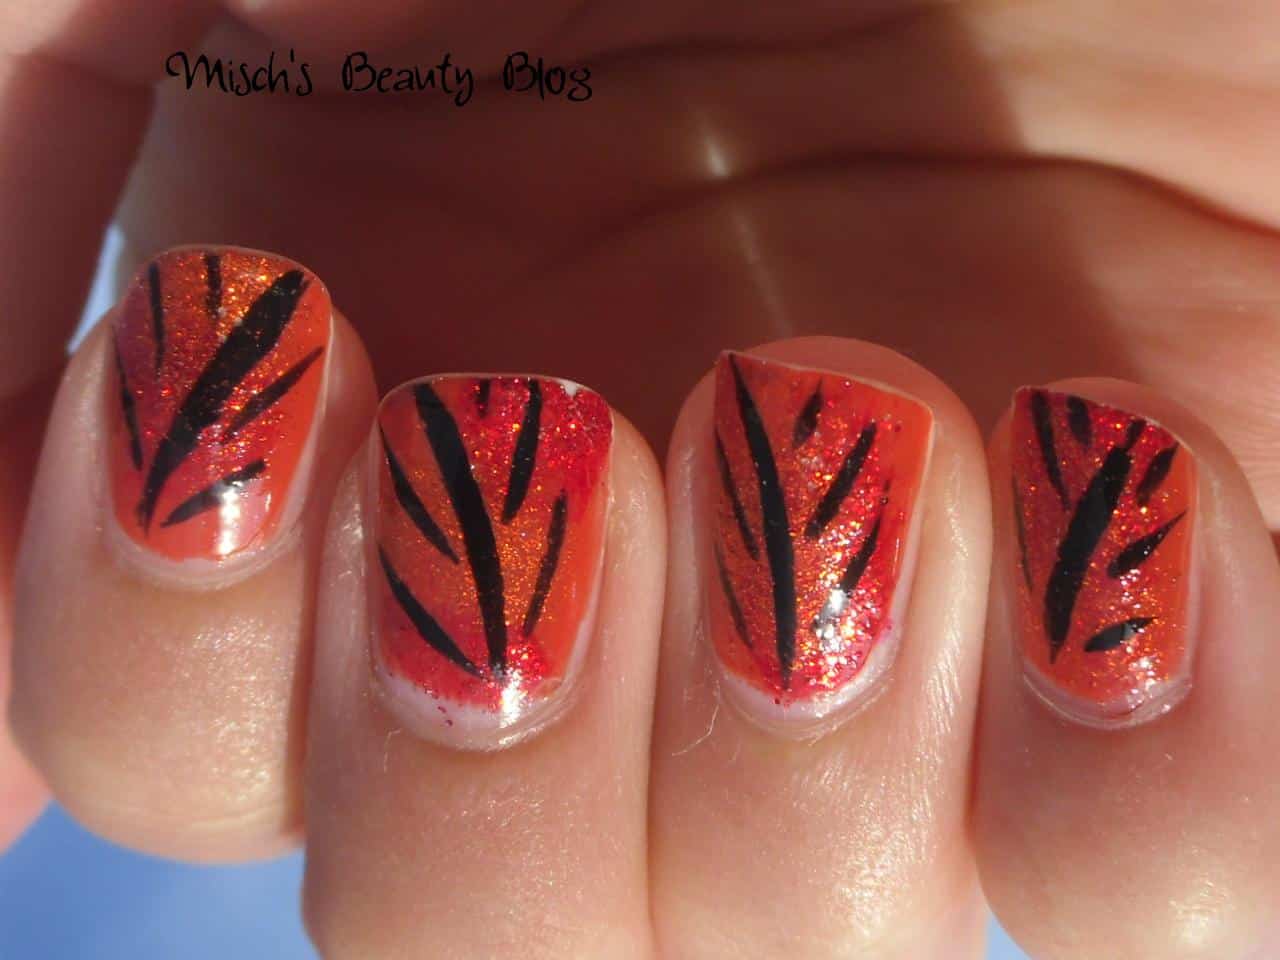
We love this manicure idea because it’s easily recognizable as fall leaves, but it’s also incredibly simple to paint. All you need is an orange background (we love the sparkles but you could do a solid colour if you prefer) and some black to make the strokes that look like the stem and branches of each leaf. See the idea in more detail on Misch’s Beauty Blog.

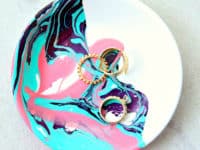
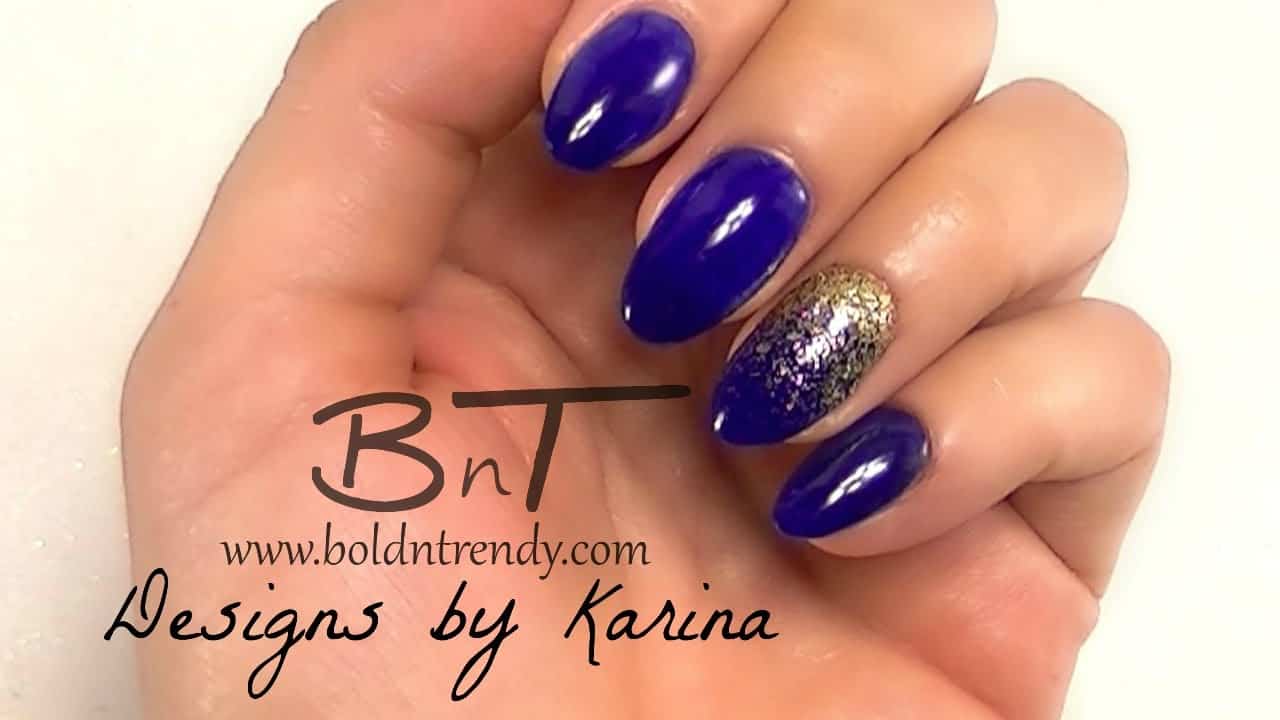
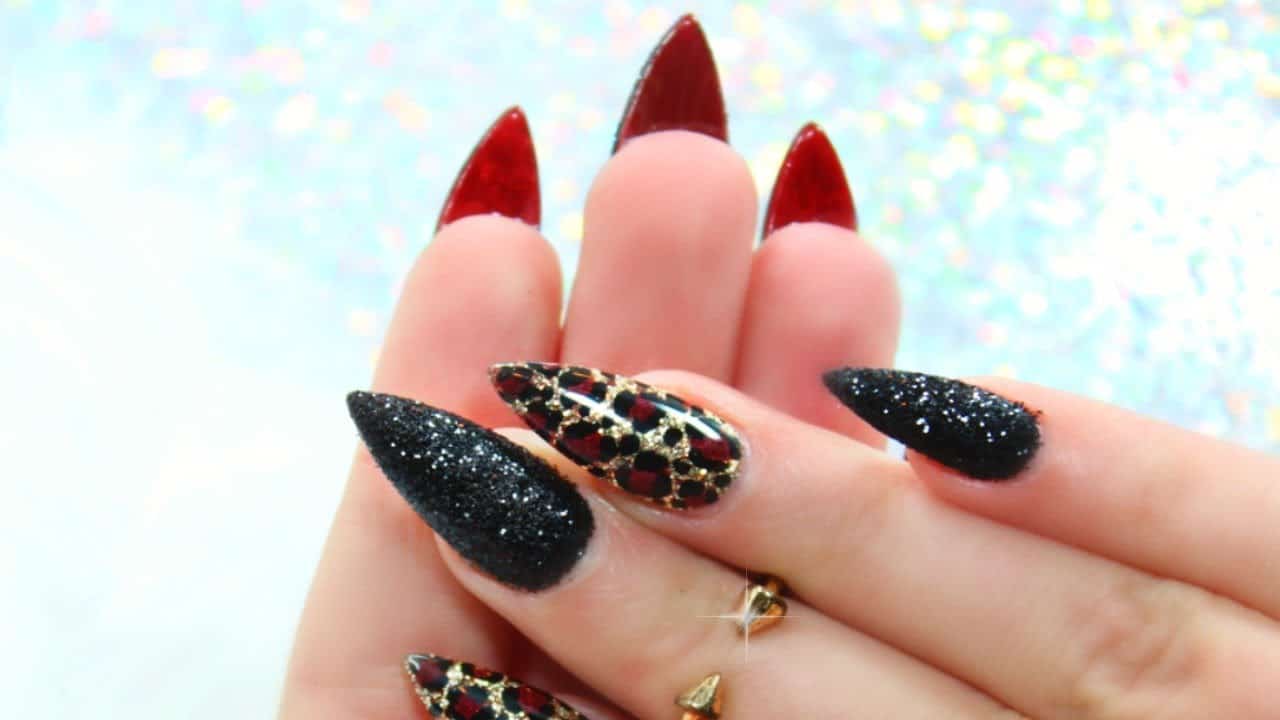
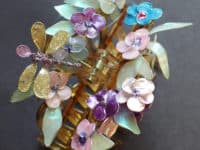
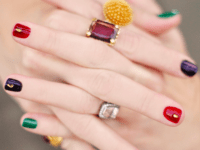
3. Deep jewel tones with gold accents

VIEW IN GALLERY

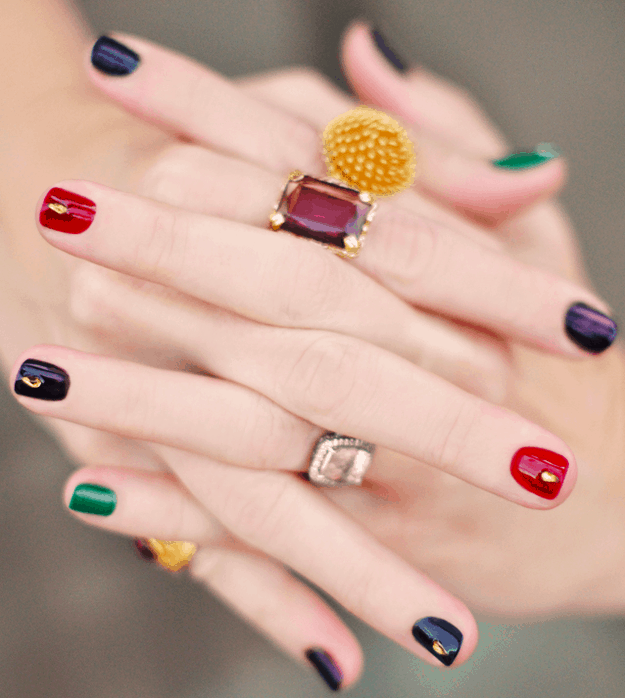
There’s always just been something about deep jewel tones and gold accents, together or separate, that reminds us of fall. We’re sure you can imagine, then, just how excited we were when we found this wonderful combination of the two featuring all different colours! See how simply this design can be done on Love Maegan.

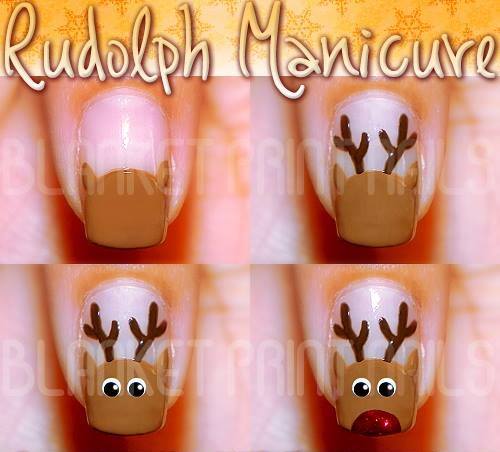
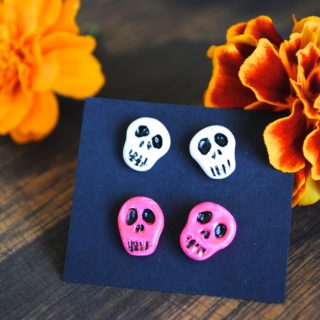
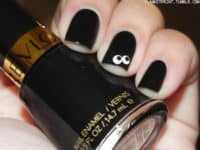
4. Simple spooky nails

VIEW IN GALLERY

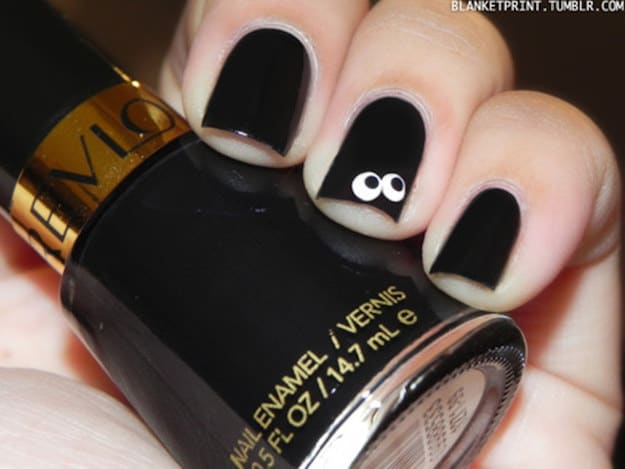
Do you actually work in an office where you’re allowed to have nail designs but they’re supposed to be pretty subtle, so you’re looking for an easy pattern and preferably a spooky one since Halloween is your favourite part of fall? Then we think you’ll get along very well indeed with these awesome peeking eyeballs on a black background, just like Blanket Print Nails did!

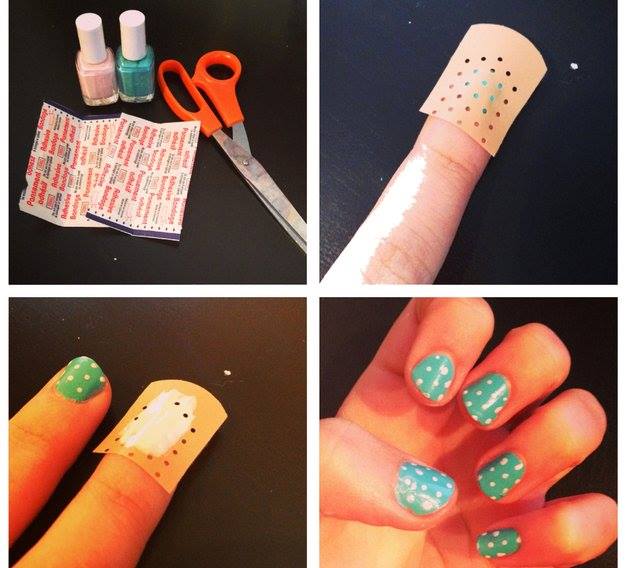
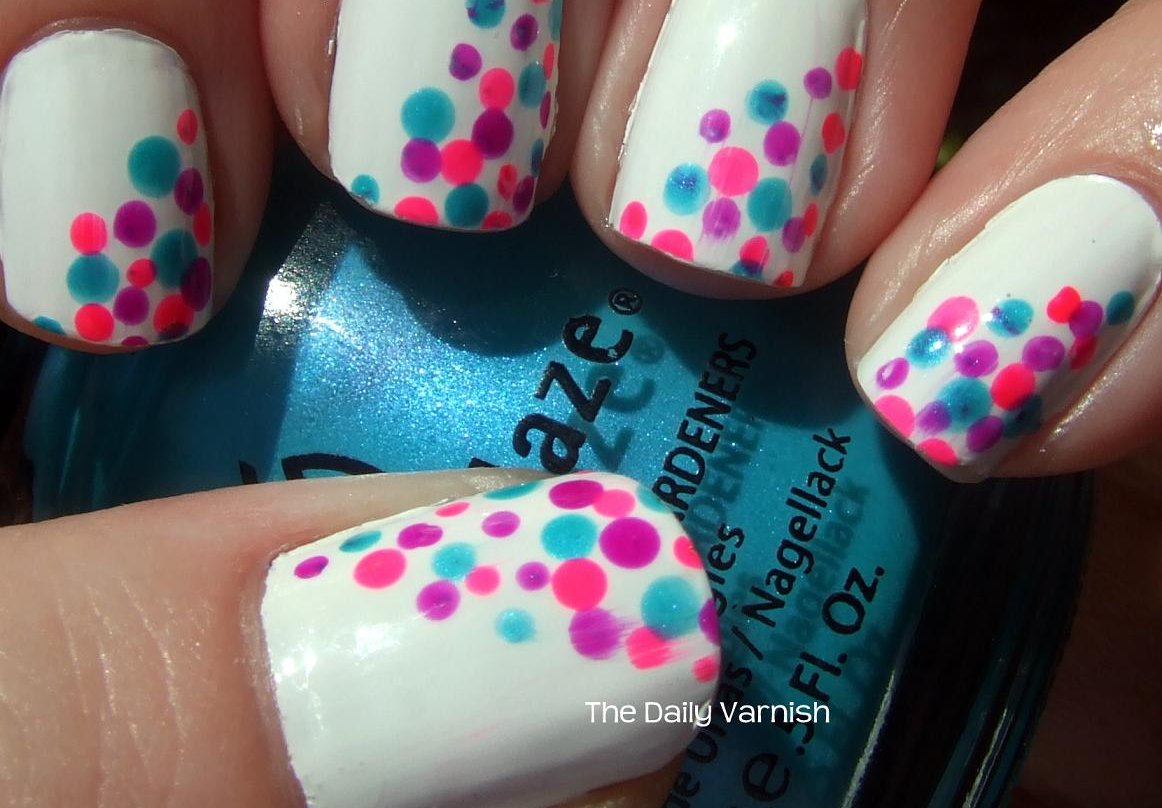
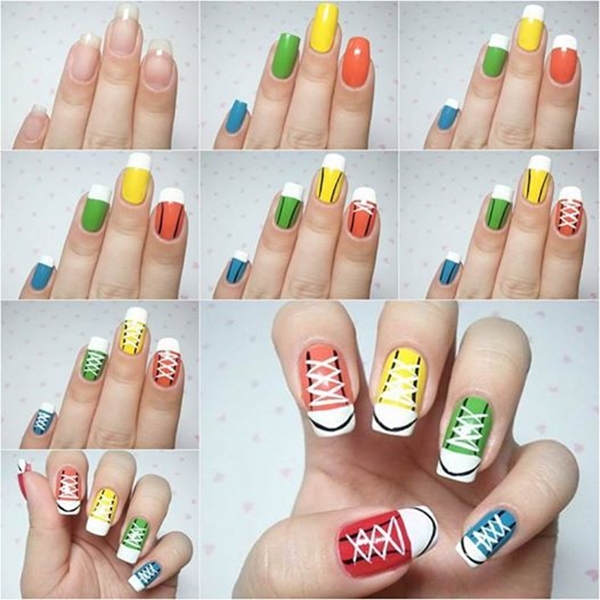
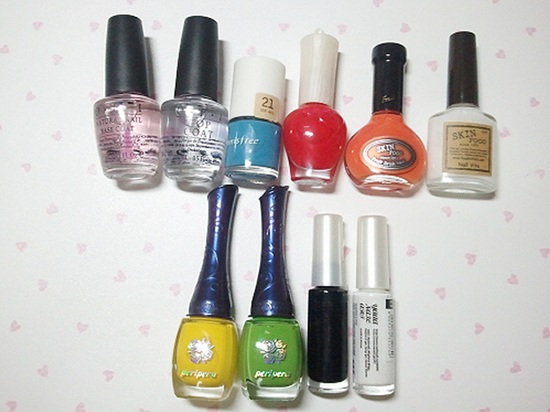
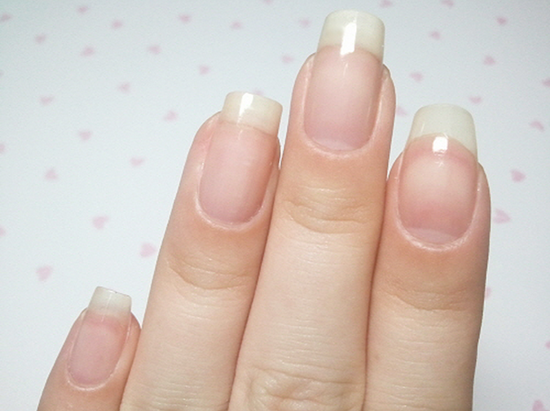
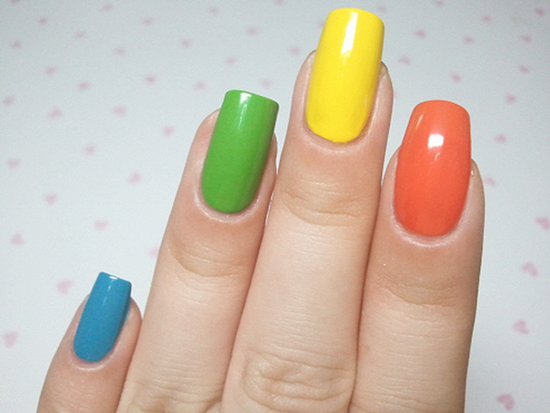
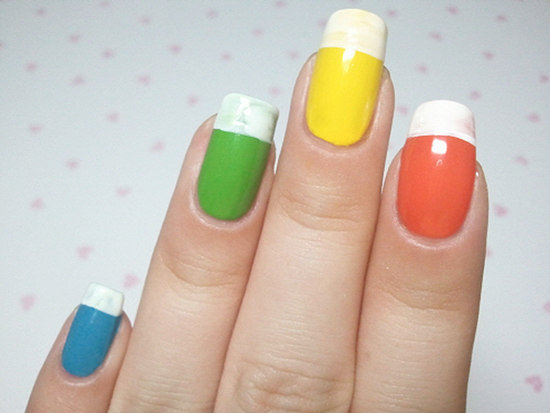
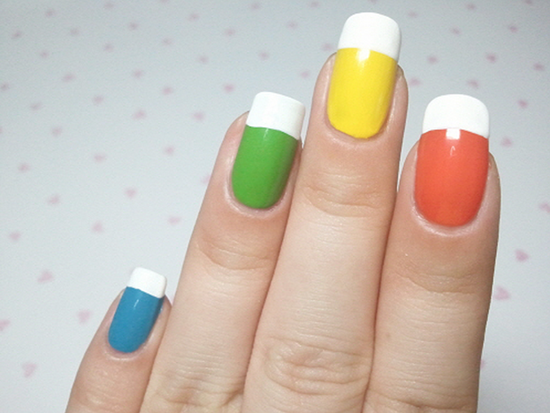
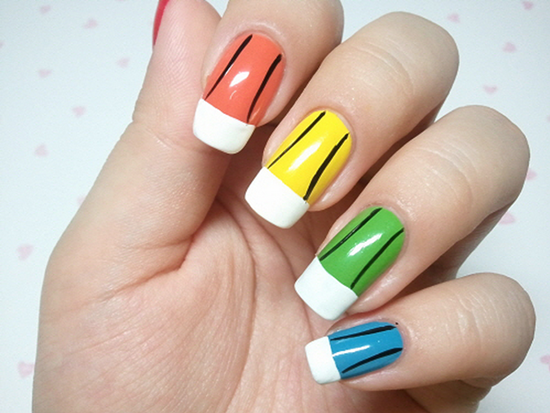
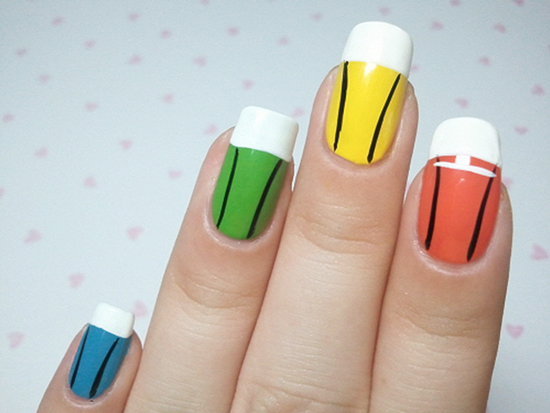
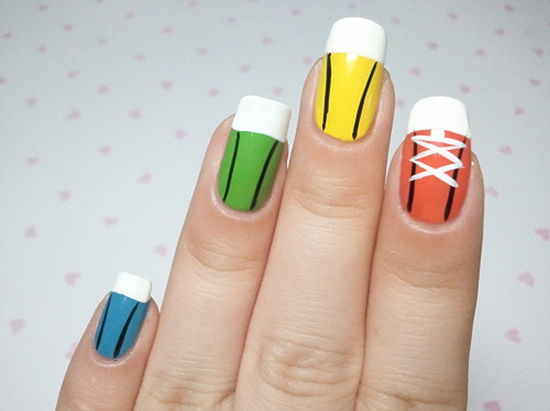
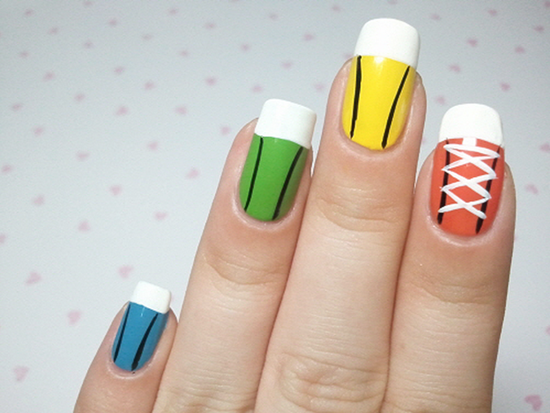
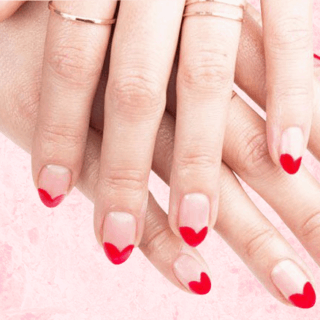
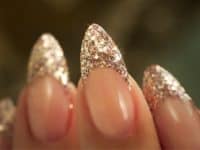
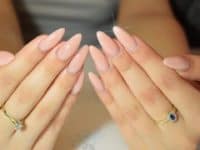
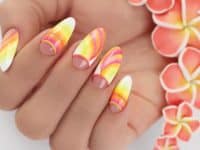
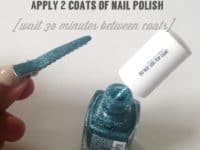
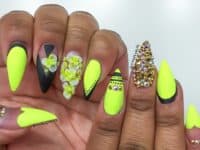
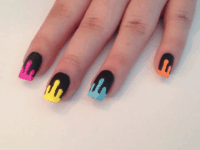
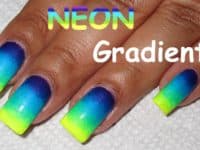
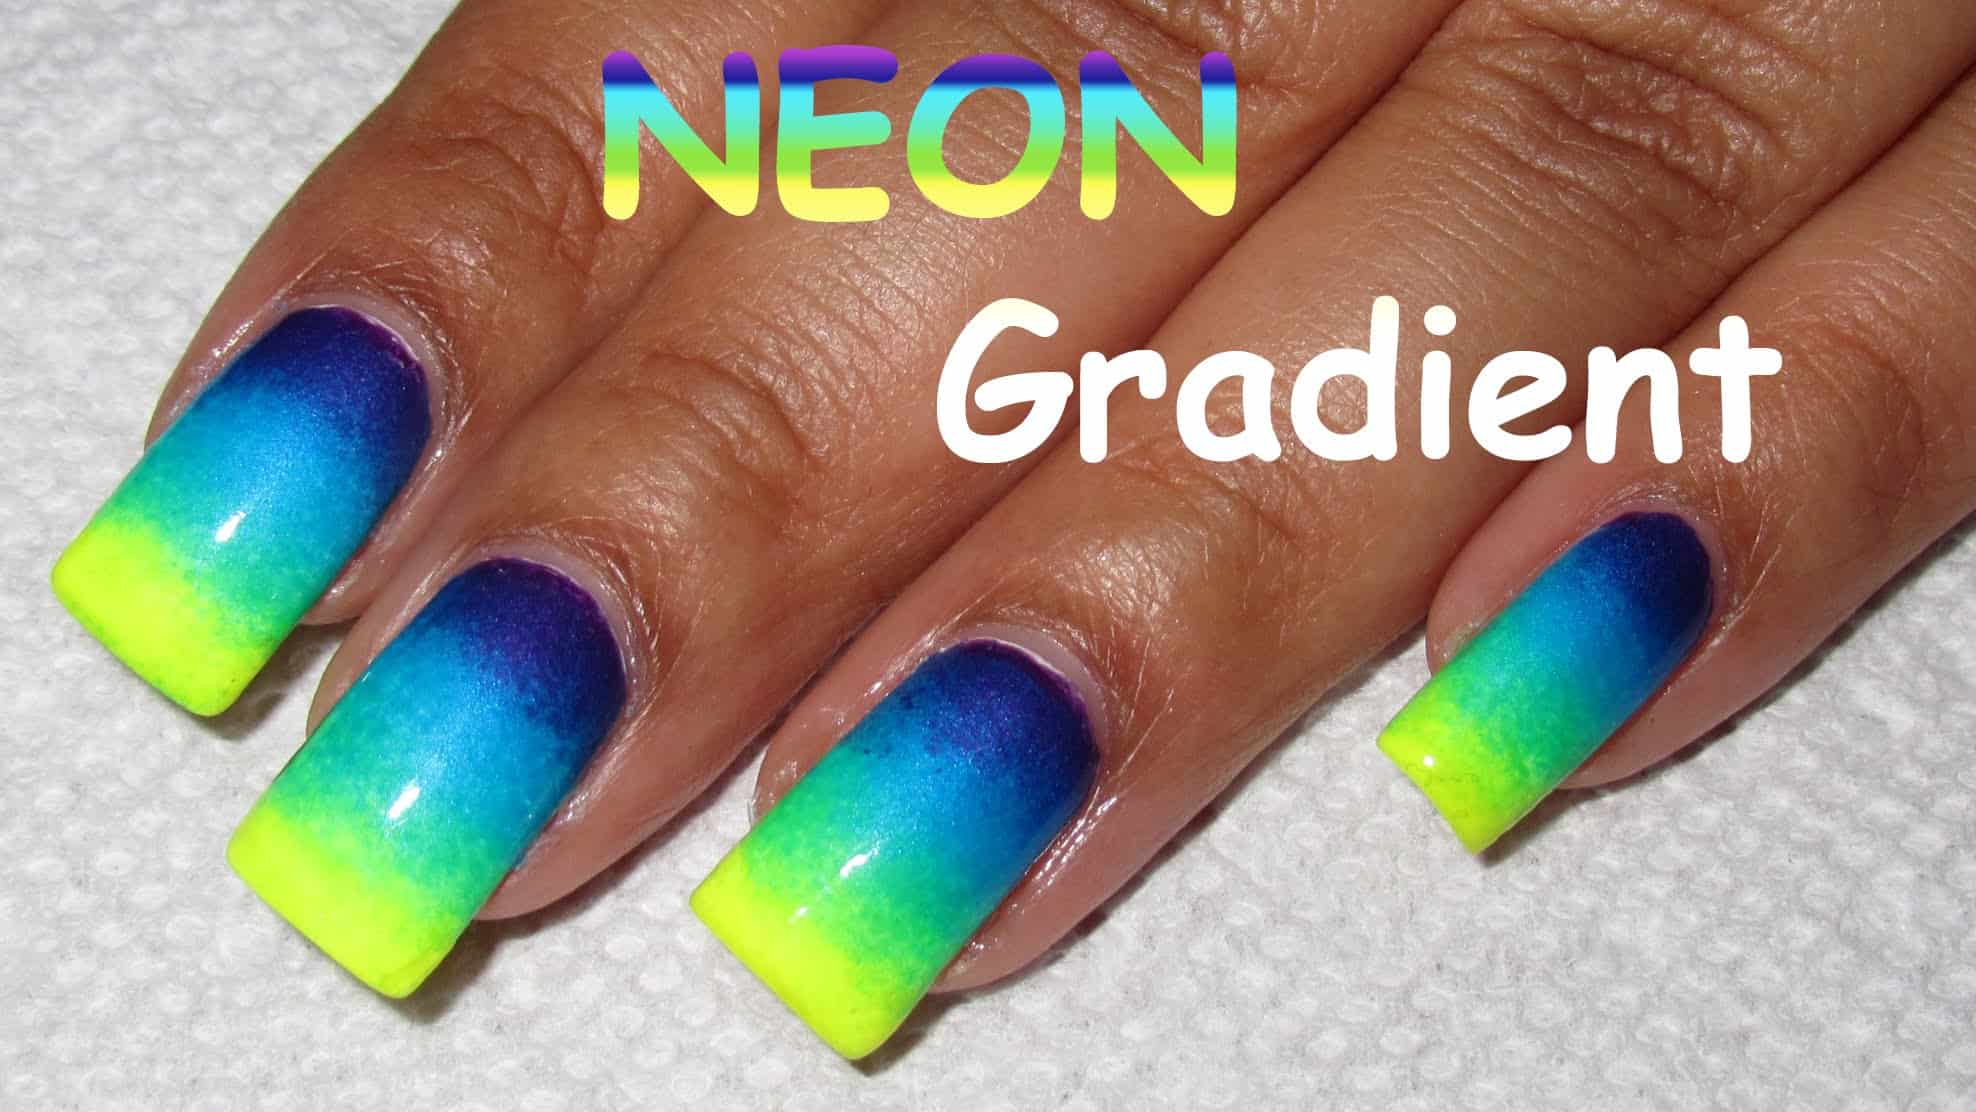
5. Nude and neon French tips

VIEW IN GALLERY

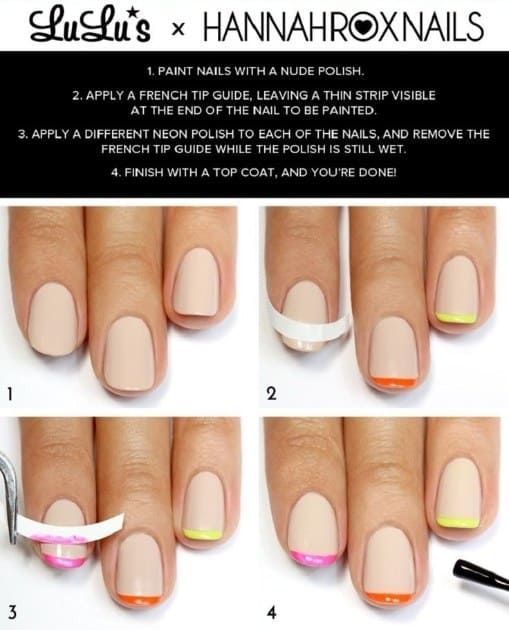
We love a good nude nail in the fall because with enjoy how the skin toned neutral really complements all the neutrals in the autumn environment and fall fashion around us, but we’re also colourful people who just can’t help adding a pop of bright tone whenever we can. That’s why we adored this nude and neon French tip idea featured step by step on Lulu’s so much!

6. Fall ombre tree silhouette nails

VIEW IN GALLERY

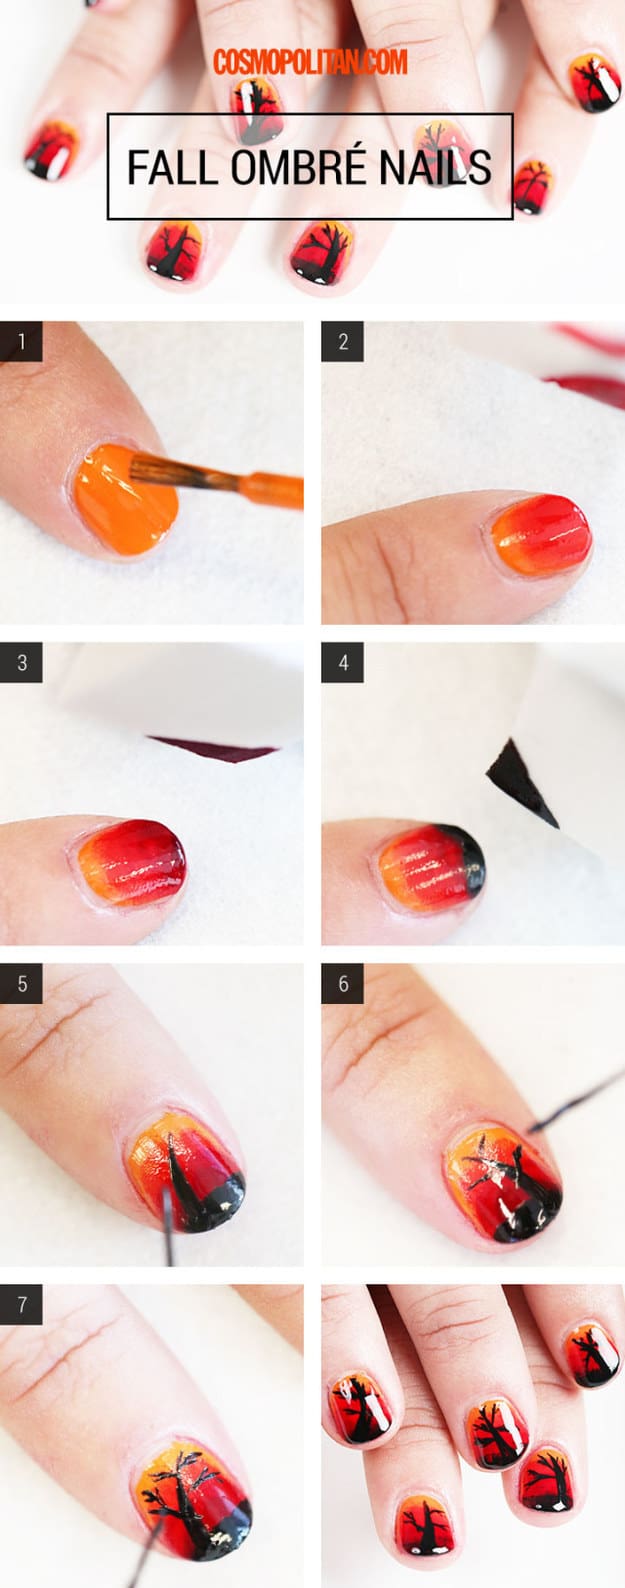
Are you actually quite experiences in painting nail designs or careful hand painted art, so you’re looking for something that’s a bit more detailed in order to challenge yourself? Then we’d definitely suggest taking a look at how Cosmopolitan made an intense looking autumn sky in an orange ombre and then carefully painted the silhouette of a bare tree on the surface.

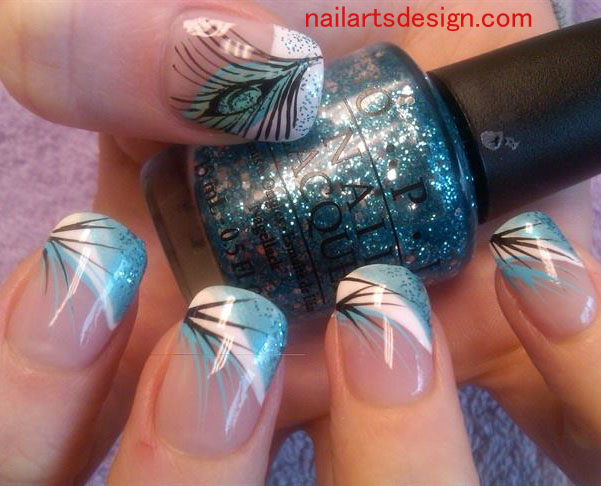
7. Fall feathered manicure

VIEW IN GALLERY

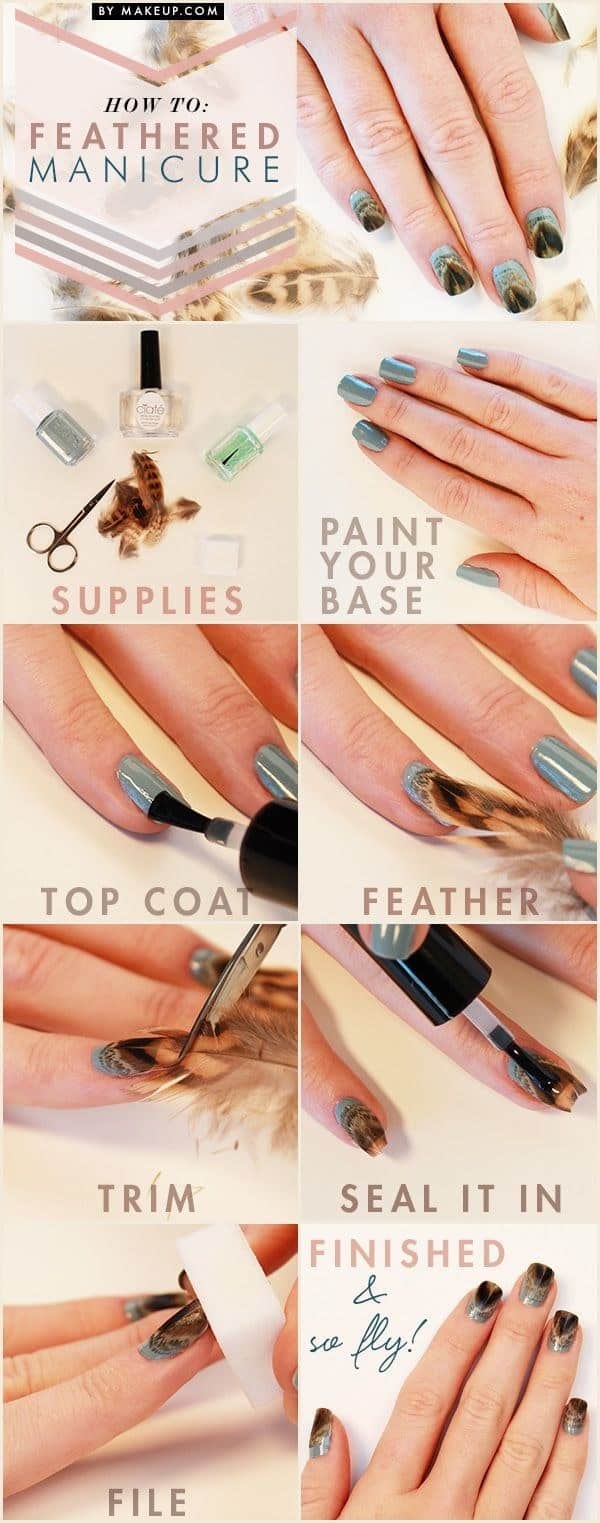
Have you always adored manicure techniques that are a little more unique and that add some kind of texture or novelty to the look? In that case, we’d absolutely suggest taking a look at how Makeup.com made a fall feathered manicure by sealing actual feathers onto the surface of their mails! We think you’ll be pleased to see how secretly easy the look really is.

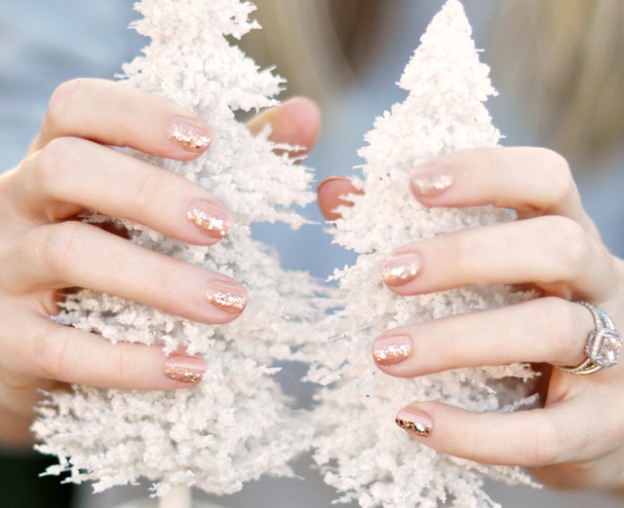
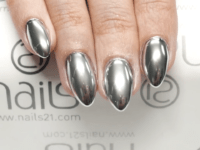
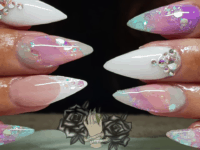
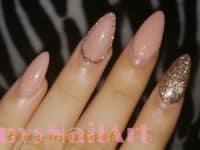
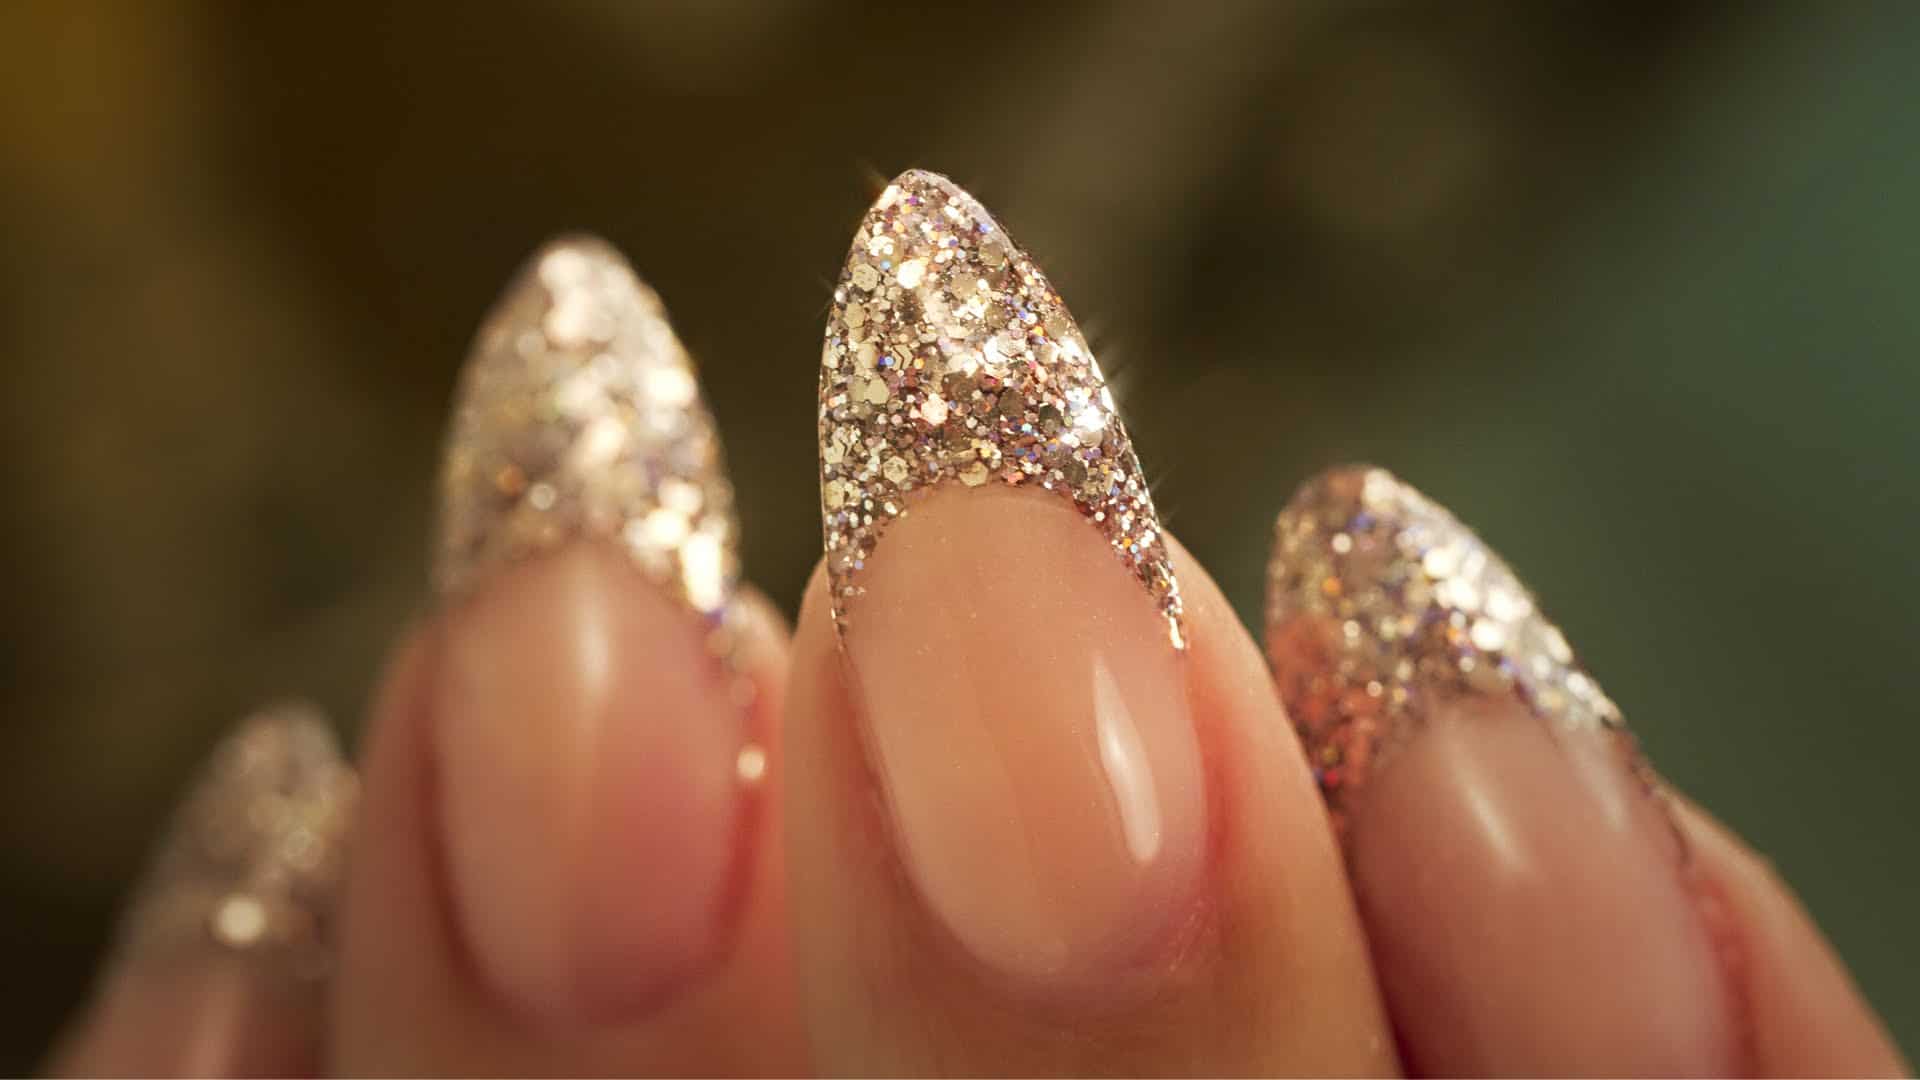
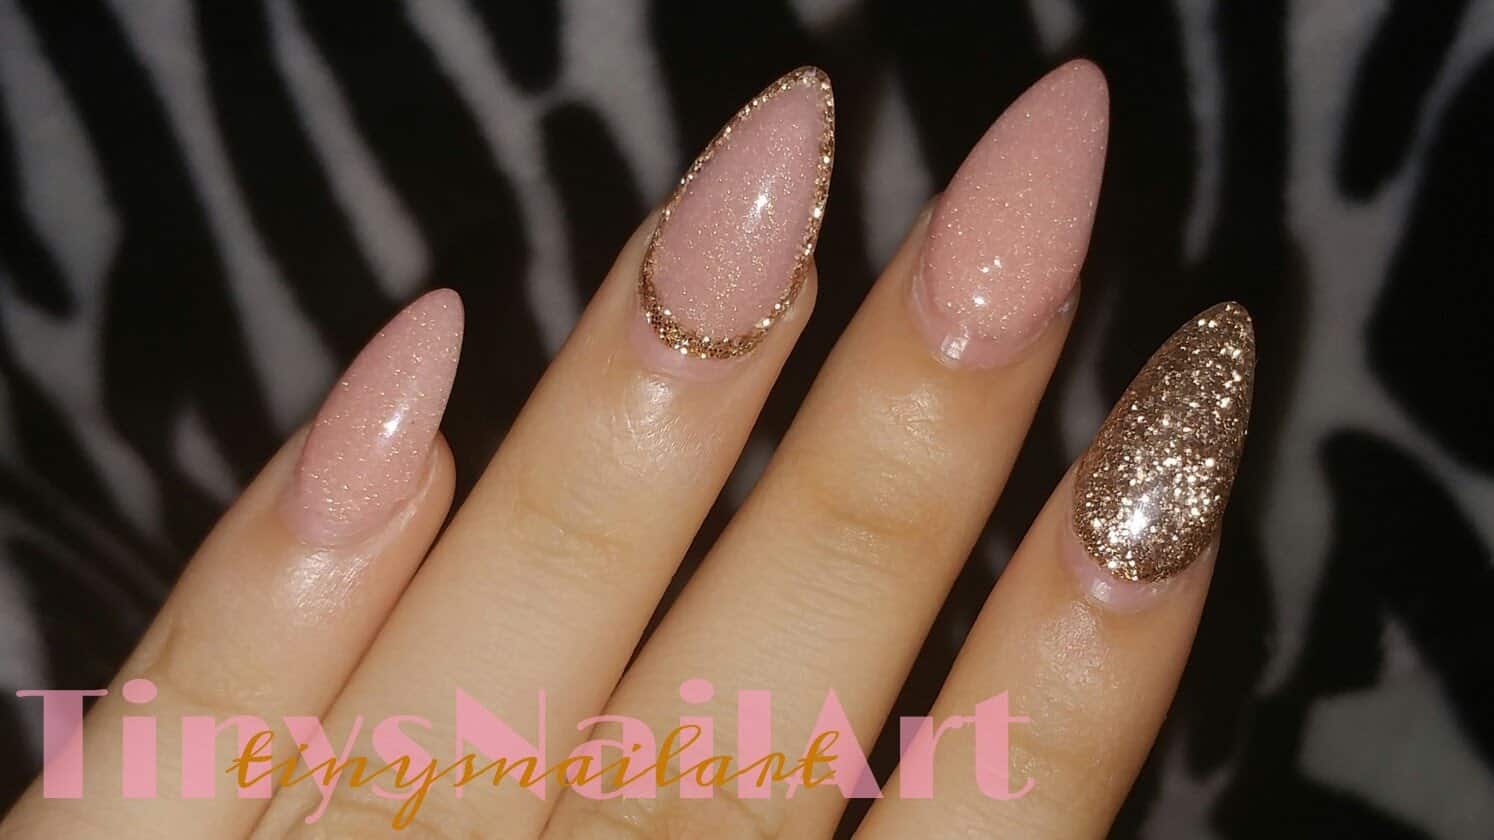
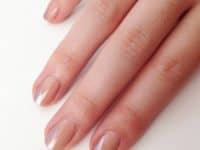
8. Minimalist nude and metallic mani

VIEW IN GALLERY

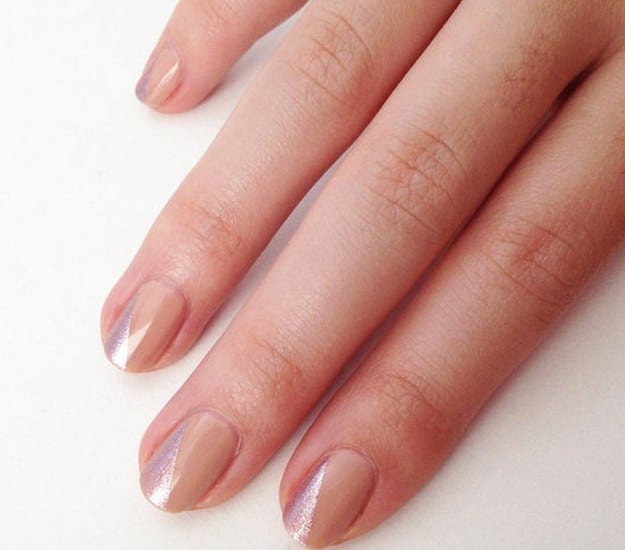
Did we really catch your attention when we started talking about the simply beauty of fall nudes and neutrals but you can’t help wanting to add just a touch of sparkle? In that case, we’d absolutely suggest taking a look at how Popsugar used a solid nude and a matching shimmer to complement each other, adding visual interest by meeting the two at a jaunty angle.

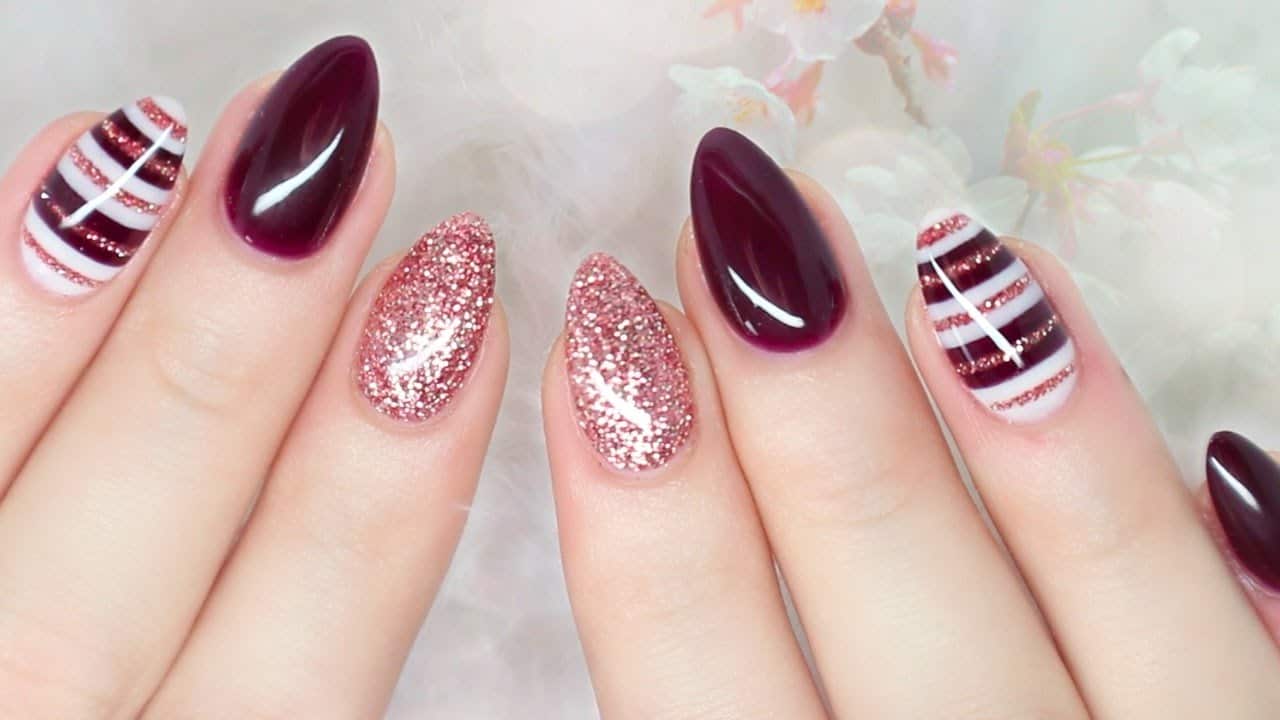
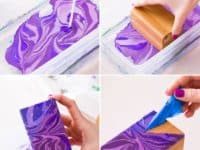
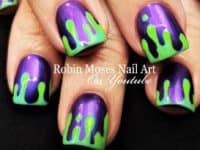
9. Two toned taped mani

VIEW IN GALLERY

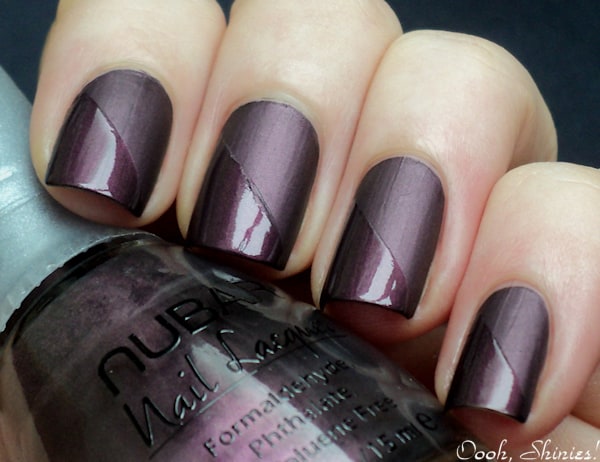
Perhaps you really loved the basic concept of what you saw above but you’d much prefer to paint your nails in some kind of deep fall shade that still has tones of your favourite summer colours, rather than sticking to nudes? In that case, we’d definitely encourage you to take a look at how Oooh Shinies created a similar contrast in a deep eggplant purple, balancing matte finish with gloss polish rather than gloss with shimmer.

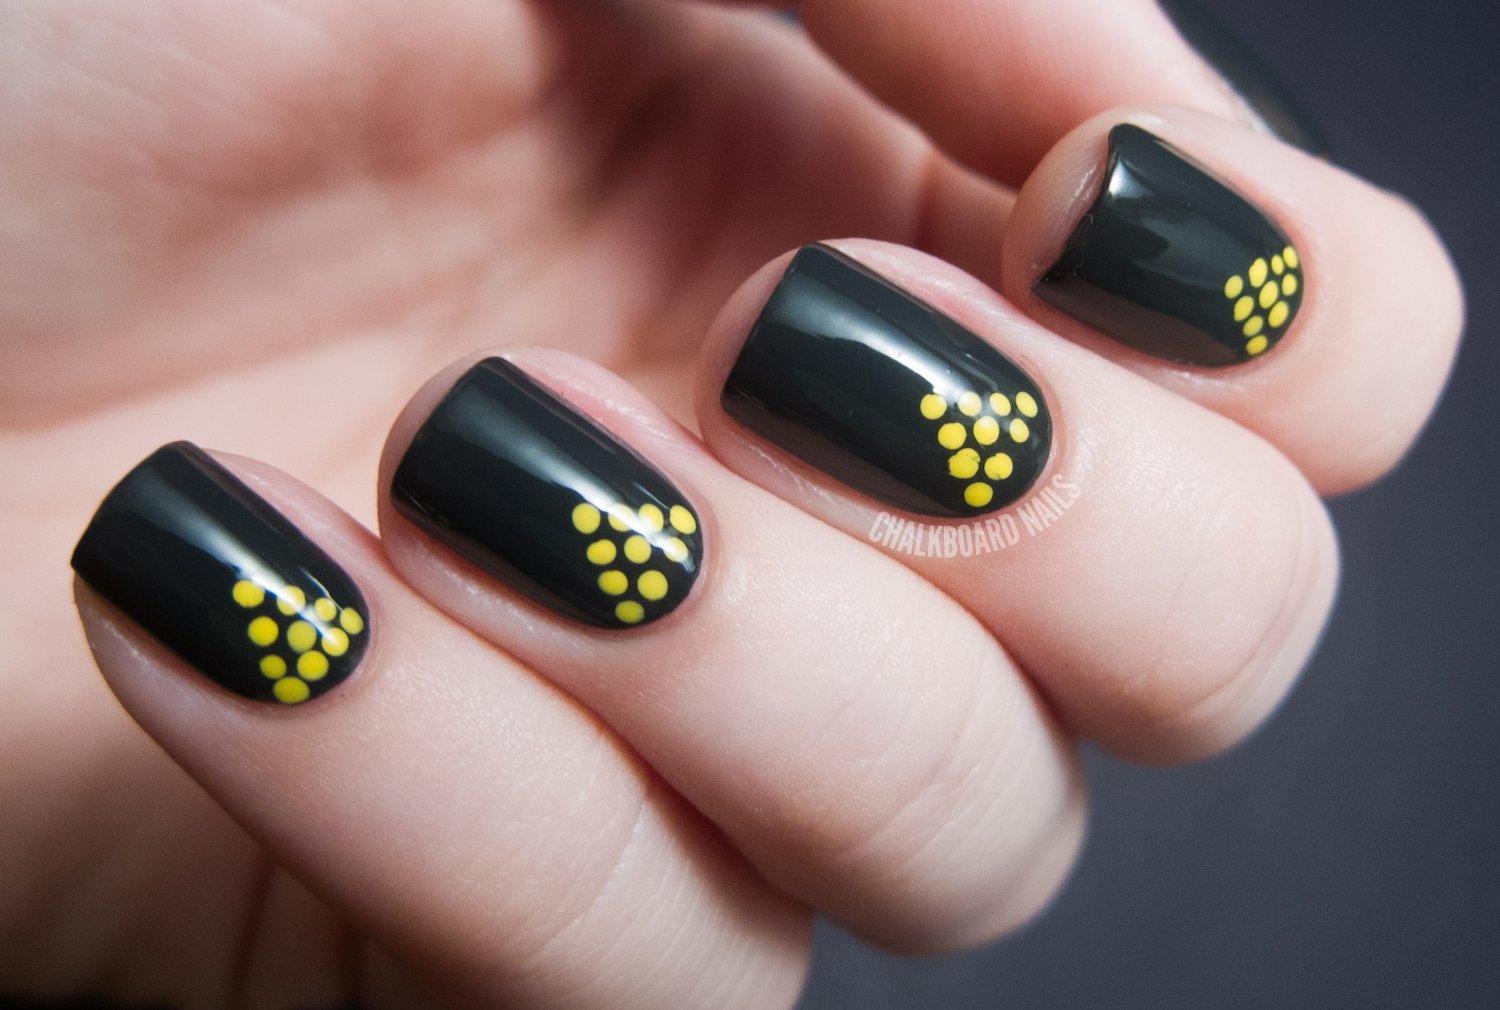
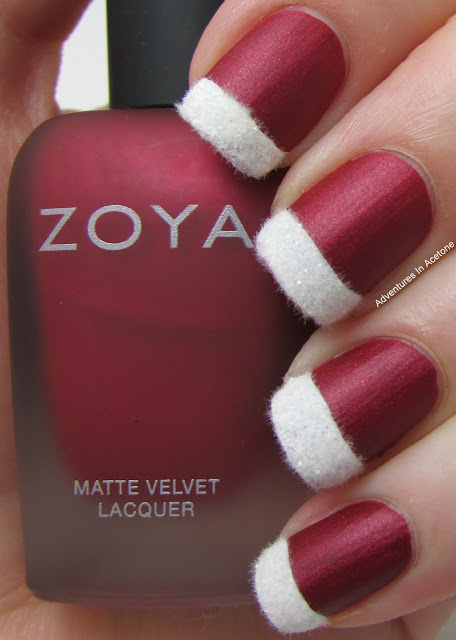
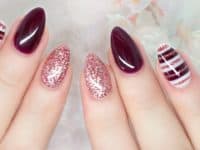
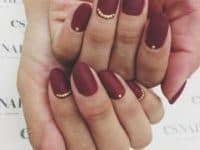
10. Flat matte burgundy nails with gold dot accents

VIEW IN GALLERY

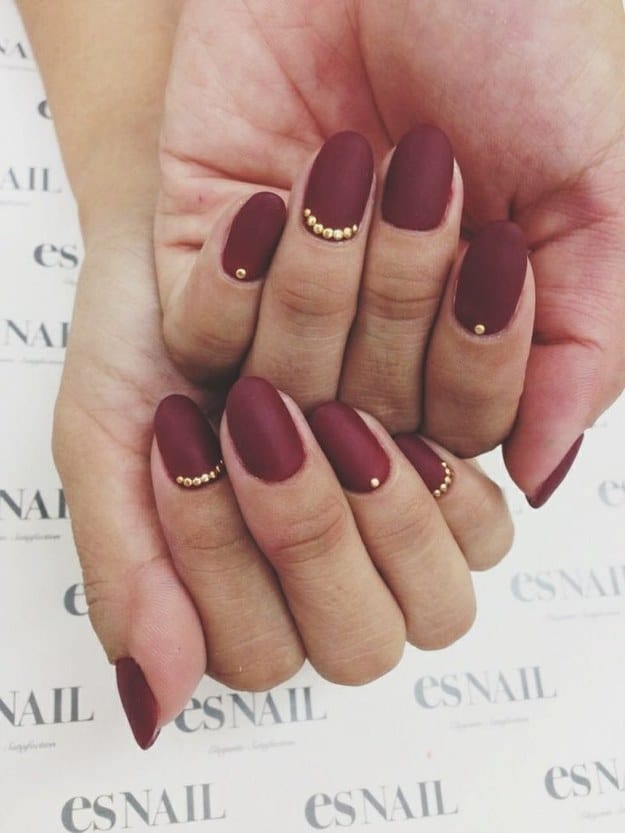
Speaking of matte polish and deep tones, burgundy just might be our very favourite colour to wear in fashion, accessories, and makeup the moment fall has arrived! That’s why we adored this idea from Popsugar for solid matte burgundy nails with adorable little dotted gold accents, similar to the ones you saw earlier on the list but slightly more delicate.

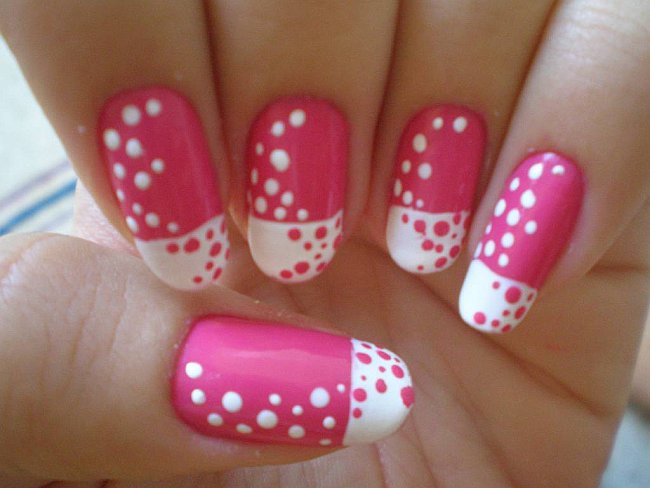
11. Harvest French tips

VIEW IN GALLERY

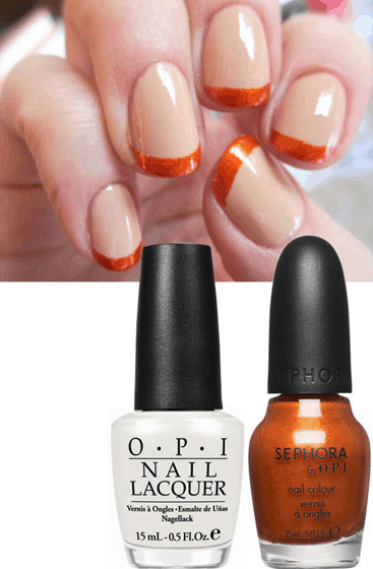
Are you still thinking about how much you actually enjoyed the basic concept of the neon and nude manicure we showed you earlier on our list but you just can’t shake the feeling that the neon tips look a little too summery for you? Then we’d suggest trying something like this harvest manicure from Harper’s Bazaar that sticks to just oranges instead!

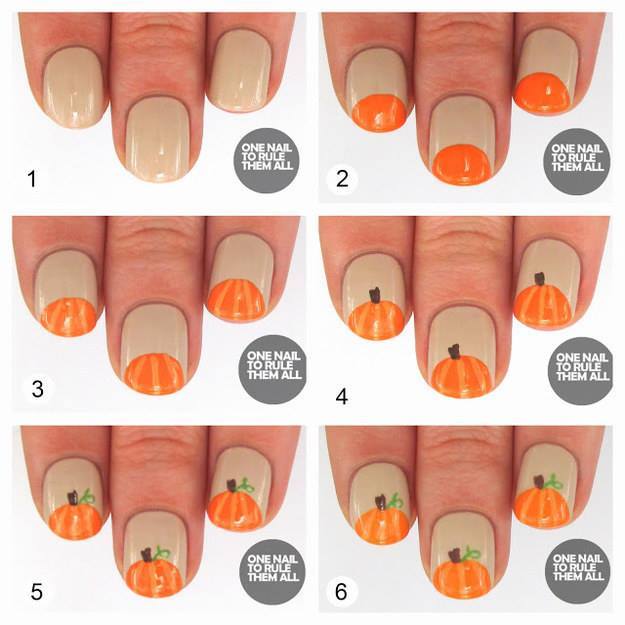
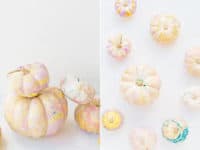
12. Cute pumpkin nails

VIEW IN GALLERY

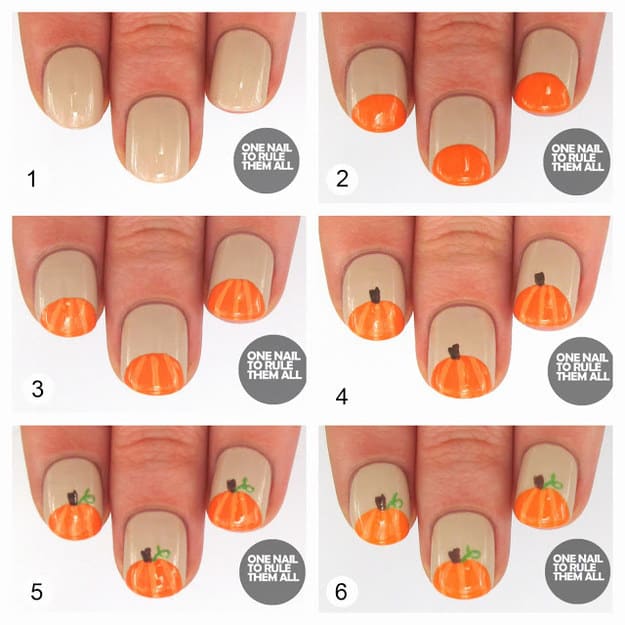
Are you feeling pretty intrigued by all these nude and orange combinations because you like how the colours look together, but you can’t help thinking that the tips just remind you of pumpkins? Then maybe you’d be better off with a tutorial like this one from One Nail to Rule Them All that actually shows you how to turn those tips… into pumpkins!

13. Fall leaf branches

VIEW IN GALLERY

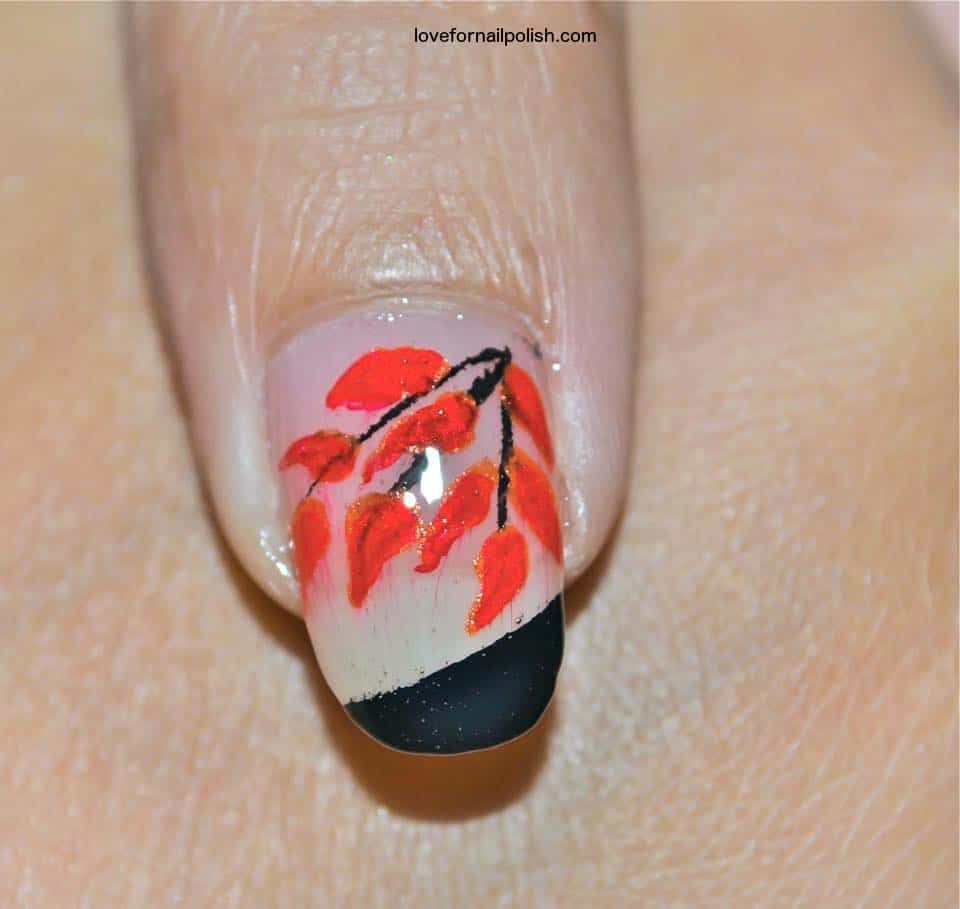
We’ve talked a little about fall leaves and we showed you a design that looks like bare branches, but what if you were actually picturing something that put the two in one place? Then we’d like to point your attention to this awesome design and tutorial from Love for Nail Polish that shows you how to paint a branch of fall leaves right on your nails’ surfaces.

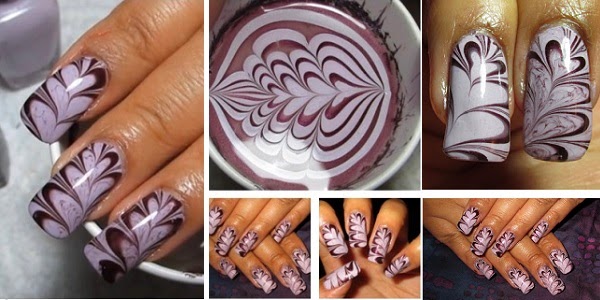
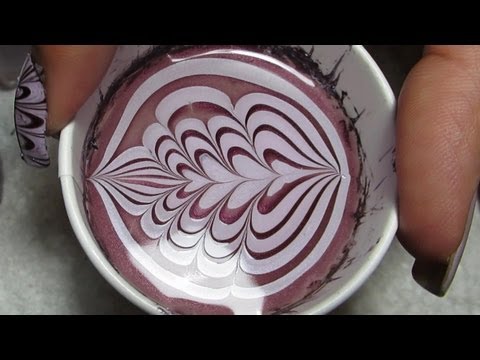
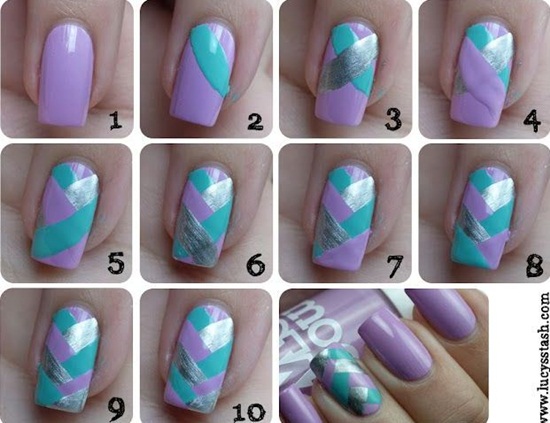
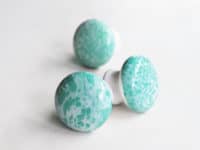
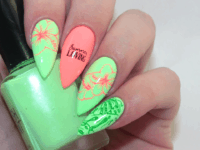
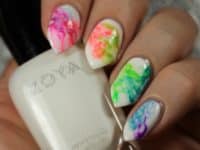
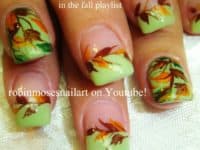
14. Minty fall leaves

VIEW IN GALLERY

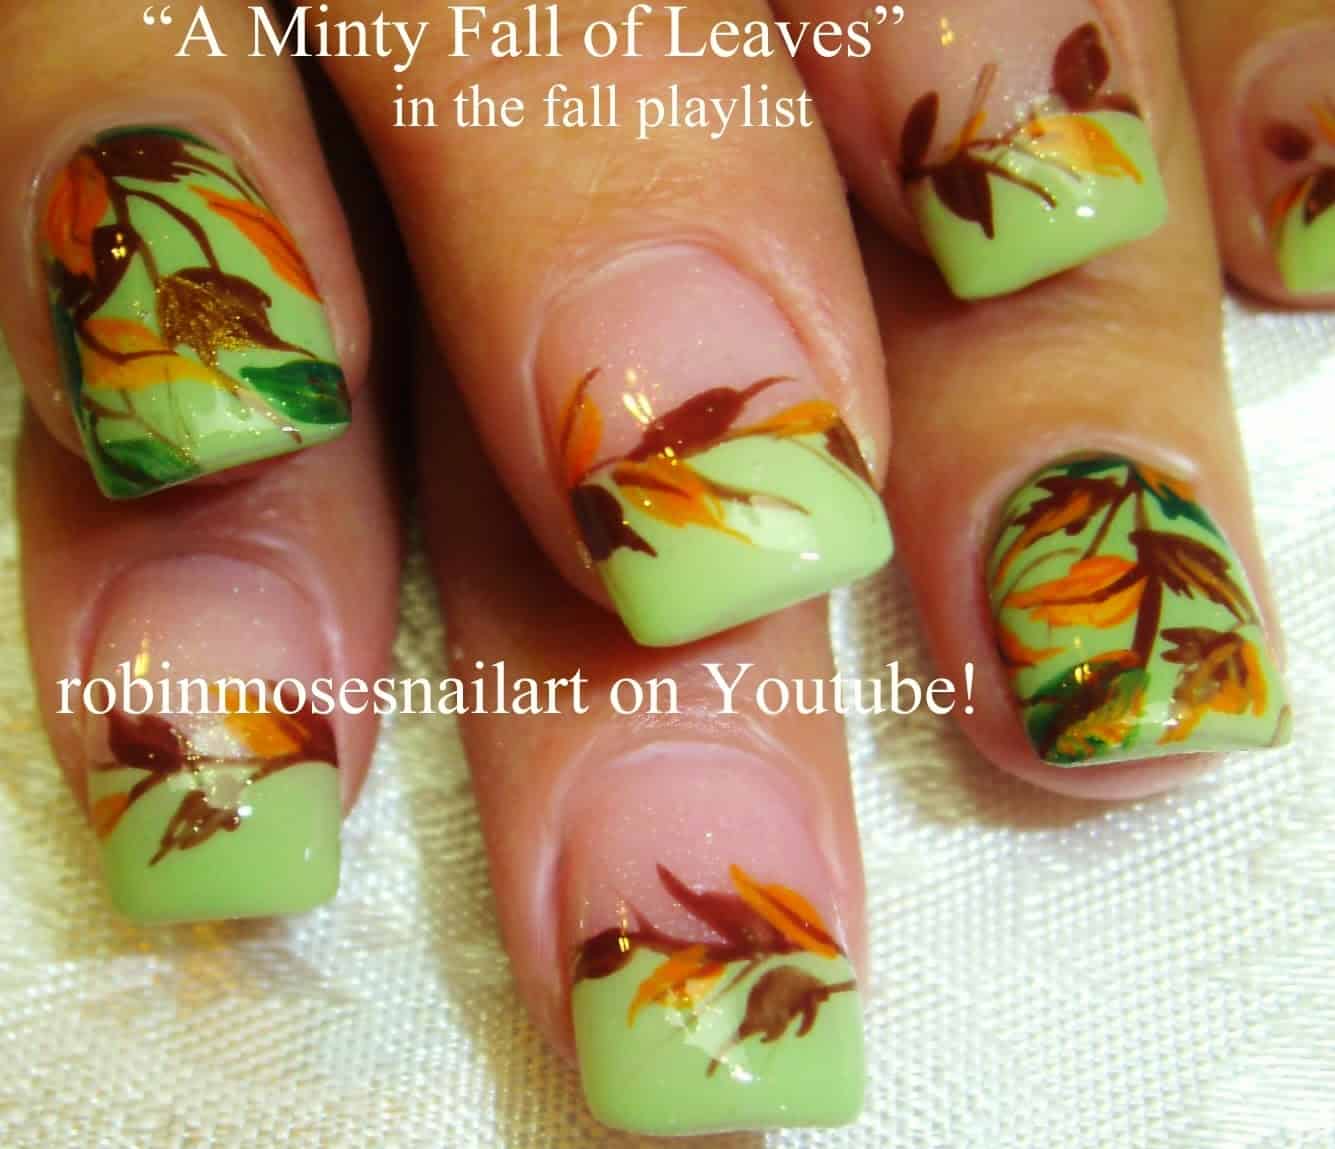
Are you quite a big fan of the fall leaves idea but you think maybe you’d rather combine your leaf tones with some kind of slightly more unique colour, just to create a contrast that grabs your attention more? Then we have a feeling you’ll appreciate this awesome minty leaves design and tutorial outlined step by step by Robin Moses Nail Art a little more.

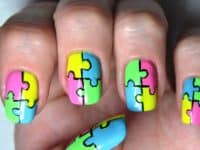
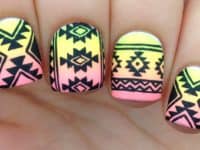
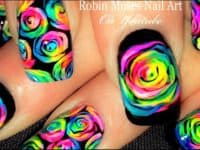
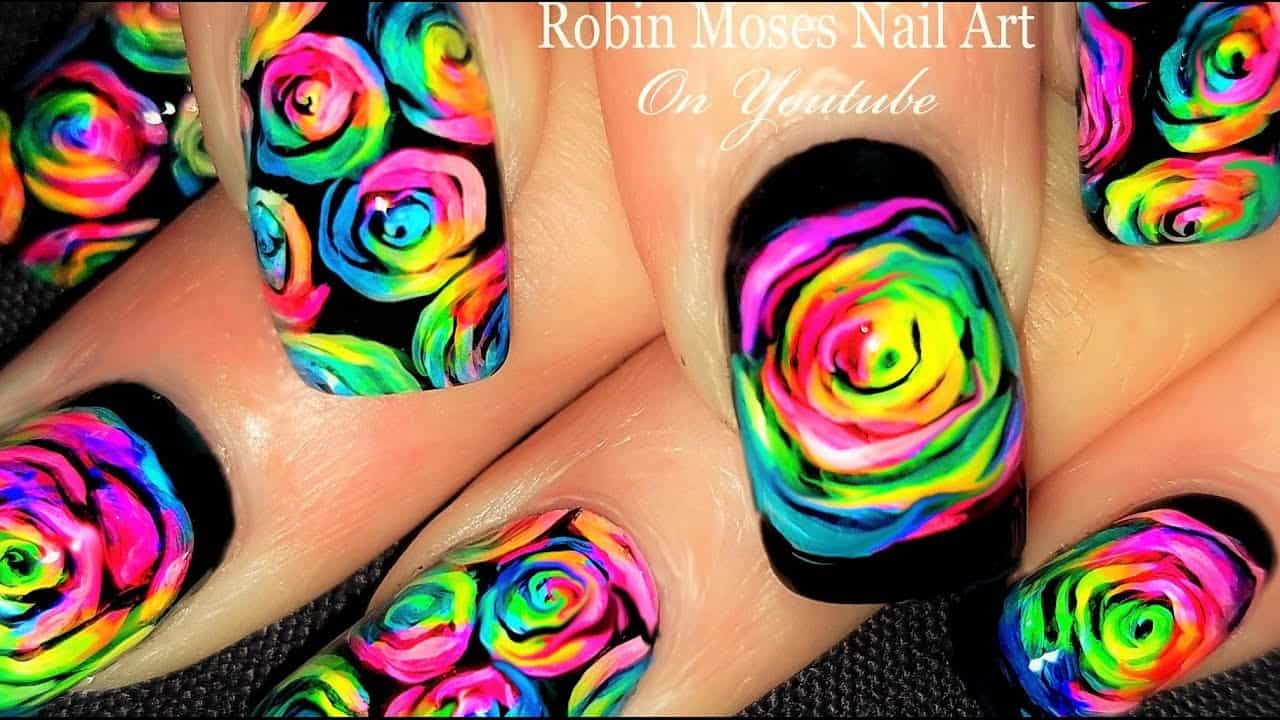
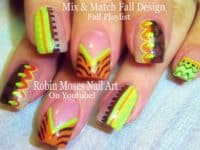
15. Mix and Match fall design

VIEW IN GALLERY

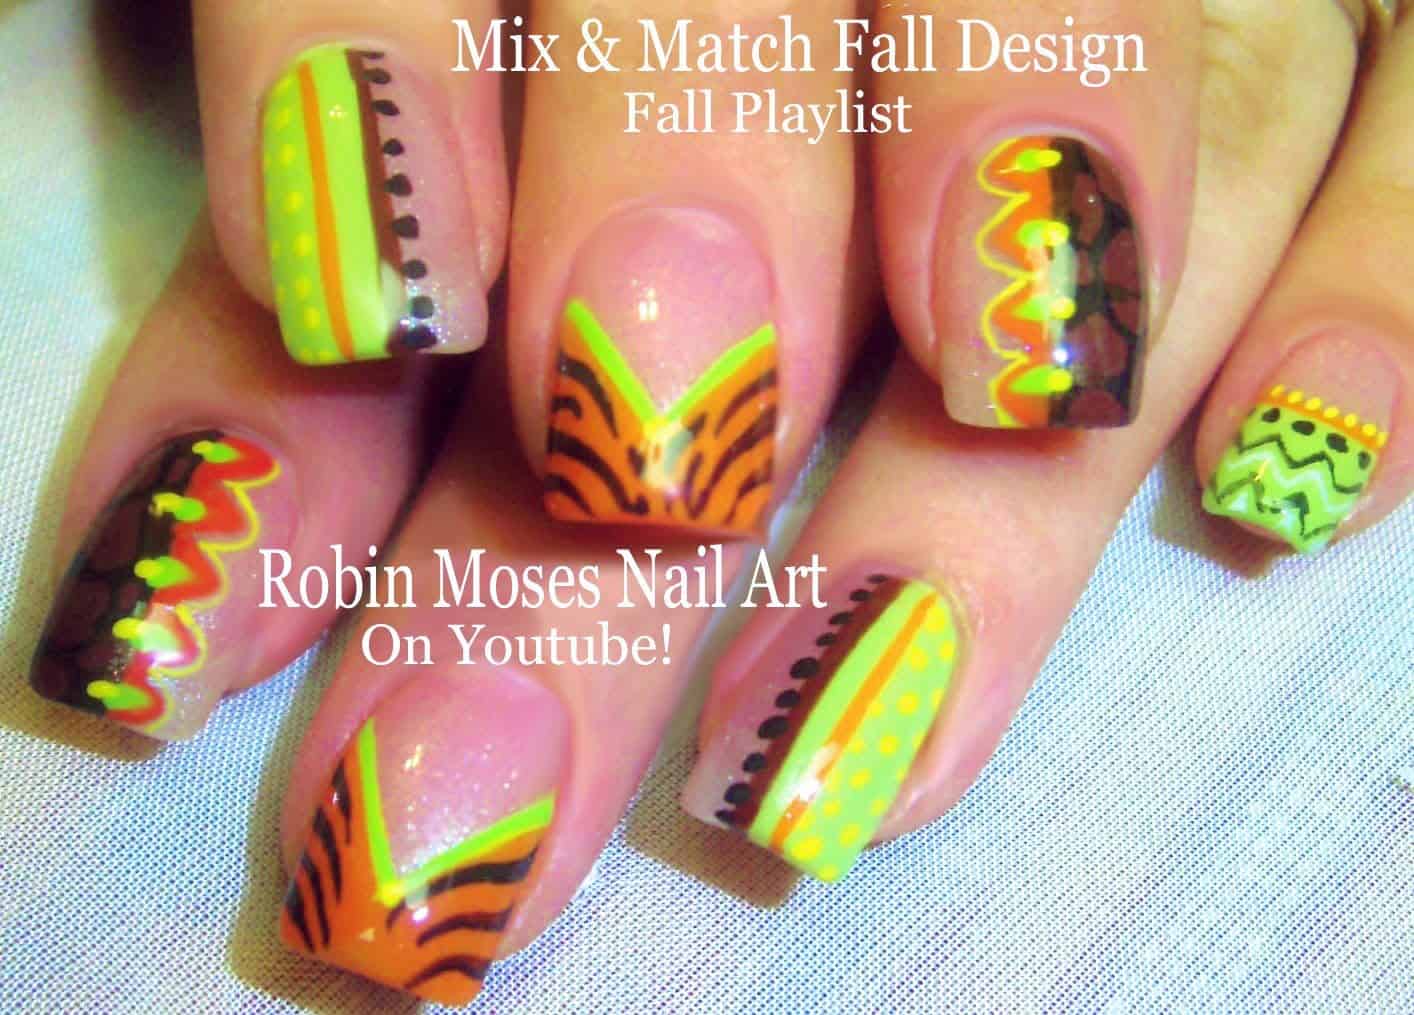
Well, we know we actually just showed you a fall nail design by Robin Moses Nail Art, but we came across this alternative fall design in the process and we just loved it so much that we couldn’t resist including it as well! We love the way they created awesome graphic patterns by painting all kinds of shapes in fall and harvest colours.

The Very Best DIY Nail Art Designs: All Free

Chances are that if you’re a girl or woman living in the 21st century, you’re a nail art fan! Over recent years, millions of new nail art designs have been tried and tested all over the world – the options really are endless! However, if you’re looking for the very best of the bunch and also the kinds of mail art designs you could pull off without having to hit the beauty salon, we’ve pulled together a selection of the web’s finest!

VIEW IN GALLERY10 latest nail art deaigns-wonderfuldiy

Nail art may look really tricky, but it’s actually the kind of things that’s pretty simple once you get the hang of it. It’s all about learning the tricks of the trade, which include one or two simple steps that never fail to add up to an amazing results! Take a look at the examples we’ve brought together here – they may look like the work of life-long professionals, but they’re all totally within the capabilities of the DIY nail art fan at home!

Get Creative With Nail Art

We simply love every single one of these designs, but at the same time we’re even bigger fans of getting wholly creative and unique with your nail art. So as well as taking inspiration from what you see here, be sure to add a few unique changes of your own to come up with something like nothing else ever created!

One quick tip from us – it’s much easier to pull off excellent results with nail art if you use quality nail polish, as the cheaper stuff is harder to work with when creating precise patterns. And of course, there’s no harm in practicing on paper before getting to work for real!

VIEW IN GALLERYnail-art-61 VIEW IN GALLERYnail-art-51 VIEW IN GALLERYnail-art-41 VIEW IN GALLERYnail-art-31 VIEW IN GALLERYnail-art-12 VIEW IN GALLERYnail-art-10 VIEW IN GALLERYnail-art-9 VIEW IN GALLERYnail-art-8 VIEW IN GALLERYnail-art-7 VIEW IN GALLERYnail-art-2

YOU MAY ALSO LIKE

These mermaid nail art designs are totally worth it. Take our word for it. You won’t look cartoonish, but rather mesmerizing. And they go so well with long hair, right? Check out these 30+ classic ideas and let your imagination wild.

VIEW IN GALLERYMermaid-Nails-wonderfuldiy


Wonderful DIY Cute Christmas Minion Nail Art

VIEW IN GALLERYHow-To-Make-Christmas-Minion-Nail-Art-512x418

These Minion Nails  are so cute, they are perfect for Christmas  to get holiday spirits. Please check the link below for the more details. Enjoy ~~

Naildeesignz –  Christmas-minion-nail-art

More 30+ Christmas nail art :

VIEW IN GALLERY36 DIY-christmas-nail-art designs F

36 wonderful Christmas Nail Art Design

50 Awesome St. Patrick’s Day Nail Art Ideas

VIEW IN GALLERY50-St-Patricks-Day-Nail-Art-Ideas -wonderfuldiy

St. Patrick’s Day is a perfect opportunity to indulge in some nail art . Here are 50 awesome St. Patrick’s Day Nail Art Ideas that shared by Totallythebomb, how amazing !  Check out these St. Patty’s nails now and enjoy ~~

VIEW IN GALLERY50-St-Patricks-Day-Nail-Art-Ideas150 st-patricks-day-nail-art-ideas — Check tutorial here

Please check the below ‘Related posts’ for more wonderful nail art projects !

10 Wonderful Halloween Nail Art Ideas

VIEW IN GALLERYhalloween nail art

We found these easiest Halloween Nail Art on Facebook. Since we know you love nail art as much as we do, we’re sharing the love! Halloween nail art does not only involve brightly painted candy corn and pumpkins. There’s enough frightening designs out there to transform your hands into mini costumes. Will you be wearing any amazing nail art this Halloween?What better time to decorate your claws?

Click here for   89 Awesome Halloween Nails Designs from “Nail Dopily Designs

VIEW IN GALLERYHalloween nail art 10

VIEW IN GALLERYHalloween nail art 9

VIEW IN GALLERYHalloween nail art 8

VIEW IN GALLERYHalloween nail art 7

VIEW IN GALLERYHalloween nail art 5

VIEW IN GALLERYHalloween nail art 4

VIEW IN GALLERYHalloween nail art 3

VIEW IN GALLERYHalloween nail art 2

VIEW IN GALLERYHalloween nail art 1

VIEW IN GALLERYHalloween nail art 6 More Stylish nail art ideas HERE

Wonderful DIY Beautiful Butterfly Nail Art

VIEW IN GALLERYButterfly-Nail-Art-wonderfuldiy

This butterfly nail are is   cute, gorgeous yet simple  that you will love it .Color scheme for this little cute butterfly: Black for the body, Pin for the wings, and fill the wings with glitter. Source here.

Directions :

    1. Draw the body
    2. Draw the wing
    3. Draw the other wing
    4. Fill the wings
    5. Outline the wings and add extra details
    6. Apply glitter
    7. Apply top coat

More nail art tutorials HERE

VIEW IN GALLERYGray-Smokey-Eye-Makeup

 40-amazing-smokey-eyes-makeup-tutorials — Check here

Cute Polka Dot Nail Art Tutorial

If you’ve ever wondered how the professionals come up with so many great ideas for nail art…well, let’s just say there are a few secrets they’d probably prefer you didn’t know. And we thought we’d share one of them with you right now – how about professional-quality polka-dot nail art you can try out at home without having to invest in any special equipment at all?

VIEW IN GALLERYdiy-easiest-polka-dot-nail-art-use-a-band-aid

Once you’ve tried this out, chances are it will become a new favorite you’ll be going back to over and over again. Believe it or not, the secret lies in using a simple household sticking plaster which you’ll be converting into a makeshift stencil.

Polka Dot Nails: What You’ll Need

VIEW IN GALLERYpolka dots nails VIEW IN GALLERYpyramid polka dots nails

How it works

  1. Take the one of the sticky ends of the plaster (the end with the holes in it) and cut it off using the scissors. Make sure the piece you cut is large enough to cover your nail in full.
  2. Take the color of nail polish of your choosing and paint your nails as normal, being sure to leave plenty of time for the polish to dry.
  3. When fully dried and hardened, take the plaster and stick it over your nail.
  4. After this, it’s simply a case of painting the top of the plaster with the second color of your choosing, which will travel through the small holes and create the polka dot effect.
  5. Wait for the new layer to dry and then peel the plaster away carefully to leave the dots in place.

It’s simply brilliant to try out a bunch of different color combinations or perhaps to try different colors on each of your nails. In any case, a box of plasters isn’t going to cost you nearly as much as heading to the salon, so feel free to be as creative as you like.

Nail Art Summer Polka Dots: Ideas

VIEW IN GALLERYblack and white polka dots nails VIEW IN GALLERYpink and white polka dots nails VIEW IN GALLERYsummer polka dots nail art VIEW IN GALLERYsummer nails with polka dots VIEW IN GALLERYpolka dots summer nails

Share your ideas with our readers below – we’re always delighted to hear your thoughts!

Wonderful DIY Rainbow Marble Nail Art

VIEW IN GALLERYRainbow-Water-Marble-Nails-

YouTube video

Bring COLOR to your wardrobe with perfect shaped rainbow water marble nails.
Water marbling is a type of nail art that looks like multi-tonal swirls. Water marbling as a nail art is actually a variation of the Ebru, the Turkish art of creating designs with dye on the water, and then placing paper on the water’s surface to soak up the dye. Water marbling takes practice, but it is worth trying.

Wonderful DIY Cool Sneakers Nail Art

VIEW IN GALLERYsneakers nail art F

Customized nail art is a great way to let your fun-loving personality shine through. This is a very easy and fun nail design to do. The type is colorful, but you can always stick to one color or use your favorite. I’d love to try out this sweet and cool shoe nail designs, how about you ?

What you will need:

– nail base coat;
– nail top coat;
– different colors of nail polish ( white is a necessity);
– black nail art pen (or a toothpick to dip in the black nail polish);
– white nail art pen;

Instructions:

1. Apply your preferred coat of base coat and let it dry.
2. Paint each of your nails in any nuance that you desire.
3. Once the color has dried, paint over the upper edges using a white nail polish to make French tips.
4. Meticulously draw parallel lines on the colored side of your nail using a nail art pen or a toothpick dipped in black nail polish. This will help for your shoelaces.
5. Tie things up by drawing the laces over and across the black lines using a white nail art pen. Let it dry then put top coat to prolong your polish.
6. Draw a thin curved line on top of the French tip using a black nail polish and a brush to make the edges of the sneaker.

VIEW IN GALLERYSneakers-Nail-Art-Tutorial-1 VIEW IN GALLERYSneakers-Nail-Art-Tutorial-2 VIEW IN GALLERYSneakers-Nail-Art-Tutorial-3 VIEW IN GALLERYSneakers-Nail-Art-Tutorial-5 VIEW IN GALLERYSneakers-Nail-Art-Tutorial-6 VIEW IN GALLERYSneakers-Nail-Art-Tutorial-7 VIEW IN GALLERYSneakers-Nail-Art-Tutorial-8 VIEW IN GALLERYSneakers-Nail-Art-Tutorial-9 VIEW IN GALLERYSneakers-Nail-Art-Tutorial-10 VIEW IN GALLERYSneakers-Nail-Art-Tutorial-11 VIEW IN GALLERYSneakers-Nail-Art-Tutorial-13 VIEW IN GALLERYSneakers-Nail-Art-Tutorial-14 VIEW IN GALLERYSneakers-Nail-Art-Tutorial-15 VIEW IN GALLERYSneakers-Nail-Art-Tutorial-18 VIEW IN GALLERYSneakers-Nail-Art-Tutorial-111


DIY Water Marble Nail Art With Salon Quality Results

There are so many different projects and ideas out there to make fabulous nail art at home, but we’re sure you’ll agree that few come close to the impressiveness of this. Admittedly this DIY water marble nail art might take you a couple of attempts before you nail it (excuse the pun!), but just as soon as you get it right you’ll perhaps never even think about heading down to the professional nail salon again.

VIEW IN GALLERYmarble-nail-art

Amazing results and without the need for any specialist equipment – just the kind of DIY craft project we’re into! Go it alone or perhaps rope in a few friends to help you out, either way you’ll soon be coming up with the kinds of results you never dreamed possible.

What You’ll Need:

How it Works:

  1. Put a little paper down around the bowl you’ll be using to help minimize mess…it can get a little on the messy side!
  2. Add some water to the bowl and then add one small drop of the two nail polish colors to the water. Add the dark color first, then the lighter color right into the middle of the dark drop. Then the dark into the light and so on for about eight repetitions, allowing the polish to spread across the water’s surface each time.
  3. You can then use the toothpick to manipulate the colors to create a chain of hearts pattern like the one in the picture here. Start by tracing a straight line from the center to the cup’s edge, before doing the same in the opposite direction. Next, trace lines from the edged of the bowl at the sides inwards, around four times on each side – this should create an effect like the one you see here.
  4. Add a thin layer of Vaseline to the skin around your nail in order to prevent the polish from sticking to your skin.
  5. Use a clear or light-colored nail polish to your nails and allow them to dry well before going ahead.
  6. Dip your nail into the patterned liquid to transfer an incredible pattern from the water’s surface.
  7. Remove the excess polish by taking off the Vaseline

And here’s a quick video tutorial on how you can make water marble nails.

YouTube video

And Another Water Marble Nail Idea …

VIEW IN GALLERYwater_marbling_tutorial1

VIEW IN GALLERYwater_marbling_tutorial2

30+ Classic Mermaid Nails art Design

VIEW IN GALLERYMermaid-Nails-wonderfuldiy

When I was a child, I wish I could become a mermaid . Mermaid in all movies and cartoons is always described as mesmerizing creature that has long hair, beautiful tails and whose scales shine in moonlight. She’s smart and pretty , she make us be charmed by her strength and beauty ! Who don’t like a beautiful mermaid ?
You can make some mermaid inspired nails for yourself, here are 30+ classic mermaid nails art ideas , please follow your imagination and create your own style. Check the below link to get started and enjoy ~~
VIEW IN GALLERYMermaid-Nail-Art-wonderfuldiy2

36 Wonderful Christmas nail art Designs

VIEW IN GALLERYsnowflake-nail-ideas

Now winter is just around the corner it’s socially acceptable for every girl to wear inspirational winter nail design. Here are 4 super cute nail ideas that use a snowflake design .We are all like snowflakes, each one of us unique, so these are easy nail art technique because there is no perfect!

Here’s the links to each individual tutorial:

         1 – Rudolph (rina-alcantara.com)                   2 – Big Glitter (lacquertude.com)

   3 – Single Flake (nailsworlddd.blogspot.co          4 – Polka Dots (sassyhongkong.com)

image via Pinterest

Here are more 30 + Christmas nails art ideas , you will love them :

Santa nail art:VIEW IN GALLERYChristmas-Nail-Art-Santa-Nails

Click here for the Tutorial from ‘Nuthin’ But A Nail Thing’

 VIEW IN GALLERYChristmas snowflake-Nail-Art

 Youtube – Holiday Sweater Nail Art Tutorial

Image source here 

VIEW IN GALLERYStarry-Night-Nails

 Nailside – Shine like a star

Christmas Lights Nails Art:

VIEW IN GALLERYChristmas Lights Nail TutorialClick here for the tutorial from Zoendout

VIEW IN GALLERYChristmas-Nail-Art 20 VIEW IN GALLERYChristmas-Nail-Art 21 VIEW IN GALLERYChristmas-Nail-Art 22 VIEW IN GALLERYChristmas-Nail-Art 23 VIEW IN GALLERYChristmas-Nail-Art 24

 Christmas Trees Nails Art:VIEW IN GALLERYChristmas-Nail-Art 25

VIEW IN GALLERYChristmas-tree-nail-art

Click here for the tutorial from Blue Tape and Nails

 Abstract Christmas tree design :

VIEW IN GALLERYChristmas-tree-nail-art-1

Click here for the tutorial from nailside

Another Snowflake Nails Art:

VIEW IN GALLERYSnowflake Nail Art

Click here for the Video tutorial from Youtube

Image via beautylish

One more snowflake Nails Art :

VIEW IN GALLERYSnowflake Nail Art-1Click here for the tutorial from Nailside

 Snow man nails art :

VIEW IN GALLERYChristmas-snowman-nail-art

Click here for the tutorial from The Crafty Ninja

VIEW IN GALLERYChristmas-Nail-Art 26 VIEW IN GALLERYChristmas-Nail-Art 27

 Click here for the Tutorial from ‘Cajon De Los’

Gift Box Nails Art:

VIEW IN GALLERYchristmas-gift-box-nail-art

Click here for the tutorial from Syl and Sam

Christmas Robbin Nails Art:

VIEW IN GALLERYChristmas Robin nails art

Click here for the tutorial from E.L.F

 Rudolph the Red Nose Reindeer Nails Art:VIEW IN GALLERYReindeer Nail Art Tutorial

VIEW IN GALLERYRudolph the Red Nose Reindeer nails artClick here for the tutorial from Nuthin’  But A Nail Thing

 Christmas Pudding Nails Art:

VIEW IN GALLERYChristmas Pudding Nails artClicke here for the tutorial from Nuthin’  But A Nail Thing

More 4 Easy Christmas Nails Art :

VIEW IN GALLERYchristmas-nail-art-allClick here for the tutorial from Nail Art 101

 Winter Wonderland Christmas Nails Art:VIEW IN GALLERYWinter Wonderland christmas nails art

Click here for the tutorial from Nails by Kayla Shevonne

Santa Suit Christmas Nails Art :VIEW IN GALLERYSanta Suit christmas nails art

Click here for the tutorial from Nails by Kayla Shevonne

Water Marble Christmas Tree nail art:

VIEW IN GALLERYwater marble Christmas TreeClick here for the tutorial from  Colores De Carol

 Holiday Sweater Nail Art:

VIEW IN GALLERYHoliday Sweater Nail ArtClick here for the Video tutorial from Youtube 

 Image source girlshue

 Peppermint Swirls Christmas Nails Art:

VIEW IN GALLERYEasy Peppermint Swirls Christmas Nail ArtClick here for the tutorial from Youtube

Image via Olivia Frescura

VIEW IN GALLERYSanta Suit Nails

Click here for the Tutorial from ‘Adventures in Acetone’

  Christmas Santa Hat Nails Art:

VIEW IN GALLERYChristmas Santa hat nails art

Image Via websta

 Christmas Hat Nails Art:

VIEW IN GALLERYchristmas-hat-nails art

Image Via Clube Das Esmaltadas

VIEW IN GALLERYChristmas-Nail-Art 28 VIEW IN GALLERYChristmas-Nail-Art 29

VIEW IN GALLERYhint-of-glitter-on-nude-polish

 Love Maegan — nude glitter subtle elegance

VIEW IN GALLERYnail-art-christmas-tree DIY F2

DIY  christmas-tree-nails-at-home

15 Bottle Cap Crafts Ideas to Start Doing

Are you feeling just as interested as we are, if not more, in the idea of turning old bottle caps into all different kinds of awesome DIY projects? Check out these 15 ideas, designs, and tutorials that we’ve come across so far in our search for inspiration and guidance!

Great Bottle Cap Crafts

If we’re being honest with you, we’re the kind of avid crafters who collect little bits and pieces as we go about our day, stuffing them in our pockets if we think it might be something that looks neat and like we could use it to make a craft in the future.

It might be a paper restaurant placemat we thought was pretty, a bead we found on the sidewalk, or the ribbon off a gift someone gave us; our craft supplies mentality is truly the definition of the old saying “waste not, want not”. There are some things, however, that we’ve long been stashing away and now have a rather large collection of that we can’t help feeling we should probably start using up.

Bottle caps are a great example! We’ve got so many set aside now that we’ve started keeping our eyes a little extra peeled for crafting tutorials that use bottle caps so we can finally start transforming the ones we’ve held onto into awesome DIY things.

1. Pretty resin bottle caps

VIEW IN GALLERY

If you’ve never tried making resin crafts before than we’re sorry to have to tell you that you’ve been missing out on something very fun indeed! We’d suggest remedying that situation right now by giving these lovely little resin bottle caps featured on Resin Crafts a try.

They show you how to seal a photo or pretty piece of paper behind the resin on the bottle cap’s surface and give you all kinds of suggestions as to what you can turn your dried bottle caps into, like fridge magnets or keychains!

2. Cute beaded pill case from plastic bottle caps

VIEW IN GALLERY

Have you actually saved other kinds of bottle caps too and not just the metal ones that come on glass beer and soda bottles? Well, if you have the screw top time from plastic bottles or water or pop and you can find some ribbon and a few beads, then you have almost everything you need to make this adorable little travel sized pill case that WikiHow outlines nice and clearly!

3. DIY bottle cap serving tray

VIEW IN GALLERY

Do you actually have quite an eclectic bottle cap collection and you’re doing your best to try and find a project that lets you display the different brand art on the tops in a unique way? Then maybe you’ll appreciate this awesome bottle cap mosaic serving tray from Addicted 2 DIY!

They show you how to glue the caps down all fit together and seal them in place with a little more resin pouring than you saw above.

4. DIY bottle cap coasters

VIEW IN GALLERY

if you’re going to make something out of beer bottle caps (because that’s what you’ve collected the most of), would you actually rather make something that relates to the world of beer and your enjoyment of the beverage too?

Then we’re pretty sure this next tutorial from Snapguide has precisely the kind of project you’re looking for! Their page gives you all the info you need to make a set of these beer top drink coasters for yourself.

5. DIY bottle cap tabletop

VIEW IN GALLERY

Are you actually so in love with the idea of putting all of your bottle caps on display that you’d like an even bigger statement piece than anything you’ve seen on our list so far, just to catch the eye of visitors and show off your handiwork?

Then we’re pretty sure this awesome bottle cap tabletop project, outlined in detail on My So Called Crafty Life, will be right up your alley.

6. DIY bottle cap earrings

VIEW IN GALLERY

Are you actually such a big fan of the way bottle caps look when they’re upcycled that you can’t help feeling like you’d actually wear them to show off their charm all day long if you could? Well, believe it or not, you actually can! We’d absolutely suggest taking a closer look at how WikiHow outlines the process for turning two bottle caps into fun dangling earrings.

7. DIY bottle cap fridge magnets

VIEW IN GALLERY

Are you feeling rather intent on the idea of upcycling your old bottle caps but you’re also a bit of a beginner when it comes to crafting, so you’re looking for something that’s very simple indeed? Then perhaps you’d get along quite well with something like these quick and easy bottle cap fridge magnets that Resalvaged is here to teach you all about!

8. DIY bottle cap fishing lures

VIEW IN GALLERY

In addition to being an avid crafter are you also a very outdoorsy person who loves to do things like hiking and camping? Well, if you also like fishing the we have a feeling you’re going to adore this next idea from 2 Little Hooligans! Their tutorial teaches you nice and clearly how to make awesome quality fishing lures from hammered and curled bottle caps in just a few simple steps.

9. DIY sequin bottle cap necklace

VIEW IN GALLERY

Did we really pique your interest when we started talking about the idea of wearing bottle caps like jewelry but you don’t have your ears pierced or you’ve simply never been one for dangly earrings? Then perhaps you’d prefer to wear a necklace instead! We’d definitely encourage you to take a look at how Crafts Unleashed made this adorable bottle cap necklace pendant filled with sequins.

10. DIY bottle cap wind chimes

VIEW IN GALLERY

Are you actually scrolling through our list looking for a fun idea that your kids can get in on and will enjoy helping you make and display, but you’d prefer something a little more colourful and whimsical than anything you’ve seen so far? Then we’d definitely suggest taking a look at how Frogs, Snails, and Puppy Dog Tails made these adorable and very cheerful looking bottle cap wind chimes using a branch as the base and bells for nice sounds!

11. Bottle cap wreath

VIEW IN GALLERY

If you’ve ever loved funny, kitschy door wreaths even half as much as we do then we’d be willing to bet that you’ll find this next idea from Make Something Mondayswhole lot of fun!

Using a foam wreath base like the kind you’d find at your local craft store, they teach you how to make a whole ring of bottle caps that will greet guests with craftiness right away, before they’re even off your porch.

12. Bottle cap candles

VIEW IN GALLERY

Are you the kind of cozy homebody who adores covering your whole personal space with candles because you find their soft glow relaxing and you just can’t get enough of them, since they come in all different shapes, colours, and sizes?

Well, that might not seem like something you can combine with your love of bottle caps, but Craftaholics Anonymous is here to show you that is actually is! Take a better look at their tutorial to see how these funny little bottle cap candles were made.

13. Bottle cap checkers game with a DIY canvas board

VIEW IN GALLERY

Are the crafts that usually do the best in your family always the ones that have some kind of play value after you’re done making them, especially when your kids are involved, because then you get double the entertainment value? Then we’re pretty sure that this super cute checker board set with bottle cap pieces will be the perfect project for you. Get the full details for trying it our yourself on Martha Stewart.

14. Bottle cap spring garden art

VIEW IN GALLERY

Just in case you liked the idea of making something with your kids that you can put out in your garden but you’d like to create more than one project along that vein if you can, here’s something really cute to compliment the wind chimes we showed you earlier!

Suburbia Unwrapped is here to teach you step by step how to make these adorable bottle cap flower pieces of garden art that will help keep things bright until your natural flowers bloom in the spring.

15. Monogram bottle cap keychain

VIEW IN GALLERY

Are you still thinking about how much you actually liked the idea of covering some kind of central inset with resin on the underside of your bottle cap but you just haven’t see the idea that has you quite convinced yet? Then here’s one last alternative for your consideration before we sign off for the day!

Check out how I Made This… And That Too created an adorable monogram keychain using just the fun techniques we just discussed.

Conclusion

Have you made other awesome things from bottle caps before that you were very happy with indeed and had fun doing but that you don’t see here on our list? Tell us all about what you created and how you did it or link us to photos of your finished work in the comments section!

DIY Easter Bunny Party Hat to Celebrate

In my house, literally any holiday is a great excuse for the kids to play a little bit of dress-up! If I’m being totally honest, they don’t actually even need an excuse, but things are always a little extra fun when there’s a seasonal theme to work within their regular, rather crafty costuming endeavors.

That’s why I love coming up with ways to help them make their own pieces to celebrate different holidays, changes in season, and so on, and Easter is no exception.

One of my children actually has a birthday just before Easter arrives and making all kinds of fun things for the party, including birthday hats, got us all talking about how much fun it would be if there was a funny party hat to wear for every occasion. That’s how these adorable little Easter bunny-themed party hats came to be!

VIEW IN GALLERY

VIEW IN GALLERY

Naturally, I knew I just had to document the process of making these the moment I finished the first one and saw how much my kids loved it. That’s why I decided to create a tutorial for other crafters to follow along with when the kids started begging me to make more! Now we’ve made enough for everyone who will be coming to our Easter dinner.

Check out these step by step instructions complete with photos! If you’d rather follow along with a video tutorial instead of written words, scroll to the bottom of this post to find just what you’re looking for.

VIEW IN GALLERY

VIEW IN GALLERY

For this project, you’ll need:

Step 1:

Gather your materials!

VIEW IN GALLERY

Step 2:

First, turn your piece of pink cardstock landscape-wise so its long edges are the top and bottom and its short edges are the sides. Now, cut a piece of yarn that’s the same length as the long edge of your pink card page. Fold it in half so the two ends meet evenly and a loop form at the string’s halfway point. Hold those two ends tightly together, hold your pencil in your other hand and place it in the looped end, and stretch the yarn straight and taught between your hands.

Now, place the tip of your pencil in the top lefthand corner of your pink page and use your thumb to pin the yarn ends at the centre point along the page’s top edge (which should measure halfway between the corners). Carefully arc your pencil downwards, across the page in an arcing motion, and back up to the opposite corner; the tension and control of the piece of yarn will help you draw a well-measured and even semi-circle.

VIEW IN GALLERY

VIEW IN GALLERY

VIEW IN GALLERY

Step 3:

Cut the pink semi-circle out along the pencil line you just drew across your cardstock. This will be the base of your actual hat.

Step 4:

Holding your pink semi-circle so that the straight edge is at the top and the rounded edge is at the bottom, curl the corners towrds yourself, in towards each other, and down so that they meet up even with each other and the rounded edge at the bottom and make an open point at the top.

Then pass one corner over the other and start overlapping them, pulling one corner further along the bottom edge on the inside and one on the outside. This will close the opening in the top and make an actual point, while the bottom becomes a circular opening.

You now have a plain pink cone shaped party hat! Use your glue stick to apply glue to the outer corner and up its vertical edge to keep the cone shaped hat curled into place properly. Set it aside for a moment.

VIEW IN GALLERY

VIEW IN GALLERY

VIEW IN GALLERY

Step 5:

On your piece of white paper, draw the shape of a rabbit ear with a narrow, flat bottom edge and tall sides that widen towards a rounded top. Draw a second ear the same side. Now, take your piece of pink and white checkered paper and draw two more ears that are the same shape as your white ones, but this time smaller. These will layer on top of the first ones to make the pink inner ear of your Easter bunny. Finally, draw a heart shape about half an inch tall by half an inch wide on your pink and white checkered paper as well. Cut all of these shapes out.

VIEW IN GALLERY

VIEW IN GALLERY

VIEW IN GALLERY

Step 6:

From one of the short edges of your purple paper, cut two very thin strips from bottom to top, less than a centimetre wide each. Curl the ends of each strip by holding the paper tight between your fingers on one hand about an inch from the end and running your thumb nail down towards the tip, pressing hard enough to get the effect but not so hard that you just rip the end of the strip off. These two curled strips will be your Easter bunny’s whiskers!

VIEW IN GALLERY

VIEW IN GALLERY

Step 7:

Pick a central spot to anchor your Easter bunny’s face around and use your glue stick to apply a dot of glue there. Stick your whiskers down at their central point, crossing them slightly over each other like a small X so the curled ends stick out at cute angles on each side. Then stick your heart shaped nose down right on top of that central point where the whiskers overlap.

VIEW IN GALLERY

Step 8:

Apply glue to the backs of your pink and white checked inner ear pieces and stick them down in the centre of your larger white ear pieces, so the white peeks out around the pink edges like a border. Then curl the bottom corners of each newly layered ear in towards each other to make a point kind of like you did earlier with the pink hat, gluing them into place overlapping on each one. Your ears now have pointed bottoms instead of flat bottom edges.

VIEW IN GALLERY

VIEW IN GALLERY

VIEW IN GALLERY

Step 9:

Turn your pink hat around so you’re looking at the back, on the side with the seam opposite to where you just glued your nose and whiskers down. Apply a decently sized patch of glue closer to the top of the hat, just above the halfway point in its height. Glue your ears down here by sticking the front of each curled bottom into the glue with the pink inner ears facing the other direction, away from you and towards the other side of the hat. Angle them slightly diagonally so that they stick out the other side at a cute angle, like the bunny is very happy indeed.

VIEW IN GALLERY

VIEW IN GALLERY

VIEW IN GALLERY

Step 10:

Turn the hat back around and then apply glue to the backs of your googly eyes and stick them down above the nose but below the ears.

VIEW IN GALLERY

VIEW IN GALLERY

Step 11:

Starting at the tip of the heart shaped nose and drawing downwards to then curve outwards, use your black marker to draw the rabbit’s mouth, like a smile.

VIEW IN GALLERY

Step 12:

Cut a piece of elastic string that’s however long it needs to be to loop from the side of your child’s head (or your own, if you’re getting in on the fun too), down underneath their chin, and back up the other side to about their temple. Then turn the Easter bunny hat over so you can see inside the cone and apply glue on each side, about an inch or so higher than the circular bottom edge. Stick the two ends of your elastic string down there so it arcs downwards and can fit over a face easily but without being too loose.

VIEW IN GALLERY

Your Easter bunny party hat is officially ready to wear! Of course, you can feel free to play with colours, details, and embellishments if the pastel theme I opted for isn’t quite spring-like or bright enough for your tastes.

VIEW IN GALLERY

Just in case you’d like to try this project out for yourself, here’s a fantastic tutorial video to help you!

Easter Bunny Party Hat [Video Tutorial]

YouTube video

Making Most of Extra Space: Smart DIY Garage Organization Ideas

Each year, when the spring cleaning season arrives and we start feeling restless like we need to clean everything in sight, we always make sure we save time to organize our garage. It’s by no means our favorite task, but it’s also the area of the house that falls apart the most throughout the rest of the year and getting it done now sets us up for months to come! That’s why we’re always on the lookout for awesome DIY garage storage solutions or organizational tips to deal with garage clutter.

Just in case you need help getting your garage organized just as badly as we do, if not more, here are the best and most effective ideas that we’ve come across so far in our search for guidance and inspiration!

1. Sliding ceiling storage

VIEW IN GALLERY

Perhaps you’ve got quite a few things that you’d really like to just store safely and dryly in boxes but you’re not sure where you’ll put those tubs because you don’t have a lot of floor or wall space to work with? Then we just might have found the best solution for you right off that bat! Check out how Family Handyman installed wooden runners all along the ceiling that let storage bins slide easily across to keep them high up, out of the way, and safe from dampness as winter melts into spring.

2. Pegboard storage panels

VIEW IN GALLERY

If you’ve ever seen photos of big pegboard storage walls before then we’re sure you already . know just as well as we do how useful they can be, but not everyone has the spare space above their garage workbench to take up that much space on the wall. That’s why we Love this idea for making a series of hinged pegboard storage panels instead! See how this more space efficient, double sided version of the idea was created on Woodsmith eTips.

3. DIY lumber cart with wheels

VIEW IN GALLERY

If you’re the kind of garage user who tends to store all of your wood in there alongside your woodworking supplies, then we’re sure you know just how quickly things can start to feel cluttered and cramped! That’s why we liked this idea from Shanty 2 Chic for making a lumber card with wheels for easy movement and different sections to place different types of wood into so you can always find what you need easily but still keep it all under control.

4. PVC pipe garden tool organizer

VIEW IN GALLERY

Are you actually more of a gardener than a woodworker and it’s your long handled yard tools that are taking up a little too much space for your liking? Then perhaps you’ll get along a little better with something like this PVC pipe storage rack that sits right along the wall and stops things like spades and rakes from fall over where they’ve been leaned. Get the full details for making your own on Ashbee Design.

5. Garage mudroom

VIEW IN GALLERY

Is your garage actually more of a social and dressing place because your kids are very active and always putting on or taking off gear and equipment for various sports and outdoor activities? Then maybe you’d get along better building yourself a mudroom along one side so that all of those supplies and accessories can be kept in one spot rather than scattered across the whole space and into the house! Take a look at Wild Ruffle to find out how this version featuring cupboards, space for bins, a bench, and some coat hooks was made.

6. Pallet lawn tool storage

VIEW IN GALLERY

Did we really hit the nail on the head when we started talking about the need for lawn tool storage but you’re just not sure that working with PVC pipe quite appeals to you? Well, if working with something wooden and doing a bit of upcycling sounds a little more your speed, we’d definitely suggest taking a look at how Fabulessly Frugal made this long handled tool rack that keeps things contained right up against the wall!

7. Floating shelf garden station

VIEW IN GALLERY

Maybe instead of a workbench and tool area, what you could really use on the wall in your garage is a space efficient spot to get some of your gardening tasks done and keep your tools for that all in one place? In that case, we’d definitely suggest taking a look at how Mini Manor created this folding garden station complete with DIY floating shelves mounted on the wall above.

8. DIY garage storage cabinets

VIEW IN GALLERY

Do you actually have a sizeable wall space available for some kind of storage solution but you’re feeling intent on building a structure from scratch that will give you lots of places to put things? Then we think you might find this tutorial from Sugar Bee Crafts that walks you step by step through the process of creating an entire custom cabinet full of garage cupboards very useful indeed!

9. Wall hook storage

VIEW IN GALLERY

Were you a huge fan of the idea of creating additional wall storage in the form of pegs but you’ve actually been wondering whether a hook might be better so you can hang all different kinds of things, rather than just bikes? In that case, we think you’ll be rather pleased to hear that Craving Some Creativity is on your same wavelength! They’ve got some tips and tricks for you to help you plce the hooks just right in order to maximize space.

10. Painted screwdriver coat rack

VIEW IN GALLERY

Do you actually use your garage as an entrance to your home and a storage and workspace, so you find that a coat rack is really lacking near the door where they take their shoes off? In that case, why not combine aesthetics to make something that suits all the different purposes of your garage? We’re completely in love with the way Homemade Modern used painted screwdrivers to make an awesome wooden mounted coat rack.

11. Magnetic tool hanger

VIEW IN GALLERY

Are you the kind of woodworker who loves to keep your most commonly used tools on hands at all times, so you’re looking for a way to store them that is accessible, rather than just stashing them away in a garage cupboard? In that case, we think you’ll get a real kick out of the way Instructables created this magnetic took storage where your metal based tools, like screwdrivers and pliers, can be grabbed and hung quickly and easily in just seconds.

12. Repurposed crib to paint shelf

VIEW IN GALLERY

Perhaps you’re actually the kind of person who finds yourself using cans and canisters of paint quite often and you’re looking for a place to put them but you’ve also got some old baby furniture you need to upcycle or clear out? In that case, we think you’ll be just as intrigued as we were to see how My Love 2 Create turned their old baby crib into a paint shelf that’s perfectly sized and measured!

13. Garage storage shelves above the car

VIEW IN GALLERY

Are you actually still scrolling through our list and finding yourself thinking more about the garage ceiling storage we showed you above but you’re not sure the long, sliding concept you saw there will work because you don’t have quite enough room? Then check out this ceiling shelf design that sits right at the end of the garage instead! Jay’s Custom Creations shows you how to make it happen nice and solidly but with lots of space to put things.

Discover the World of Pretty String Art Crafts with Modern Flair

Between the process of mapping out the design and laying down the nails or tacks for the outline before you even get to stringing the details, the technique for string art might look quite advanced. Even so, it’s actually quite simple and fun to do if you keep your patience and work together. We tried a few things with our kids over the summer and now they’re completely obsessed, so we’ve been spending some of our spare time trying to find as many useful resources as we can in order to help us all make some more!

Just in case you’re as intrigued by the idea of making string art with your family as we were, if not more, here are 15 of the very best designs that we’ve come across so far in our search.

1. “Lady” string art

VIEW IN GALLERY

If you’re looking for a tutorial that’s both easy to follow step by step in order to recreated it directly and that is also simple to extrapolate from and get creative with the basic idea of, then we think we might have found exactly what you need right out of the gates! Check out how Craft Like a Lady created simple but pretty cursive letters to spell the word “lady” in string art (and consider how easy their technique would be to create other letters and write other things).

2. DIY home state string art

VIEW IN GALLERY

No matter what state you live in, this adorable home state string art idea featured on Semi-DIY makes for some fantastic decor (and also a caring housewarming gift). Besides showing you in just a few simple steps how to create the basic outline of a state, we also adore the way they outlined how to make a cut-out heart shape in the middle of your string art too, just so show a little bit of appreciation for the place you come from or the place you fell in love with and chose to live in!

3. Elephant shaped nursery string art

VIEW IN GALLERY

Just in case you’re looking for something a little more simply shaped or maybe just a little cuter in order to make it fitting for a kid-friendly space, here’s an absolutely adorable elephant design featured on Erin Spain! We love the way they outlined their criss-crossing stringing technique because it fills the blank space inside the elephant well and in a way that has a lot of appealing texture, almost like shading inside a sketch.

4. Kid-friendly string art

VIEW IN GALLERY

Did we catch your eye with the term “kid-friendly”, but more because you’d actually like to introduce your kids to the technique in a much simpler way because they really are quite small, rather than because you want the final aesthetic of the piece to look good in a kids’ space? In that case, we’d definitely suggest taking a look at how Anne Carista made this simple but super cute heart with tacks instead of nails! They show you how to poke the tacks through a canvas rather than nailing metal into a wooden board, just to keep things safer for little fingers (and also quicker for little attention spans). We love the way they finger painted polka dots all over their canvas around the heart as well!

5. “Dream” rainbow string art

VIEW IN GALLERY

Have you actually already tried your hand at a bit of simple string lettering and really enjoyed it, but now you’re looking for a way to swap the project up a little in order to make more? Then we’d definitely suggest taking a look at how Instructables created some pretty, multicoloured string art around their tacked words rather than inside of them, making the words stand out like a negative space in the mix of bright hues.

6. Simple blossom string art on wood

VIEW IN GALLERY

Since we are talking about tutorials designed to help you and your kids do some learning when it comes to the basic skills of the technique, here’s a tutorial that really lays it out for you in a surprisingly simple way! Creme de la Craft shows you how to carefully map out the nails for your string art because you actually commit to the shape by using a printed and cut out template, just to make sure you get the outlined you want. This will make sure you really love what you’re stringing!

7. Pretty string art heart card

VIEW IN GALLERY

Believe it or not, the string art you’ve probably seen the most, which is classically done on a structured background like wood or canvas, isn’t actually the only kind you can do! If you and your kids are looking for something a little more delicate, or perhaps a little bit easier to gift, then we’d definitely suggest taking a look at how Guidecentral created a simple string art heart on the front of a greeting card. Talk about a heartfelt piece to both give and receive!

8. Batman string art

VIEW IN GALLERY

If you’re going to start learning and practicing new DIY techniques with your kids, would you rather do so by creating piece that are themed around their very favourite things, just to make sure they stay as interested as they can for as long as possible while you work on it together? In that case, we’d absolutely suggest taking a look at how A Turtle’s Life for Me made this totally super (pun intended) Batman logo string art!

9. Spraying elephant sequin and string art

VIEW IN GALLERY

Were you perhaps very intrigued indeed by the idea of making a string art elephant happen, but you can’t help but feel like your kids would really enjoy adding some kind of additional element into the mix now that they’re feeling a little more experienced and comfortable with the craft… especially if that extra detail was sparkly? In that case, we think this little spraying string art elephant where the water is made of sequins might be right up your alley. Get the full details for making one of your own on Time Traveller!

10. Mickey Mouse string art

VIEW IN GALLERY

Just in case you adored the idea of making string art that’s themed after the things your kids love but they’ve never really been huge Batman fans, here’s a Mickey Mouse themed tutorial that will get you working on things in the same way, just with a cute Disney spin! Get the full details for making this wonderfully simple outline and string filling on This Fairy Tale Life.

11. Funny moustache string art

VIEW IN GALLERY

Just in case you’re looking for a trendy, kitschy design that will be fun for your kids to work on but also somewhat stylish for you to hang up in your house, here’s an idea that’s actually kind of neat to have hung up by the time November rolls around, just in case you have friends and family members that participate in Movember charity campaigns! Tierra Este guides you step by step through the process of making a funny moustache that curls upward at each end.

12. DIY snowflake string art

VIEW IN GALLERY

We know it’s not quite winter time yet, but we’ve always really liked the idea of stockpiling DIY ideas and crafting tutorials seasons in advance so that we have plenty of ideas to work with when the time comes and the weather changes! That’s why we couldn’t resist putting this adorable snowflake idea outlined by Erin Spain on our list even though fall has only just started.

13. Monogram heart string art

VIEW IN GALLERY

Were you actually quite interested indeed in the idea of learning how to make string art letters, particularly the negative space or cut-out kind, but you’re not sure your kids are quite ready to tackle cursive shapes yet? Then we’d suggest taking a look at this tutorial from Artsy Paints instead because they shows you how to make simple, bold block letters! We love their design for putting a monogram inside a heart because we think it would make a nice gift.

14. Captain America string art

VIEW IN GALLERY

Just in case you were very interested indeed in the idea of making superhero themed string art but there’s another crime fighter that has caught your kids’ attention a little harder than Batman, here’s a Captain America tutorial to try your hand at instead! Instructables shows you how to alternative colours and make circular stripes to create the classic shield your kids will instantly recognize.

15. Whale tail string art

VIEW IN GALLERY

Have you always been an avid reader of classic novels, a lover of the sea, or just someone who likes kitschy decor? In any case, perhaps this neat whale’s tail project, complete with a few crashing waves of white sea foam, might make for a neat project on an afternoon! We like that this design is quite impactful despite being made from only a few simple shapes, which you can find outlined nice and clearly on Kept.

Artistic Sophistication: 15 Most Beautiful Marbled Paint Projects

When it comes to crafting and DIY projects, one of our very favourite techniques has always been painting. That’s partially because it’s such a diverse art form, meaning there are just about countless ways to do it and techniques to try out even within the overarching idea of simply “painting” something! In fact, we love painting so much that we’ve long been on a mission to try out as many different techniques as possible, so we can often be found browsing art blogs and online crafting boards for new ideas that we haven’t given a shot yet. That’s how we found ourselves rather obsessed with the idea of marbled painting recently!

Just in case you’re as enamoured with the gorgeous aesthetic of marble painting as we are, if not more, here are 15 of the very best ideas we’ve come across in our search so far.

1. Paint marbled wine glasses

VIEW IN GALLERY

Like us, have you recently purchased a nice set of stemless wine glasses that sit low to the counter or table and, although the clear glass has a certain simplistic charm, have you caught yourself wondering whether or not the glasses might look a little more exciting if they had some kind of colour or detail, since they don’t stand high? Then we have a feeling you’ll get along very well indeed with the way Kenarry marbled the bottom half of each glass in their set, just to give them a little more personality.

2. Marbled paint jewelry dish

VIEW IN GALLERY

If you’re going to put in the effort and patience it takes to marble something, would you prefer to make it something flat and a little more opaque to really make sure the colours show properly in their beautiful swirling pattern? In that case, we have a feeling you might prefer the way Crafts Unleashed transformed this simple white polymer clay jewelry dish using the same marble techniques we showed you above! The colours really bounce against the stark white of the clay.

3. Marbled glass ball ornaments

VIEW IN GALLERY

Were you very intrigued indeed by the idea of marble painting smooth, clear glass but you’re just not sure that you drink wine enough to warrant painting a whole set of wine glasses? Then perhaps you’d prefer to make something that’s glass and decorative instead! We love the way Persia Lou fully marbled the outside of some pretty glass hanging ornaments fastened with ribbons on the top.

4. Marbling canvases with spray paint

VIEW IN GALLERY

Believe it or not, the acrylic or nail polish water marbling techniques that you saw in the tutorials we showed you above aren’t actually the only ways you can create that swirling effect you love so much with paint! If you’d rather take a slightly different, more classically “artistic” approach, perhaps you’d prefer to take a look at how Polished Habitat water swirled their canvases using spray paints in a slightly less traditional way.

5. Mini marbled paint pots

VIEW IN GALLERY

Are you perhaps already experienced and accomplished in the water marbling techniques we’ve shown you, so you’re actually mostly looking for inspiration for things to do that on? Well, if you’re the kind of home decorator who loves to add a little bit of green to just about any space you have, then we think you just might get a kick out of the way A Pretty Fix decided to marble their planter pots!

6. Marbled paint glass jar vase

VIEW IN GALLERY

What if you’re actually such a plants and flowers lover that you need something even bigger than the miniature planters we just showed you above? Then we think you might have better luck putting your greenery in something like a mason jar rather than a little terra cotta pot! Ishaan Tube is on the same page as you and shows you how to water marble something that big instead.

7. DIY marbled paper artwork

VIEW IN GALLERY

What if you actually enjoy the aesthetic of marbled painting so much that you’d rather create art with it instead? Of course, we regard all kinds of different DIY projects as art, but there’s something to be said for being able to create art on paper so you can frame it and hang it on your wall, like a slightly more classic art piece. That’s why we were such big fans of this awesome marbled paper artwork tutorial featured on Mad in Crafts!

8. Marbled paint and shaving cream craft

VIEW IN GALLERY

If you’re going to get create with colours, visual textures, and techniques, would you prefer to make sure you’re making something that your kids can easily get in on the fun with as well? In that case, we definitely think you should take a look at how Sea Lemon made marbled paper art in a slightly different, more hands-on and fun, messy way! They show you how to create a marbling effect by mixing your paint with shaving cream, swirling that mixture around, and letting it try.

9. Marbled tea light candle holders

VIEW IN GALLERY

Are you actually still thinking about how much you love the idea of marbling glassware, but you’re still not convinced you’ll use wine glasses like the ones you saw above enough to justify making yourself a whole set? Well, if you’re the kind of person who loves to light a few relaxing candles at the end of the day, them we think perhaps this lovely tea light candle holder idea outlined step by step on Lovely Indeed might be a little more up your alley!

10. Marble dipped stemware

VIEW IN GALLERY

Have you actually been scrolling through our list so far and thinking about how much you liked the marbled glassware, as we said, but you’re hesitated on getting started because your own wine glass collection actually does have stems, unlike the ones we showed you in that tutorial? Well, never fear, because The Daily Meal is here to save the day! Their tutorial shows you how to make it happen on stemware instead.

11. Custom marbled coffee mugs

VIEW IN GALLERY

All of these tutorials that show you how to marble different styles of wine glasses are all well and good, but what if you don’t actually drink wine at all? In that case, you probably don’t even own any, so why not try adding the same lovely effect on something you will use? Well, coffee lovers rejoice, because Domestic Fashionista is here to show you how to make painted marbled mugs instead!

12. Marble rimmed bowls

VIEW IN GALLERY

If you’re going to start making yourself wonderfully colourful marbled dishes to hold your drinks and beverages, would you actually prefer to make your whole dish set match, just to be as thoroughly creative as possible? In that case, we think you’ll really enjoy the way Plaid marbled all of their bowls as well! Their tutorial shows you how to do it so the main part of the bowl stays stark white while the rim takes on all the colour.

13. Marbled miniature pumpkins

VIEW IN GALLERY

Is your favourite way to get creative and learn a new technique actually to do it in a way that’s quite seasonal, so you can use it as an opportunity to roll over your home decor scheme and follow the weather patterns and the holidays? Then here’s the perfect tutorial for you! Omega Pure shows autumn lovers how to add a wonderfully marbled painting effect to miniature pumpkins that just scream fall.

14. Colourful marbled coasters

VIEW IN GALLERY

Have you always been the kind of crafter who adores making things that are both decorative and practical so that your guests can see how skilled you are int he look and the function? Then we think perhaps you’ll get a huge kick out of the way Sisoo made these beautifully marbled drinking coasters from scratch! Their tutorial guides you step by step through the process of not only forming the coasters themselves but also adding the painted, colourful effect.

15. DIY marbled tabletop

VIEW IN GALLERY

By this point, are you actually realizing that you just might love the look of painted marble so much that you’d prefer to make a bit more of a statement piece than the smaller things and sets you’ve seen so far? In that case, we have a feeling you might get a bit more satisfaction out of making something like this fantastic painted marbled table! Get the full, step by step instructions for making one of your own on Cute DIY Projects.

Modern and Trendy Manicure: DIY Almond Nails 

There are so many different ways to shape your nails but lately the so-called almond nails seem to be the hottest trend! As the name suggests, they are shaped like an almond but there’s definitely a lot of room for creativity left within those boundaries. They can be longer or shorter, with sharp or blunt points but most of all, they can adjust to any style of manicure! Get inspired by our selection of the most modern DIY almond nails! 

1. Red Almond Nails 

VIEW IN GALLERY

Just like a red lip is always in style, so is the red manicure. It is absolutely timeless and can easily fit into any occasion. It has a seductive undertone, so it’s the perfect choice for date night or Valentine’s Day! Find the tutorial at Nail Tutorials for charming red almond nails!

2. Glitter Almond Nails 

VIEW IN GALLERY

Adding glitter to your manicure is never a bad idea! It’s a quick and easy way to bring some sparkle to your style and make your nails look absolutely glamorous. You can learn at Nail Career Education how to give your almond shaped nails a glittering touch!

3. Short Blue Almond Nails 

VIEW IN GALLERY

If you are a fan of a short manicure you can often feel like you don’t have too many options when it comes to shaping or decorating your nails, but all you really need is a good teacher! Bold N Trendy will show you how short nails can have a gorgeous almond shape and a mesmerizing blue color!

4. Nude Almond Nails 

VIEW IN GALLERY

Nude tones are one of the most popular trends in the beauty industry right now. If you already have all the nude makeup palettes and really resonate with their simplicity, the obvious next step is to treat yourself to a matching manicure! Dyra Luxe has a great tutorial for nude almond nails!

5. Silver Mirror Almond Nails 

VIEW IN GALLERY

Metallic colors are incredibly chic and elegant. They have a certain aristocratic undertone, so they can instantly add an element of nobility to your style. If you’re loving the metallic trend and have a soft spot for silver, check out how Nails 21 created these silver mirror nails!

6. Rose Gold Almond Nails 

VIEW IN GALLERY

Rose gold blends together the sensitive nature of pink and the glamorous essence of gold, giving us one of the best combinations for jewelry, makeup and nails! Tiny’s Nail Art has an amazing tutorial for charming rose gold nails with a trendy almond shape!

7. Marble Almond Nails 

VIEW IN GALLERY

The marble trend is still very present and it has definitely made an impact on the beauty industry. If you’re looking for modern nails that have a very polished look but don’t stand out too much, opting for marble almond-shaped nails is your best bet! Get the tutorial at Nail Career Education!

8. Gothic Almond Nails 

VIEW IN GALLERY

Your almond nails don’t have to have a preppy look at all – you can totally push the boundaries and make them super long, play around with colors and give them an edgy style! Crystal Nails TV created an epic gothic manicure that celebrates the almond shape!

9. Burgundy Almond Nails 

VIEW IN GALLERY

Shades of red are some of the most beautiful colors to work with. If the bright red manicure we started this roundup with doesn’t fit your style and you’re wishing for something with a little bit more depth, burgundy is the perfect shade of red for you! Find out the details at The Nails Queen!

10. Red Bottom Almond Nails 

VIEW IN GALLERY

We’re all in love with the red soles of the Louboutins, but now this trend has finally made its way into the world of manicures as well! Give the bottom of your nails an unexpected twist by following the tutorial at The Nails Queen and creating captivating red bottom almond nails!

11. Three Colored Blend Almond Nails 

VIEW IN GALLERY

When you’re choosing a manicure it all comes downs to shape and color, but one would argue that the color is the most important element in this equation. It’s often hard to choose just one suitable color tone or to find the right blend of multiple ones. Thankfully, Kaylie Hogan Nails found a gorgeous three color blend!

12. Color Gradient Almond Nails

VIEW IN GALLERY 

If you’ve been on the lookout for a manicure that celebrates the warm tones of the summer, these color gradient almond nails by Crystal Nails TV would be our first pick! The way the colors blend with each other creates a truly stunning visual poetry!

13. Pastel Purple 

VIEW IN GALLERY

We’re so in love with nails in pastel tones! They are a beautiful way to display a color that you really resonate with but don’t want to have a manicure that is too vibrant. If you’re loving the idea of pastel nails and also want to give them an almond shape, Lorna Andrews is your go-to girl!

Dazzling and Cheerful Nail Polish Crafts full of Color!

There are so many reasons to love nail polish. Besides being an awesome tool for expressing creativity in your personal style, did you know that it makes for a really great crafting resource as well? Nail polish works just like paint in most cases, but it often has a better ability to stick to different surfaces than paper or canvas without chipping and flaking the way a lot of paints would. In addition to that, it’s usually a lot more sparkly. Finally, the density of nail polish and they way it dries makes it great for uniquely cool crafting techniques!

Are you just as intrigued about nail polish crafts as we are? Check out these 15 awesome nail polish projects and tutorials that we’ve either already tried and had a blast with.

1. Nail polish marbles

VIEW IN GALLERY

We’ve always had a strange love for decorative flat-backed glass marbles. Perhaps it’s the era we grew up in, but there’s just something about them that screams fun décor to us, especially if there are bright colours involved! We love that you can make them look either classy or kitschy, depending on how you arrange them and what you make with them. What if you only have access to the regular clear glass kind though, rather than fun coloured ones? Well, Craft Klatch is here to show you a great way around that! Paint the backs with nail polish and glitter using their awesome (and totally kid-friendly) technique.

2. Marbled nail polish bowls

VIEW IN GALLERY

If you’ve never tried nail polish water marbling then we’re sorry to tell you that you’ve been missing out! There’s just something so fun and interesting about the technique, which can only really be done quite so effectively with nail polish as opposed to paint. We love the way Gathering Beauty turned these simple little decorative bowls into works of art where they would have otherwise been plain and only functional. Now they’re useful and stunning to look at!

3. Polished wire hair clips

VIEW IN GALLERY

Have you ever thought of altering your old banana clamp style hair clips to give them a little more “umph” since you know the style is slightly outdated, but you still use them regularly because they’re great for keeping your unruly hair tamed? Then here’s a totally awesome DIY way to put a cute floral spin on your clips! Get Crafty shows you how to make pretty little wire flowers and to give the petals a shining coat of colour by doing some nail polish dipping.

4. Marbled polish shot glasses

VIEW IN GALLERY

Have you always been a big an of personalizing everyday home things that you bought from the store looking quite plain? We love doing that too! We’re always painting or glittering the little useful aspects of our home that we use everyday. That’s why we loved this cute nail polish embellished shot glass idea! Huffington Post shows you how to very simply transform the glasses by marbling brightly coloured nail polish across the top of a bowl of water and carefully dipping the bottoms of the shot glasses in to catch the swirled mixture. We love the way the patter shows through the glass, letting guests appreciate it even though the design of interest is on the bottom sitting against the table.

5. Marbled nail polish mugs

VIEW IN GALLERY

Perhaps you love the idea of polish marbling your kitchen wares so much that you’d rather do a project that showcases the colours a little better, really allowing whoever uses your dishes to appreciate the combinations and shapes you managed to create when you dipped the piece? In that case, we have a feeling you’re going to love these polish dipped mugs from Domestic Fashionista! We actually made these for our kitchen and we’re very glad we did because they genuinely brighten up our morning each day when we enjoy our pre-work coffee.

6. Marbled polish jewelry box

VIEW IN GALLERY

Have you amassed a decent jewelry collection but you’re always finding that things have become tangled or lost just sitting on top of your dresser without a set place to go? In that case, we think you’d make great use of a jewelry box! As usual, however, we’ve found a way to personalize the box you buy so it looks even cooler than it already did. Check out how Brit + Co. used polish dipping and tape to make a wooden safe box with a neatly edged strip up the middle.

7. Marbled polish drawer knobs

VIEW IN GALLERY

As you can probably tell by now, we’re pretty obsessed with the nail polish marbling technique, even though we know it’s not the only DIY thing you can actually use nail polish for. In fact, we’re so obsessed with it that we’ve started incorporating it into our home décor in more tangible ways, like on the furniture. This tutorial from The Pink Doormat, for example, shows you how to detach, marble, and reattach the knobs of you dresser drawers to get a little pop of colour! We did this in the exact colour you see in the picture a few months back and we’re very happy with how it looks.

8. Nail polish and glass stone coasters

VIEW IN GALLERY

Are you still thinking about those glass marbles or stones we were talking about earlier on our list and wondering what you might do  with the ones you’ve polished the bottoms of once you’re done? Well, there are actually any number of cool things you can create with those but just in case you’re in need of some inspiration, here’s a very cool coaster idea from Craft Klatch, complete with an easy tutorial for you to follow along.

9. Wire and nail polish flowers

VIEW IN GALLERY

Were you intrigued by the wire flower and half clip idea we showed you above, but you’re not sure you’re ready to tackle that entire project yet and you’d rather just learn how to make the wire flowers themselves? In that case, we’ve found just the tutorial for you! Craftsy guides you through the process of not just bending the wire into the shapes of petals, but also dipping those petals into water floating nail polish, just like you would in the marbling technique, to create a fine plastic film across the hole in the centre of each. That film looks like a delicate lower in whichever colour you decided to pour onto your water’s surface!

10. Washer and nail polish Mickey Mouse necklace

VIEW IN GALLERY

If you’re going to craft, are you intent on transforming something unconventional that you might not normally use for creative DIY into something pretty that you’d actually wear? We love totally upcycling things in unique ways like that, especially if we get to do some water marbling at the same time. That’s why we loved this tutorial from Holly’s Art Corner so much! They show you in detail how to marble some old washers from your tool bench so they feature pretty colours, as well as how to attach them so the two smaller, darker washers sit high on the larger one like a pair of little mouse ears. Finally, turn the whole thing into a necklace so you can wear your Minnie Mouse inspired piece wherever you please!

11. Foam and thumb tack dragon’s egg

VIEW IN GALLERY

Does your nail polish collection consist mostly of purple, black, and slate shades in various finishes and levels of sparkle because your personal style is quite dark and inspired by mystery and fantasy? Well, grab a foam egg from the craft store and a pack of thumb tacks or push pins from your desk and voila! You have everything you need to make this amazing faux dragon’s egg from The Adorned Claw happen. Paint the flat top of each pin a different colour and then, starting in the centre of the bottom and layering out, press the pins into the foam so the egg looks like it’s covered in dragon scales.

12. Sparkle polished hair clips

VIEW IN GALLERY

Are you actually just looking for a very simple DIY idea solely because you’ve found a colour of nail polish that you love so much, you just wish you could paint your whole life with it? Maybe you want to wear that colour as a bright accessory even when you’re already wearing another colour polish that you’re not ready to change yet. Perhaps it matches a new shirt you got exactly and you want to have as many cute adornments as possible to go with it and make an entire outfit! Whatever the reason, we have a feeling these super simple painted hair clips by Kraft Mint are just what you need. It’s wildly easy; simply buy some plain hair clips from the store and paint the top so the pretty colour you love shows when the clips sits in your hair.

13. Upcycled polished lockets

VIEW IN GALLERY

Are you still very into the idea of nail polish covered locked but you just haven’t quite seen the idea for you yet? Well, perhaps these adorable, mod looking lockets will hold your attention a little bit better! Burlap and Blue suggests finding some simple old lockets on chains at the nearest thrift or vintage store and using nail polish to add a pop of colour to the front, adding a clear top coat for lots of shine. We love the idea of making a few in different colours andw earing them at once.

14. Nail polish marbled picture frame

VIEW IN GALLERY

Have you always been the kind of nostalgic person that loves to actually print and display your favourite pictures of your friends and family, even though we live in the digital age? We love hanging photos up as well, but we’re also big crafts nerds who can’t pass up a chance to embellish the frames we choose in all kinds of different ways. That’s why this fun water coloured frame design from The Geeky Southerner caught our eye! We love that they used Disney cut-outs and stickers to add even more character, making it the perfect frame to remember your last family holiday with.

15. Simple coloured bobby pins

VIEW IN GALLERY

Were you very intrigued by the simple polished hair clip idea we showed you above but you’re just not sure that you’ll really wear those larger style clips because the only pins you tent to put in your hair are small bobby pins? Well, never fear, because you can create essentially the same effect with regular bobby pins as you saw above! Lines Across gives you a few tips for painting many pins in different colours at once without making a big mess.

DIY Mermaid Nails: An Enchanting Fairytale Manicure

Among all the manicure trends that have recently emerged, mermaid nails are one of our favorite. It encourages people to experiment with their manicure beyond the limits of a standard nail polish and it offers a chance to bring much of the childhood fairytale magic into their nail art. If you are in need of some inspiration, take a look at these enchanting DIY mermaid nails! 

1. 3D Mermaid Scale Nails 

VIEW IN GALLERY

It’s no secret that mermaid tails have glistening fish scales, so the fastest way to channel the mermaid charm is by creating a manicure that is full of scales. Naio Nails has the most outstanding tutorial because the mermaid scales are actually 3D and they appear totally realistic!

2. Sparkling Mermaid Nails 

VIEW IN GALLERY

Mermaids are known for their enchanting personality and sparkling appearance. If you want to glow with the same radiance as they do, start with a sparkling mermaid manicure that is going to bring alive the mermaid magic! The Nails Queen shares the tutorial!

3. Super Long Mermaid Nails

VIEW IN GALLERY 

If you love to artistically challenge yourself and push people outside of their comfort zones, you’re already enamored with mermaid nails by default, but Dazzle Glam Nails shares an idea for mermaid nails that are so long, they’ll leave people gasping when they see you. Work it, honey!

4. Watercolor Mermaid Nails 

VIEW IN GALLERY

Watercolors have a beautiful way of capturing the essence of colors and blending various shades together with ease. A lot of mermaid manicures are very bright and vibrant, but if you want to try something more pastel, Simply Nailogical‘s watercolor mermaid nails are a great choice.

5. Holo Mermaid Nails 

VIEW IN GALLERY

Are you obsessed with the holographic trend? We’re definitely all over it! Bring together the two crazes that have taken millennials by storm and brace yourself for a holographic mermaid manicure! Cutepolish will be with you throughout the whole process.

6. Acrylic Pink Mermaid Nails 

VIEW IN GALLERY

Not all mermaids are the same; they definitely have different personalities. If your mermaid alter ego embodies sensuality and femininity, you’re going to want to represent that with your manicure. How about these acrylic pink nails by Sarah’s Nail Secrets?!

7. Simplistic Mermaid Nails 

VIEW IN GALLERY

Can you still sport a mermaid manicure without making it super lavish and extravagant? Of course you can! Ipsy shares a tutorial for a simplistic mermaid manicure that is just as enchanting as any other, but it does allow for some more privacy when you’re out and about!

8. Blue Scale Mermaid Nails 

VIEW IN GALLERY

If we were a mermaid, we would spend all of our days exploring the depths of the ocean. Have you always felt called by the great vast sea too? Capture its colors within your mermaid manicure! The blue scales on Janelle Estep‘s mermaid nails are absolutely captivating!

9. Dark Mermaid Nails 

VIEW IN GALLERY

Maybe your idea of a mermaid is a darker and more mysterious one. A creature that knows many secrets, but seldom reveals any. Capture this quality in your mermaid manicure with dark mermaid nails that will beautifully represent your enigmatic character. Kelli Marissa is your guru for the day!

10. Green Mermaid Nails 

VIEW IN GALLERY

You can keep the color palette of your mermaid nails fairly simple and still create a mesmerizing manicure that is going to charm the onlookers! Green is always a great color to go with, as it has the superpower of looking both cold and warm at the same time. Check out how Tiffy Quake made these green mermaid nails!

DIY Envelopes: A Charming Way to Send Customized Snail Mail

Snail mail is not dead yet and truth be told we silently hope it stays around until the end of all days. There is something so profound about getting a beautiful envelope in a mail and a handwritten letter, rather than just a text message or an email. Bring back the good old days of letter writing and send out your personal letters in the most charming DIY envelopes!

1. Blooming Envelope

VIEW IN GALLERY

Most people have a soft spot for beautiful blooming flowers. The next time your dearest friend celebrates another trip around the sun, surprise them with a handwritten birthday note that is sent to them in a handmade envelope resembling a blooming flower. Mark Montano will help you make it!

2. Old Book Envelopes

VIEW IN GALLERY

We all have a couple of really old books on our shelves that we know we’re never going to read. Instead of throwing them away, Paperiaarre can show you how to repurpose the pages and turn them into charming vintage envelopes. Whoever is lucky enough to get mail from you will surely be speechless!

3. Box Envelopes

VIEW IN GALLERY

If you’ve never liked the thin nature of regular envelopes you can definitely make them a bit bulkier with this tutorial by Paper & Landscapes that shows you how to make little box envelopes. The regular envelopes usually end in trash, but these are bound to get a special place at someone’s desk!

4. Origami Heart Envelope

VIEW IN GALLERY

Are you planning on sending a card to your chosen Valentine on the next Valentine’s Day? That’s so romantic, but don’t let the card be the only surprise – impress with the envelope too! The Big Blue Van shares the idea for an amazingly creative origami heart envelope!

5. Miniature Envelopes

VIEW IN GALLERY

Envelopes aren’t only meant for letters; you can use them up for gift cards too! We love the miniature envelopes we found at Andrea’s Notebook. They are perfect for safely storing the gift cards that you’ll be giving to your friends as a party favor at your next holiday gathering!

6. Floral Envelopes

VIEW IN GALLERY

Some envelopes look completely ordinary on the outside but as soon as you open them there’s a surprise waiting for you! The idea is really innovative and one that brings a smile to the opener’s face! Check out how Snippet & Ink made these gorgeous floral envelopes!

7. Doily Envelopes

VIEW IN GALLERY

Give your envelopes a cute and elegant look by decorating them with a doily pattern and a sea of tiny polka dots! The color of the envelopes is up to you but Next to Nicx can tell you first hand that pastel colors give them an extra boost of charm!

8. Scrapbook Paper Envelopes

VIEW IN GALLERY

Do you have any leftover scrapbook paper? Set out on an envelope making spree! You’ll finally get to use up all that paper and you’ll get a whole collection of diverse envelopes for free! Gathering Beauty shares the step-by-step for adorable scrapbook paper pocket envelopes.

9. Mixed Paper Envelopes

VIEW IN GALLERY

If you love to craft with paper you undoubtedly have a big pile of various paper at home. Paperiaarre gives you a chance to use it up all at once! Mix the different types of paper together to get super interesting combinations that will turn out to be the most unique envelopes!

10. Paper Bag Envelopes

VIEW IN GALLERY

Crafting with paper bags is always an adventure! It’s quick, simple and you can get the kids involved as well! They will be so eager to send the invitations for their next birthday party in the paper bag envelopes that they have made themselves. One Bunting Away has all the details!

Vivid and Powerful: 12 DIY Ideas for Neon Nails

A manicure is such an important part of one’s style and when it is made with bold and bright colors it has the power to define your whole look, representing your shining personality and courageous fashion choices. Neon nails are the perfect fit when you’re  really going for the most noticeable and outstanding manicure! Check out our selection of vivid and powerful DIY neon nails ideas! 

1. Neon Gradient Nails 

VIEW IN GALLERY

The gradient coloring is one that is always in style, thanks to its dynamic look that mixes together different color hues. Combining neon shades results in getting a bright manicure that instantly catches the eye and acts as an important part of your whole style. Check out the tutorial at My Simple Little Pleasures!

2. Tropical Neon Nails 

VIEW IN GALLERY

If you love the tropical climate for its warmth and humidity, channel that vibe with your manicure that is proudly showing off green and pink neon shades decorated with tropical motives. For an added wow-effect give the nails the famous almond shape! You’ll learn how to do it all at Dazzle Glam Nails!

3. Neon Rainbow Nails 

VIEW IN GALLERY

Challenge yourself to fit as many neon colors within a manicure as you possibly can, to create a mesmerizing explosion of colors. The neon rainbow nails by Sarah R have such a captivating look that you’ll often think of them as your most special artistic piece!

4. Yellow and Black Neon Nails 

VIEW IN GALLERY

The combination of neon yellow and black never disappoints! It carries a strong contrast, the black shades putting the neon ones even more to the front in a manner that almost overwhelms us with how bright the yellow is! Find out how you can rock this epic yellow and black neon manicure at Tracy Nailz!

5. Turquoise Ombre Neon Nails 

VIEW IN GALLERY

Creating the ombre coloring with neon shades is a wonderful way of emphasizing color but giving it a little softness as well. Kelli Marissa has a great tutorial for turquoise ombre neon nails that have a classic neon brightness but feel much subtler given thanks to the ombre coloring.

6. Halloween Neon Nails 

VIEW IN GALLERY

Have you picked out your Halloween manicure yet? Robin Moses Nail Art has a fantastic idea for paint dripping nails with a bold green neon color and a shiny glistening purple! The manicure has a creepy look that will go perfectly with the costume of a proper witch!

7. Floral Neon Nails 

VIEW IN GALLERY

Robin Moses Nail Art has another neon nails idea that we’re totally in love with! If you love floral motives and want them to be the center of your style, these floral neon nails are the perfect fit for you. The flowers painted in the brightest colors seem to have a hypnotizing effect!

8. Smoke Neon Nails 

VIEW IN GALLERY

Sloppy Swatches shares the tutorial for a really unique manicure, not just because of the coloring, but also because of the design itself. The neon colors give your nails the visibility they deserve and if you want to bring in extra versatility, pick a different color combination for each of your nails. The whole look is completed by the smokey decor!

9. Chevron Neon Nails

VIEW IN GALLERY

Do you love the dynamic and modern chevron pattern? Now you can display it on your nails! The pattern itself is modern enough, but if you give it a neon coloring you’ll create a youthful manicure perfect for matching your boldest outfits! Get the details at Twi_Star.

10. Tribal Neon Nails 

VIEW IN GALLERY

The tribal pattern is very popular at the moment and if you’re always the first one to chase new trends, capture the wonderful patterns within your manicure! Ane Li opted for pink and yellow neon color shades under the black tribal patterns and the combination works marvelously!

11. Puzzle Neon Nails 

VIEW IN GALLERY

The motive of puzzle pieces is absolutely adorable but if you’re eager to make it stand out and give it a vivid look, neon colors are the obvious choice! Nail Easy Dream Art will teach you how to make these stunning puzzle neon nails that will give your style a playful and powerful undertone!

12. Paint Dripping Neon Nails 

VIEW IN GALLERY

If you want to decorate your nails in a creative and dynamic fashion, consider the motive of a dripping paint! You can see how it works together with neon colors in the tutorial video by Peachy Charms. We love that every nail has a different neon color, bringing much diversity to the manicure.