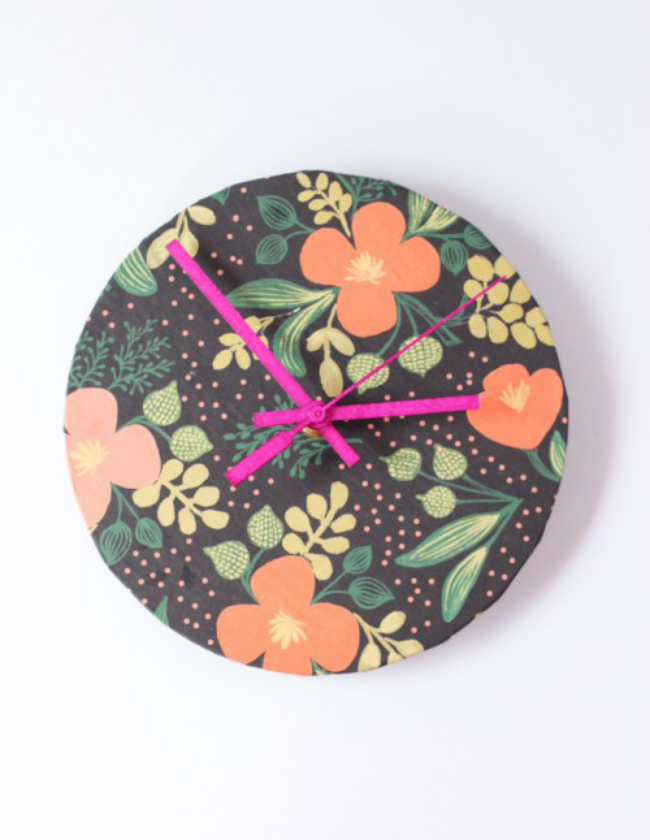
Have you been thinking about updating or making a new clock for your home, but don’t know what materials to use or what style you want to try out? Clocks are often expensive purchases, but it doesn’t always have to be that way. In order to get a clock that is suited perfectly to your decorating needs, it is best to make one yourself! We have found a cute and delightful DIY wrapping paper clock project that will be perfect for your home’s modern interior. Instantly adding color and pattern, it also makes for a wonderful gift.
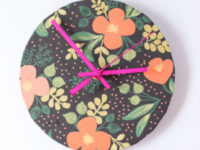


Wrapping Paper Clock
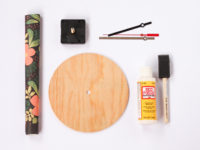
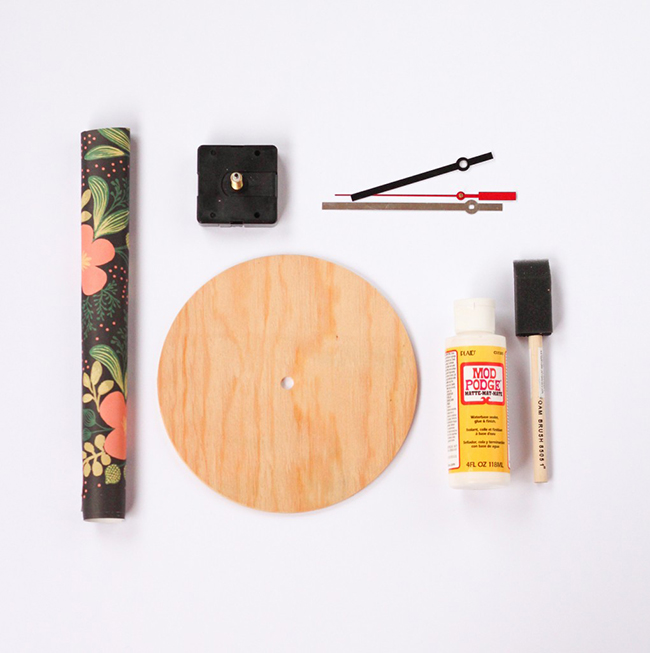
The materials you’ll need:
- Clock base
- Clock kit
- Wrapping paper
- Mod podge
- Sponge brush
- Spray paint (optional)
Step 1:
If you are using dark wrapping paper, consider using bright colours to make your clock hands. This way you’ll see the clock hands as they stand out from the wrapping paper clock face and will fashion a lovely, contrasting look for your finished clock.
Step 2:
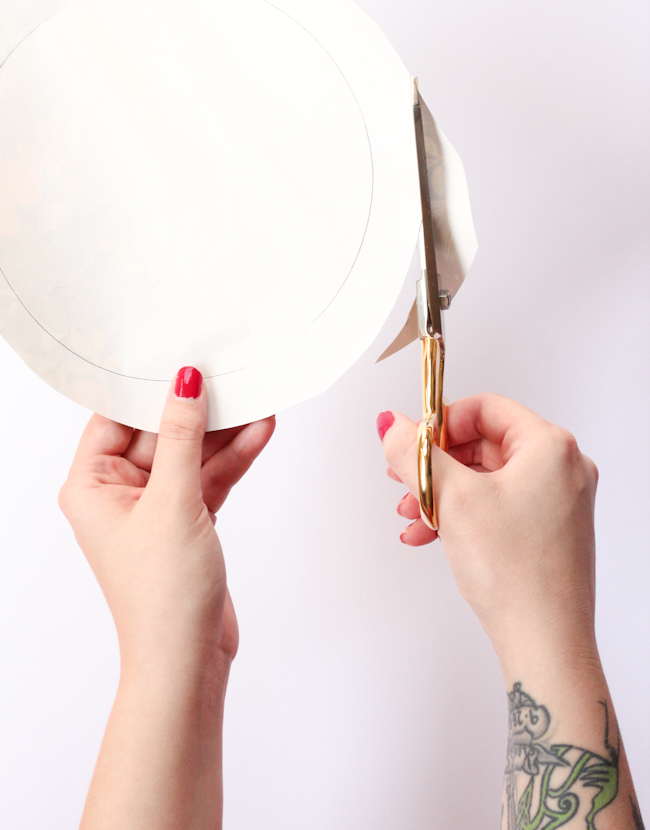
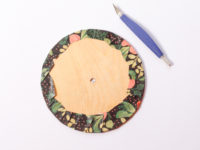
To make your clock base, simply trace a circle around the clock base that you are going to use with your chosen wrapping paper. Then cut around the circle leaving a one-inch margin, going all the way around. This doesn’t need to be too neat as you’ll be tucking this one-inch margin behind your clock face and so it won’t really be seen.
Step 3:
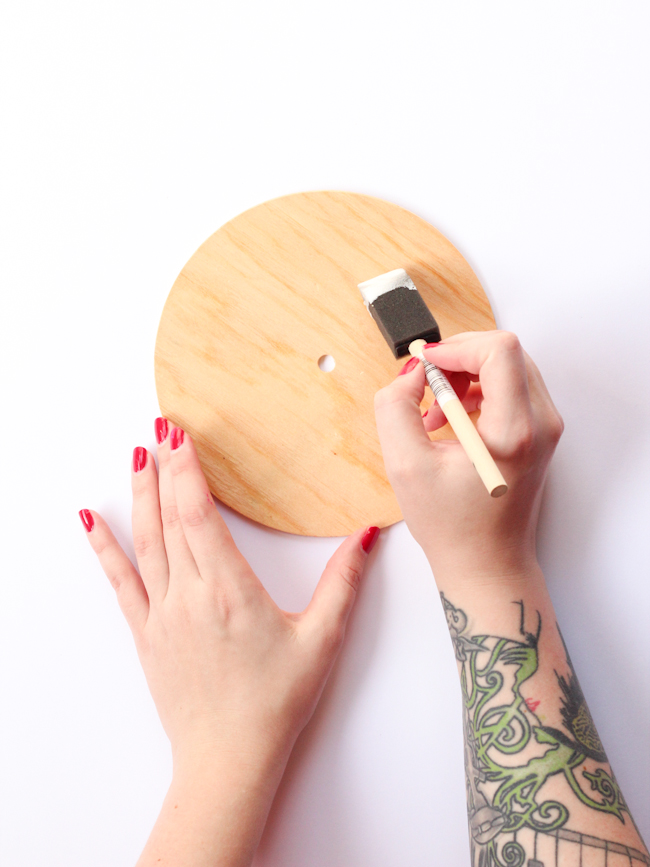
Next apply a generous amount of mod podge to your clock base and make sure you have covered it all. Cover the base with your cut out wrapping paper and smooth out any lumps and bumps that you have with your fingers. Now wrap the one-inch margin edges of your wrapping paper around the back of the clock base and Let this dry completely.
Step 4:
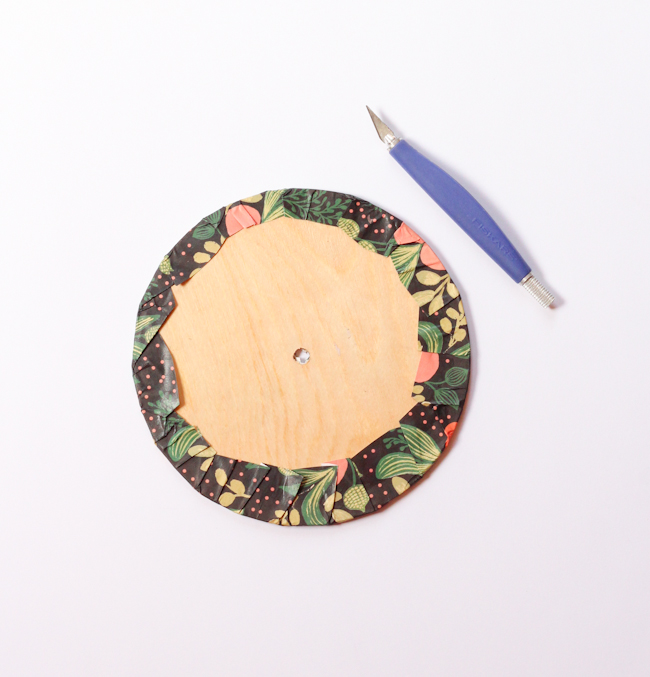
When the glue has completely dried, with the use of an X-Acto knife, cut a hole into the back of your clock face. This is where you will be securing the clock hands for your finished handmade wrapping paper clock. It’s important to note here that this needs to be done real carefully so as not to rip the existing wrapping paper or create ungainly cuts in the design.
Step 5:
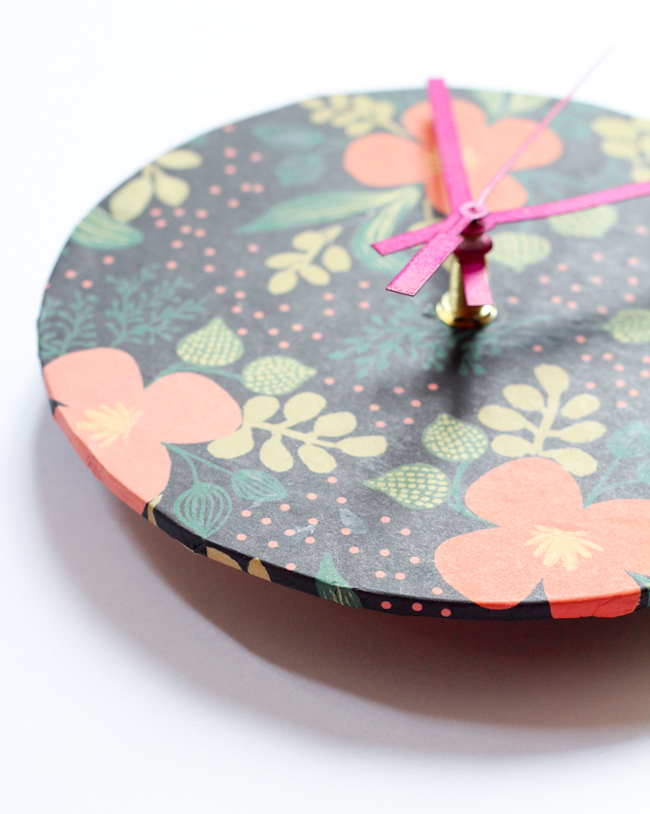
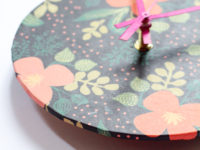
Now is the time to use of your clock kit and all you need to do is to attach it according to the instructions supplied. Having done that, your DIY wrapping paper clock is all but ready! This should take no more than an hour’s work at best and even your kids can get involved in this fun project.
Now all you have to do is decide where you wish to place your latest, coolest homemade clock!