VIEW IN GALLERY
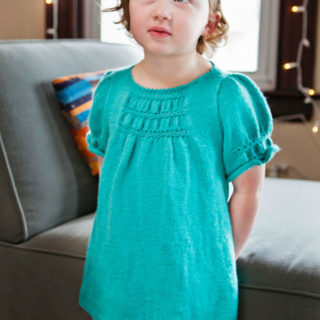
This is an easy project– perfect time to whip out your sewing machine and sew yourself a pretty Spring//Summer dress! I have never thoughte it’s so fast for making so beautiful dress . Give a try ?
Materials:
A well-fitting tank
About 2 yards of fabric
Elastic thread, coordinating thread
Scissors or rotary cutter & mat ruler and chalk
Step by step:
1.The first step is to try on your tank and mark at the smallest part of your waist. From here, mark down 1/2″.
Using your chalk & a ruler, mark a straight line around the entire tank where you marked 1/2″ from your smallest point.Cut along the chalk line.
2.Using the bottom part of your tank that you just cut off, cut a 3″ strip. (I used the entire width of the tank).
HAND-WIND your bobbin with your elastic thread, turn your stitch length up to its maximum, and sew right down the center of the long 3″ strip. It will start to ruffle, but when you put heat on it with your iron it will ruffle even more.
Place this ruffled 3″ strip down the center of your tank and pin in place.Sew up the center using coordinating thread.
3. Take the LARGEST part of your behind, multiply it by 1.5, divide it by 2.. and this gives you the width of your skirt. The length is what ever length you want it to be plus 2″. You’ll need to cut two rectangles using these measurements.
(Example: my widest point is 39″. Multiplied by 1.5=58.5. Divided by 2=29.25. I want the length of mine to be about 25″ (with the intention to hem it shorter if I want!), so adding 2″ gives me 27″. SO, I’d cut two rectangles measuring 29.25″ x 25″.
You will take these two rectangles facing right sides together and sew up both side seams (the 25″ sides).
Once you have the skirt formed, lengthen your stitch length to its maximum and sew a basting/gathering stitch along the top of your skirt. You’ll then gather the top of your skirt until it’s width matches the width of your tank.
4. keeping your skirt WRONG-SIDE OUT and your tank RIGHT SIDE OUT, stick your tank inside your skirt matching the side seams and raw edges.Pin and sew all the way around. Be sure you aren’t stretching your tank to fit the skirt, stretch (or re-gather) the skirt to fit the tank.
Flip it right-side out and you’re almost finished!
5.To make a cute sash, you’ll need to cut two 12″ by WOF* strips. Sew those strips short ends together to create one looooong 12″ strip.
Fold them right sides together and sew all the way down the long end, creating a tube. Turn your fabric right side out and tuck in the raw edges on each end, press, and top stitch.
Find the center point of your dress and of your sash. Pin your sash to your dress and hand-gather your sash so its not straight.
Sew it in place. You can repeat this for the two side-seams, if you’d like.
Tie it in a bow, and voila! You’re finished!]
Many thanks to Caroline, Source: https://bit.ly/1gp3Pnb
If you like this, share it & follow along on Facebook and Pinterest for more updates on the next Wonderful DIY!

