You might have noticed by now that we have a bit of a ‘thing’ for owls, but then again who hasn’t, right? We simply cannot get enough of these cure little critters, which is precisely why we thought we’d share with you this wonderful owl cake you can have a go at whipping up at home!
VIEW IN GALLERY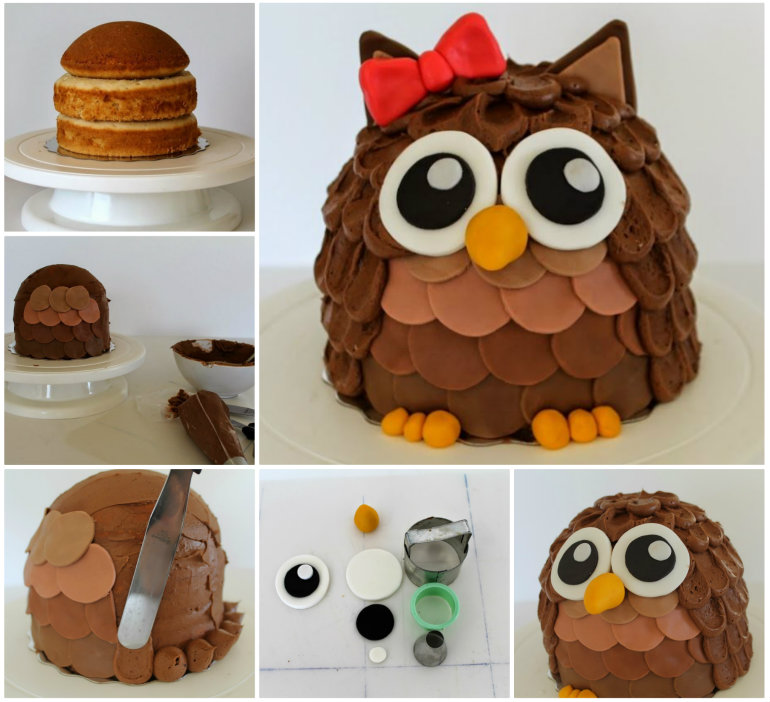
It goes without saying — kids love cake. But what if it’s cake that they helped you make at home? Owls are popular choices for DIY cakes, and you’ll have to trust us on this one, they’ll totally adore the cool sugar-filled bird. (Note: don’t blame us if they feel like bashing or making it fly in the room) 🙂
As you can see, the finished cake is every bit as amazing as any you’d find in a store, baked by professionals and carrying a pretty hefty price tag. The only difference here being that not only will you not have to pay nearly as much, but you get the opportunity to be as creative as you like! Mix up the colors, add a few extra decorative touches or go for the classic as seen here – it’s all up to you! Best of all, it might be one of the cutest cakes you’re ever likely to lay eyes on, but you really won’t believe how easy it is to make once you get started!
VIEW IN GALLERY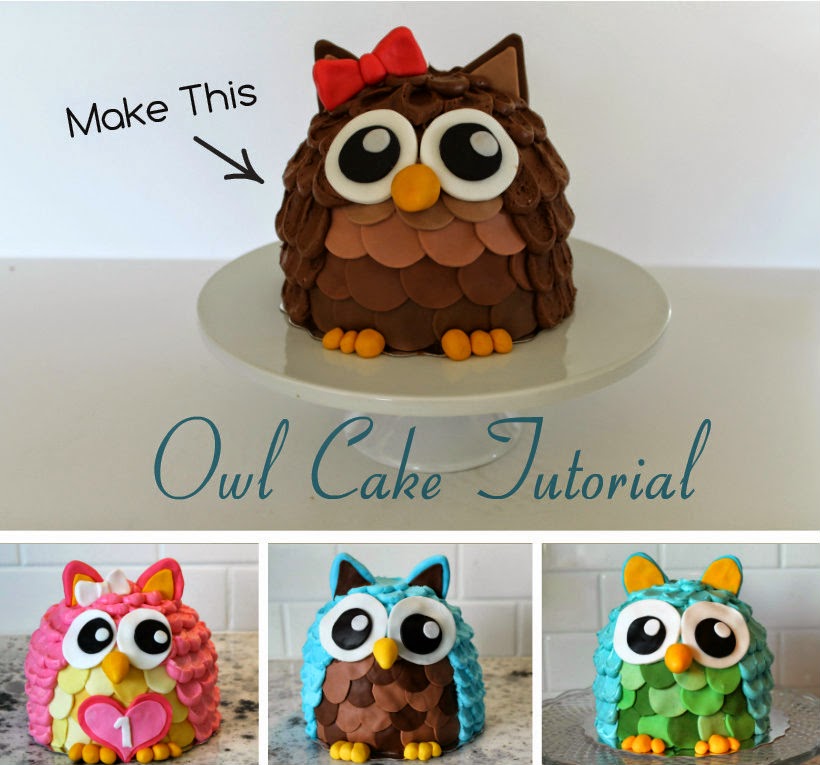
Before you head over to Joyfully Home for the tutorial let us tell you what you’ll need.
Owl Cake Tutorial
- 2 six inch round cake layers
- 1 half of a ball cake layer
- 2 cups of chocolate frosting {Like my Whipped Buttercream} or white coloured icing
- 8 inch foil cake board or cake platter
- 1A round decorator’s tip
- decorator bag
- few balls of coloured fondant
- round cutters – 1 1/2 inch, 2 inch, 3/4 inch (or base of 1A tip)
Once you pick up the basics on how to make the owl design itself, you can set your imagination free and come up with an amazing design of your own!
VIEW IN GALLERY
