These leaf shaped stepping stones are an economical way to make a personalized pathway or to add to your landscape as a decorative feature. They are perfect for an outdoor space .Everyone has these beautiful pieces in their gardens it seems. It’s a simple project that is quick and fun to do.
What you will need:
– rubber gloves
– heavy plastic sheeting
– leaves
– pre-mix concrete – One standard-size bag will make three of the leaves shown here, which are about 45 centimetres square and eight centimetres thick;
– mortor or cement colourant, if you want a colour other than the light grey that pre-mix concrete produces (Lee Valley Tools has this stuff as well as Michael’s Craft Store)
– Chicken wire or one-centimetre-square wire mesh – wire cutters.
Directions:
1. To make the stepping stones, choose an area that will remain undisturbed for several days. Any level surface – a driveway, concrete patio, bare patch of soil or even the grass – will work.
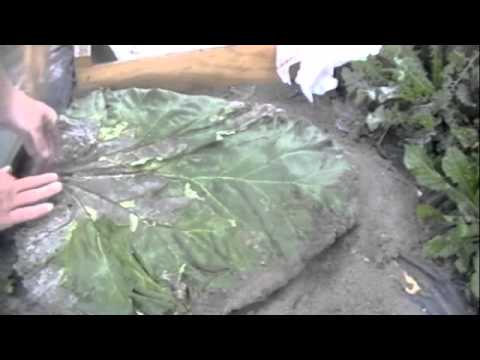
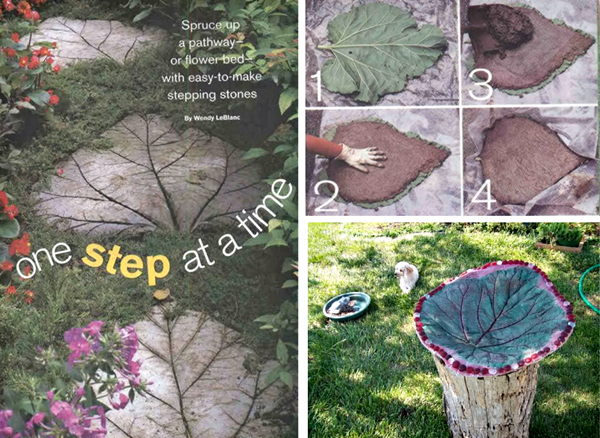
2. Cut a peice of plastic sheeting at least 15 centimetres larger all around than the leaf (or another desired shape), and place it on the ground. Put the leaf in the centre of the plastic, vein-side up (Photo 1).
3. Mix the concrete to a stiff consistency, following package instructions. With gloved hands or a shovel, move concrete onto the leaf, spreading it almost to the edge of the leaf to a thickness of approximately 2.5 to 4 centimetres; press firmly to eliminate air bubbles (Photo 2). If you’re using a small leaf or several leaves to create an imprint only, spread the concrete to form the shape you want.
4. To ensure strength and durability, place chicken wire on the concrete to within five centimetres of the edge, overlapping pieces if necessary. Shovel concrete on top of the chicken wire (Photo 3), again spreading to a thickness of about 2.5 to 4 centimetres and pressing firmly to eliminate air bubbles.
5. Gently lift the plastic up around the design (Photo 4), smooth edges with gloved hands or a trowel to ensure an even look, and place earth or gravel up around the form to support it while it cures.
6. Cover with a second piece of plastic to keep the concrete from drying out. Allow to cure for at least 48 hours, then lift the stepping stone from the plastic (the plastic peels away easily) and turn it over to see the walking surface.
7. Remove small pieces of vein or leaf with a hose turned to jet spray. If you’ve made the stepping stone in hot weather, much of the leaf will have already decomposed. You can place the stones in the garden immediately, but avoid stepping on them until the concrete has completely cured – curing time depends on the type of concrete mix used, but it usually takes five to seven days. Spray with water frequently during the curing period. Make sure the stones are set firmly in the ground and they won’t move when walked on.