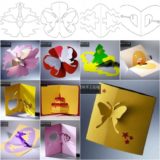
Once you start crafting with jar lids, it quickly becomes hard to stop. These 16 DIY jar lid craft ideas explore fun designs and clever builds that transform simple lids into eye-catching creations. Every piece feels unique and full of personality.

DIY Jar Lid Craft Ideas Everyone is Testing Out in 2026
Jar lid crafts are taking over DIY in 2026, transforming the smallest, most overlooked pieces into creative gems that pack serious visual impact. What looks like a simple lid can quickly become a decorative accent, a clever organizer, or a charming handmade detail that feels far more impressive than expected.
Inside this collection, jar lids evolve into everything from mini wall décor and cute magnets to tiny frames, candle accents, and creative storage ideas that look both fun and stylish. Every idea dares you to think small but create big, turning those little lids into eye-catching pieces that feel inventive, playful, and impossible to ignore.
1. Vintage Clock Jar Lid Ornaments

These are giving Victorian Christmas meets steampunk chic tiny clock faces framed in gold with sparkly trim and dangling crystals. Honestly? They look like something straight off a designer tree.
Use metal jar lids (regular or wide-mouth), print or cut vintage clock images to fit inside (approx. 2.5–3 inches), and glue with Mod Podge. Add metallic gears, rhinestones, or beads in the center with strong craft glue. Wrap the rim with gold tinsel trim, attach a small crystal bead drop using jewelry wire, and finish with a ribbon loop for hanging. Tree = instantly upgraded!
2. Upcycled Lid Toy Car

Who knew jar lids could turn into the cutest little DIY car? It’s playful, colorful, and perfect for kids or quirky desk decor.
Use 4 jar lids as wheels and a cardboard rectangle (about 6×3 inches) for the base. Attach wheels with wooden skewers or straws as axles, securing with hot glue. Add a plastic lid or cup for the “driver seat” and decorate with paint or tape. Optional: glue a pencil or stick upright for a fun “driver.” Vroom, but make it crafty!
3. Lace & Evergreen Christmas Ornament

Soft, delicate, and totally cozy this ornament feels like a snowy cottage moment. The lace detail + greenery combo is effortlessly elegant.
Start with a jar lid and glue a circle of cardboard or fabric inside. Layer a small piece of faux pine (about 2–3 inches), tiny snowflake embellishments, and a swirl of red craft wire. Wrap the outer edge with lace trim using hot glue, then attach ribbon or twine for hanging. It’s subtle holiday magic in one tiny piece!
4. Botanical Resin Lid Magnets

These are mini works of art pressed flowers sealed inside lids like little nature snapshots. Think fridge magnets, but make them aesthetic.
Place dried flowers or printed botanical images inside clean jar lids. Mix clear epoxy resin (follow package ratios carefully) and pour a thin layer to fill the lid. Let cure 24 hours on a flat surface. Once hardened, glue a magnet to the back. Pro tip: use tweezers for precise flower placement before pouring!
5. Mini Framed Photo Lids

Tiny gallery wall energy these lids turn into adorable mini frames for photos, art, or even scrapbook vibes. Think bold colors, goofy expressions.
Cut photos or patterned paper to fit inside the lid (trace for accuracy). Glue in place with Mod Podge and seal with a top coat for a glossy finish. You can add a clear plastic circle or resin layer for a “glass” look. Attach magnets, hooks, or string depending on how you want to display. Small but SO cute!
6. Bottle Cap Lid Character Craft

This one is pure, unapologetic fun like the kind of craft that instantly turns into a giggle-filled moment. With just a simple jar lid as your base, you can transform everyday materials into quirky,
Use a larger jar lid for the face base. Paint it bright yellow, blue, or any character color using acrylic paint. Add details with markers or cut foam shapes like overalls, eyes, and smiles. Use a smaller lid or cap for 3D features (like the eye). Glue everything with hot glue and let dry. Craft time = instant giggles!
7. Bottle Cap Turtle Art

Cute alert! This little turtle is made almost entirely from recycled pieces and gives big preschool craft energy in the best way.
Use a paper plate (cut in half) as the shell base and glue multiple green bottle caps on top for texture. Cut head, legs, and tail from green cardstock (about 2–3 inches each) and glue underneath. Add googly eyes and paint details for personality. It’s simple, sweet, and perfect for a rainy afternoon craft!
8. Hanging Lid Flower Decor

These cheerful flower hangings are basically sunshine you can craft bright, smiley, and perfect for kids’ rooms or garden décor.
Use colorful jar lids or bottle caps for the flower centers. Cut petal shapes from foam or cardstock (about 1–2 inches long) and glue around the lid. Add googly eyes, pom-poms for noses, and draw smiles with paint pens. Attach yarn or string as the stem and glue felt leaves along it. Hang them up and boom—instant happy vibes!
9. Heartfelt Foam Love Bugs

Tiny, glittery, and bursting with Valentine charm these adorable love bugs are basically happiness with googly eyes. The layered pink and red hearts give it that “aww-stop-it-right-now” energy, perfect for cards, gifts, or cute table scatter.
Grab glitter foam sheets in red and pink, cut 4–6 heart shapes (about 2–3 inches each), and layer them using hot glue for a fluffy body. Add a larger heart (around 3–4 inches) for wings, glue on a mini pom or foam oval for the face, and finish with googly eyes and tiny paper antennae. Let everything set for 5 minutes done and darling. Yes, please!
10. Minimalist Tin Lid Landscapes

This is giving artsy coffee table moment but make it recycled. A simple tin lid becomes a dreamy little mountain scene with neutral tones and texture that feels straight out of a design magazine.
Use a clean jar lid (about 3–4 inches wide), cut corrugated cardboard into mountain shapes, and glue them inside. Paint sections with acrylics (white, beige, soft gray), and add a tiny paper house (1 inch wide) plus a circle “moon.” Use tacky glue for precision, and let dry 20 minutes. Can you picture a whole gallery wall of these?
11. Vintage Collage Keepsake Tins

These are like tiny memory boxes with major old-world romance energy florals, butterflies, and soft vintage prints layered into something totally swoon-worthy. Perfect for wedding keepsakes or aesthetic desk decor.
Line a tin lid with scrapbook paper (cut to fit), then layer magazine cutouts, washi tape, and stickers using Mod Podge. Seal with a top coat for that glossy finish (dry time: 15–20 mins). Add lace scraps or mini beads for texture. It’s giving heirloom vibes in the chicest way.
12. Googly Eye Mini Portrait Lids

Whimsical, quirky, and just a little chaotic in the best way. These tiny faces made from paper scraps and big googly eyes are instant mood boosters (and honestly, kind of addictive to make).
Use bottle caps or small lids, glue in a white paper base, then build faces using cut paper shapes for hair, clothes, and features. Add oversized googly eyes with strong craft glue, then draw details with a fine-tip marker. Let dry 10 minutes and boom tiny personalities unlocked. Can you stop at just one?
13. Glitter Pumpkin Lid Ornament

Fall but make it sparkle. This pumpkin ornament is cozy, glam, and ready to steal the spotlight on any autumn tree or garland. That chunky glitter finish? Chef’s kiss.
Take a mason jar lid, coat it with orange acrylic paint, then brush on Mod Podge and sprinkle chunky glitter generously. Attach a small cinnamon stick (about 2 inches) as the stem using hot glue, and add fabric leaves. Loop twine (6–8 inches) for hanging. Dry time: 30 minutes. Fall aesthetic = handled.
14. DIY Christmas Tin Ornaments

These festive little tins are basically mini snow globes without the shake sparkly, layered, and ridiculously charming. The tiny paper trees? Obsessed.
Line lids with vintage sheet music or scrapbook paper, glue in a small triangle tree (about 2 inches tall), and decorate with a foam star and mini pom-poms. Add faux snow (cotton or batting) and outline edges with glue + glitter. Attach pipe cleaner loops for hanging. Let dry fully (20–30 mins). Holiday magic, but handmade.
15. Mini World Play Scenes

Tiny worlds, big imagination. These lid dioramas are perfect for kids (or let’s be honest…us too) with little roads, lakes, and trees packed into a palm-sized scene.
Fill jar lids with felt circles (cut to size) for grass, water, or dirt. Add small wood blocks (1–2 inches) for houses, paper triangles for trees, and felt strips for roads. Use hot glue for sturdy placement. Optional: seal with clear glue for durability. It’s like a toy + craft + decor all in one.
16. Recycled Lid Hanging Cluster

This is the ultimate upcycle glow-up turning a pile of green lids into a bold, sculptural hanging piece that’s equal parts eco and eye-catching. Hello, statement decor.
Punch small holes in plastic lids and thread them onto sturdy twine or thin wire, layering them in a bunch (about 15–25 lids total). Wrap the top with thicker rope (8–10 inches) to create a loop hanger, securing with hot glue. Adjust spacing so they fan out naturally. Hang and admire your zero-waste masterpiece.