Here’s another awesome tutorial to take you through the process of creating these amazing Paper Hyacinth Flowers – just the ticket to brighten up the rooms of your home! Unlike fresh flowers, these babies won’t wilt and fade in a matter of days and are guaranteed to hold onto their gorgeous looks and color for longer! Speaking of colors, you’ll have your pick of the rainbow when it comes to making your own bouquet – stick with the classic or make you flowers as bright and breezy as you like!
VIEW IN GALLERY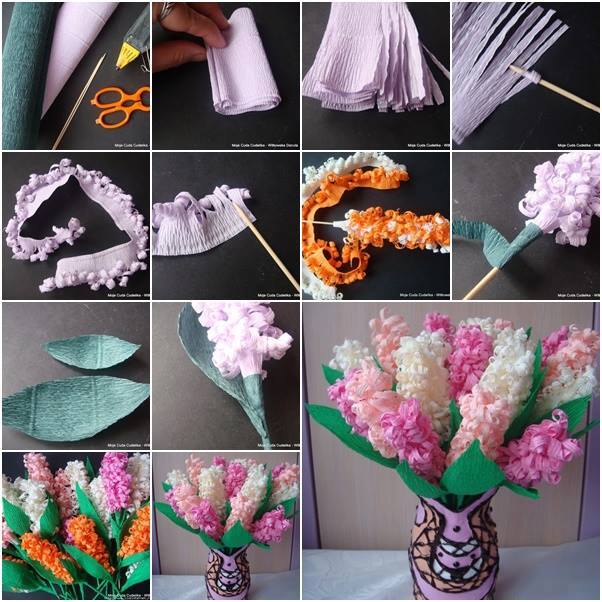
Best of all, there’s really very little you’ll need to get started other than the basic paper itself and a few everyday crafting accessories! Get the kids involved and enjoy a family crafting project that produces genuinely mind-blowing results!
What You’ll Need
– Crepe Paper
– Scissors
– Toothpicks
– Thin Sticks
– Glue Gun
Paper Hyacinth Flowers Tutorial
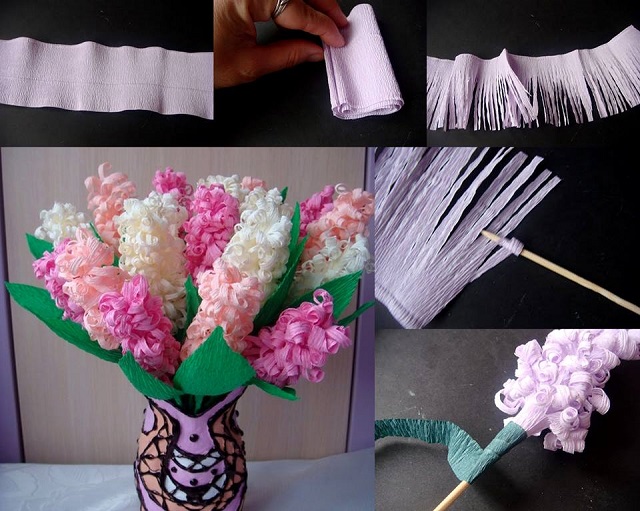
- Step one is to take the crepe paper and cut it into strips, which should then be wrapped and ‘fringed’ using scissors (see image for examples)
- Use a toothpick to wrap the fringes around and create the curled effect. The idea is one that should leave you with a bottom part that hasn’t been changed and a top end with curls.
- Attach the curled paper to a thin stick using the appropriate glue, sticking with either one color or mixing it up.
- Finish off by adding more crepe paper to the ‘stems’ to give them a dash of color, along with a few added paper leaves.
VIEW IN GALLERY