First things first, we must apologize. The truth is, this isn’t really a “how to” article for making pom poms, but rather a resource for you to find out how to make pom poms in a way that works for you! You see, we sat down all ready to write you a “how to”, but when we really thought about it, we realized that we know many ways to make pom poms and if you ask a room full of yarn work enthusiasts which way is best, they’ll all tell you something different. We figured out best strategy was really to gather all of the different methods in one place so you can try them out for yourselves and see which one you find the most effective.


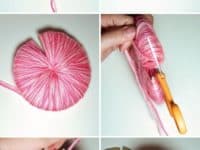


Without further adieu, here are 15 simple ways to make classic pom poms (mostly out of yarn)!
1. The cardboard template method
Homemade Gifts Made Easy suggests using cardboard cut out and folded into a particular arching shape to make the best pom poms around! In fact, they swear by that shape so much that they’ve actually given you a template here to make sure you’re able to make your own correctly before you even get down to pom pom making. Cut it out, bend up the ends, and start wrapping your yarn around and around the arch.
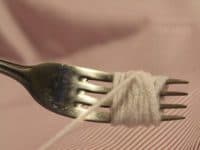
2. The fork method

The fork method is great for making small to medium sized pom poms, depending on how many times you wind the yarn around. The more winding you wrap, the denser and thicker your pom pom will be. Wrap your yarn around all four tongs over and over until you’re satisfied with the size of the pom pom and then cut a long string and wrap that around the middle of the pom pom between the two centre tongs, pulling hard and knotting it. Cut the sides by the outer tongs, fluff it up, and voila! Instructables has step by step pictures for you.
3. The double toilet paper roll method
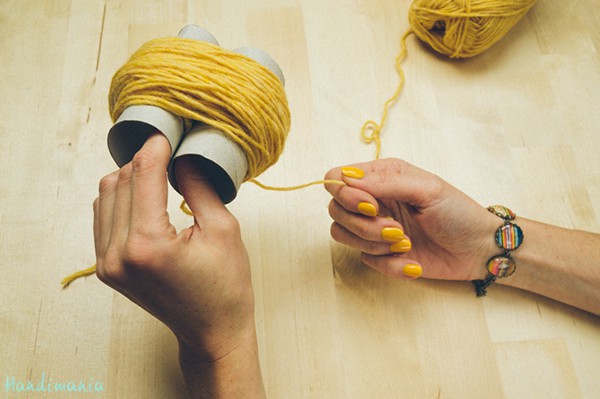
Perhaps you’re hoping to make a pom pom that’s a lot bigger and thicket than what you can get on the work tongs? Then save up a couple of empty toilet paper rolls and hold them side by side. Wrap the yarn around and around the thickness of both rolls held together until you’re happy with the size and tie the pom pom in the middle between the two rolls so you can cut on the outer side of each. Get the full details on Handimania.
4. The cardboard circle method
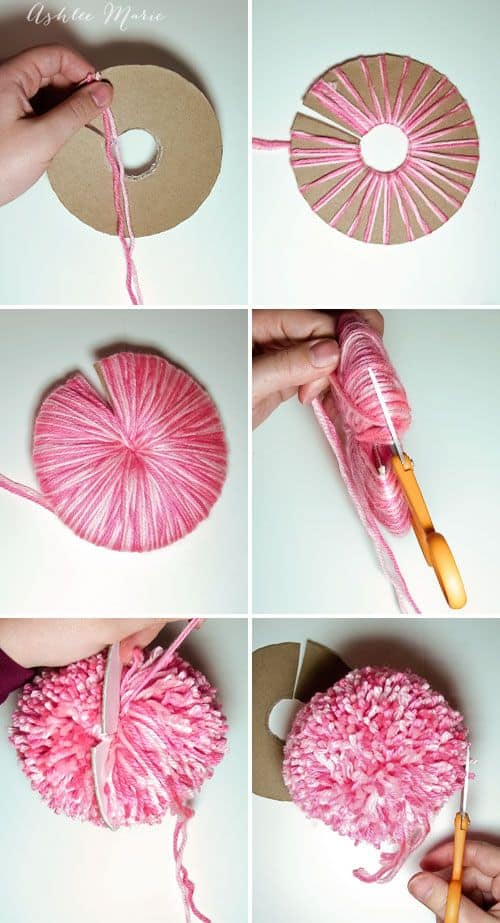
Ashlee Marie has another cardboard cut out suggestion for you! While they don’t provide you with an actual template, they do both tell and show you exactly what the shape looks like so you can mimic it yourself. They also highlight the importance of the cut in the cardboard to make sure you can actually slide the pom pom off and get the cardboard circle out once you’ve cut and fluffed your yarn!
5. The hand wrapping method
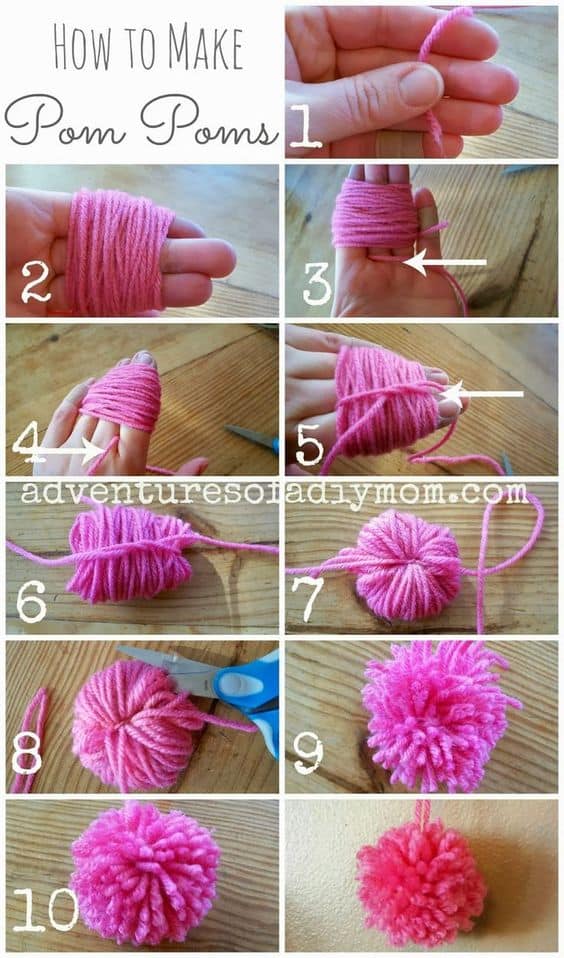
Would you rather make the pom pom with your bare hands instead of using all kinds of templates and tools, because that and a pair of scissors is all you really have to work with right now? Well, don’t worry, because that’s totally possible too! Hold your four fingers out and wrap the yarn around them like you’ve seen in every method so far. When it comes time to wrap the middle of the pom pom before you cut the fringe, do it between your middle and forefinger, just like Decozilla shows you here.
6. The bulk pom pom method
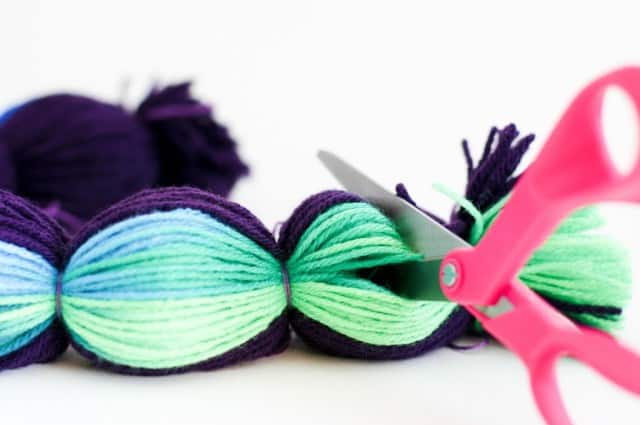
Are you making a project that involves many pom poms, or perhaps making several hats for your family for Christmas and you need pom poms for each? The we think you’ll appreciate learning this way to make them all at once! Flax and Twine guides you through the process of bunching all the yarn you need together for the correct thickness, tying it off tightly at intervals, and cutting it in between to make as many pom poms as you need, depending on the size.
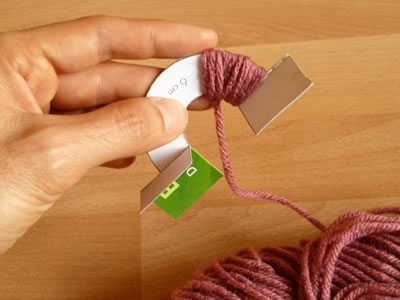
7. The cardboard tongs method
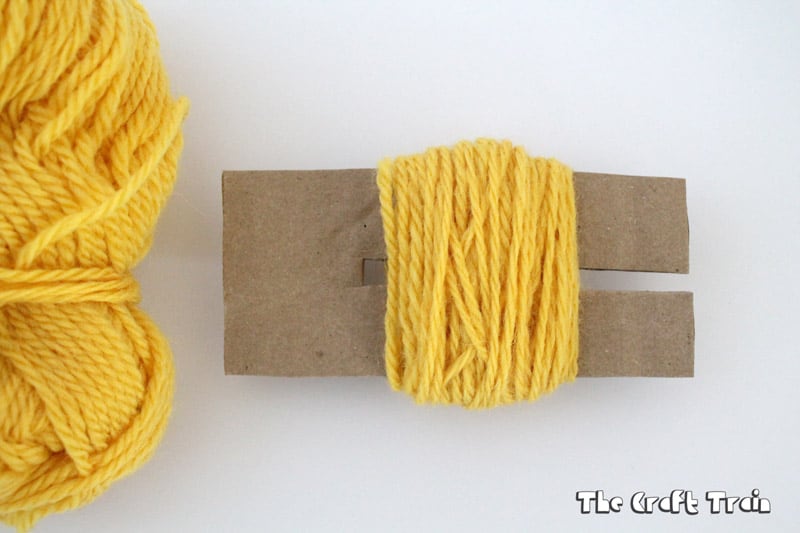
Just in case cardboard is still one of your most available DIY tools but you haven’t been quite satisfied with any of the cardboard template methods you’ve seen so far, here’s another one! It’s similar to the fork method but you’re cutting yourself two thick tongs to wind around and tie between instead. See how it’s done on The Craft Train.
8. The embroidery hoop method
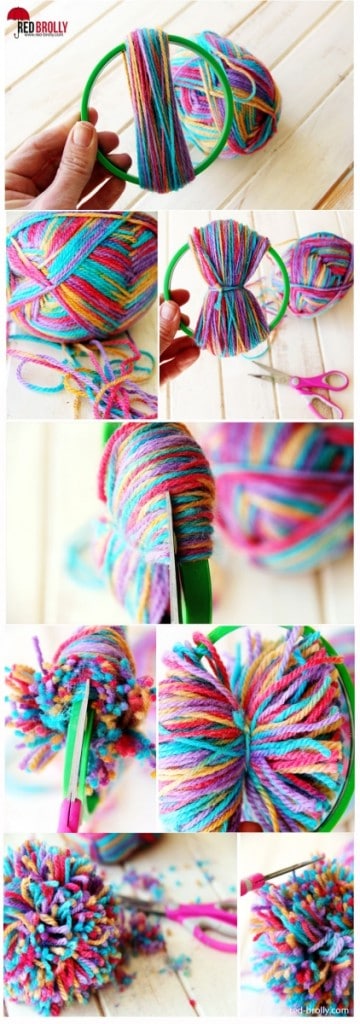
Do you have small embroidery hoops stashed somewhere in your crafting room left over from the time you tried to teach your kids needlepoint and cross stitch? Then put them to another use by using them as a frame for pom pom making! This time, you’ll wind your yarn around the outer edges and tie it off in the middle on the inside of the frame before you cut, just like Red Brolly did here.
9. The toilet roll section method
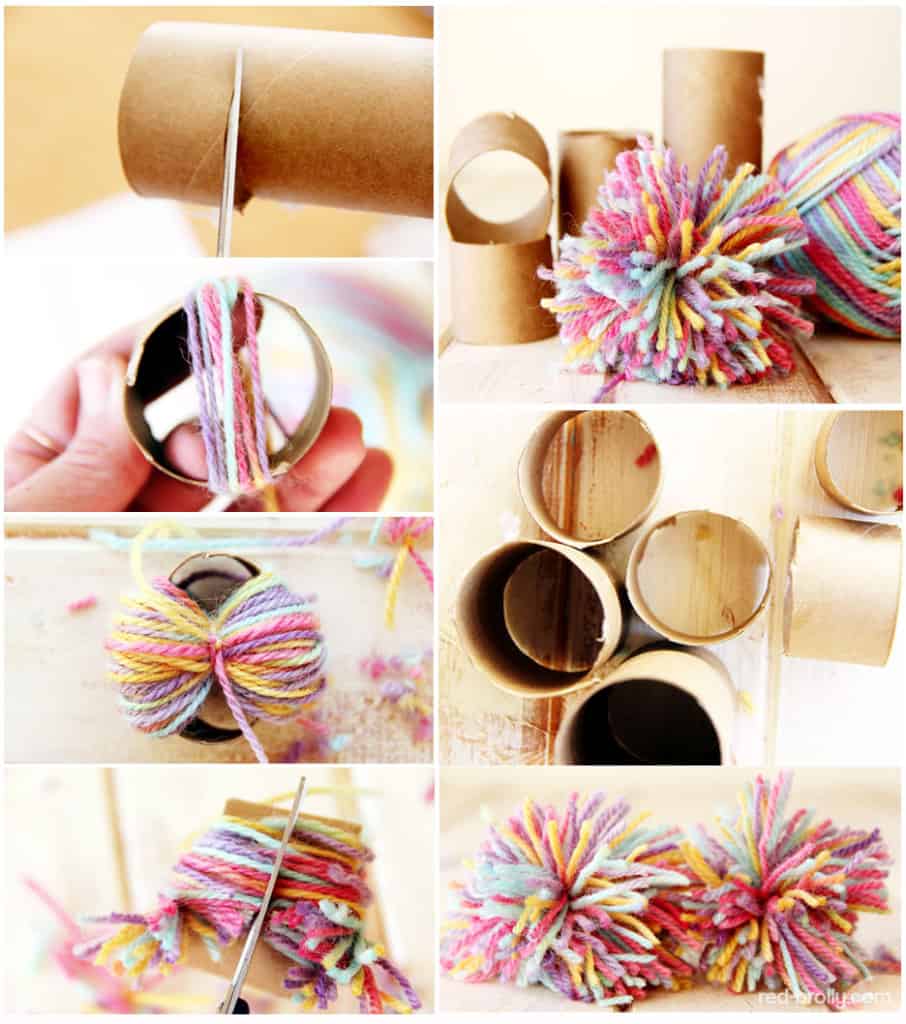
Did you like working with the toilet roll because those are affordable and easy to use but now you need a pom pom that’s much smaller in size and thickness? Then cut the toll into little sections and wind around that instead! Try to strike a balance between pulling hard enough that the pom pom has good density and pulling so hard that you crumple the cardboard section. Tie it around the middle in the hollow part and cut the yarn on the outside like Red Brolly shows you here!
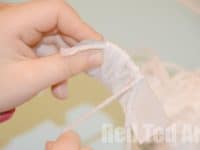
10. The card strip method
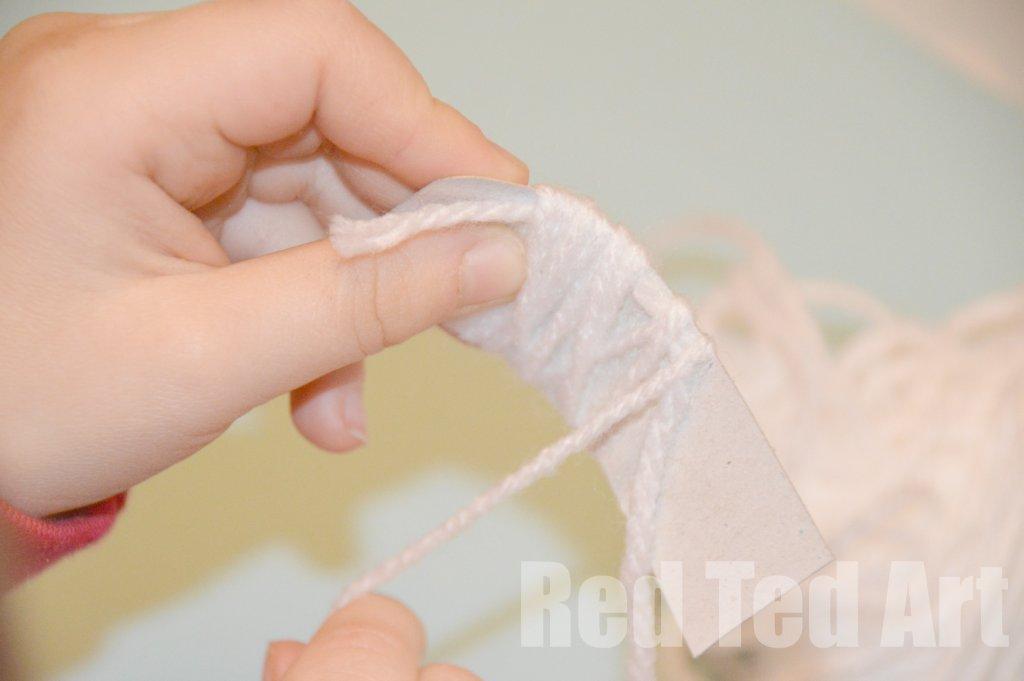
Are you look for perhaps the simplest way of all because your goal for now is just to teach your kids the basics of how pom poms are made before you work on different methods or figuring out which ones they’ll prefer? Then all you need, besides yarn and their hands, is a strip of thick card stock or thin cardboard! Red Ted art shows you how to do the rest.
11. The 60 second full ball method
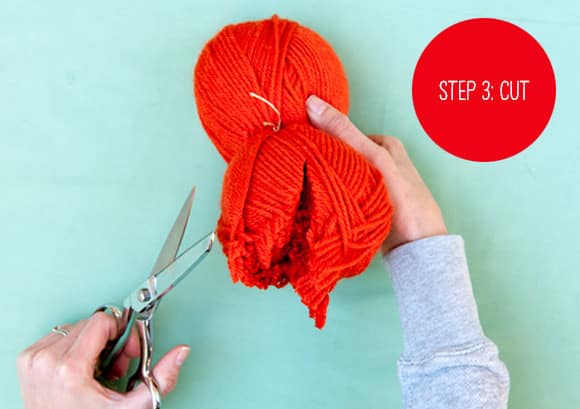
Perhaps what you really need is a massive novelty pom pom and you’re not too concerned about fullness or density as long as you’ve got a good size? Then check out how Handmade Charlotte made a massive pom pom out of an entire ball of yarn just by tying it tightly around the middle and cutting it! The results are looser and less dense than some other methods but amazingly big and poofy.
12. The fur pom pom
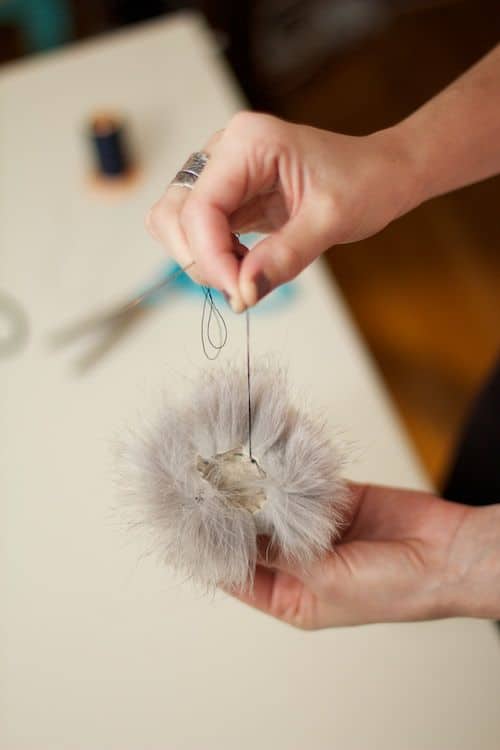
Have you been scrolling through this list hoping the whole time that we’d finally show you how to made a pom pom out of faux fur fabric? Well, here it finally is! This post on Pinterest suggests cutting a large circle of the fabric, placing some stuffing in the centre, and threading a needle in small stitches all the way around the outer edge so that when you pull the thread it bunches the material inward, making a ball around the stuffing. Voila, a fuzzy pom pom!
13. The t-shirt pom pom
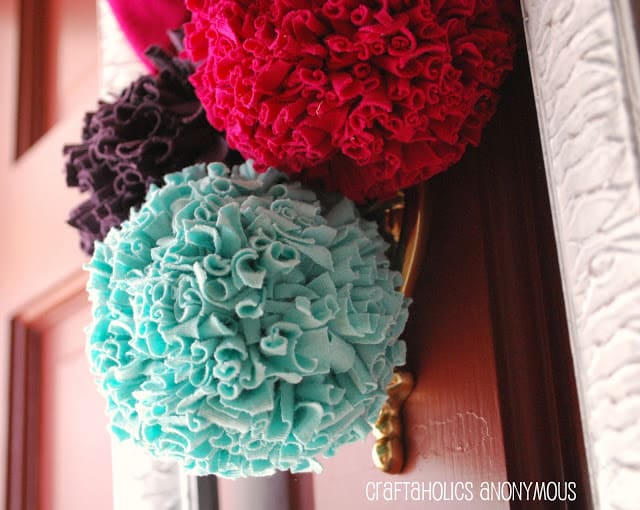
Maybe you love pom poms so much that you want to experiment with making them from all kinds of materials? Then hold onto your old shirts, because Craftaholics Annonymous is here to guide you through the process of creating a big, curly looking pom pom out of strips of old t-shirt material. We love the size and texture of the finished product.
14. The tissue paper pom pom
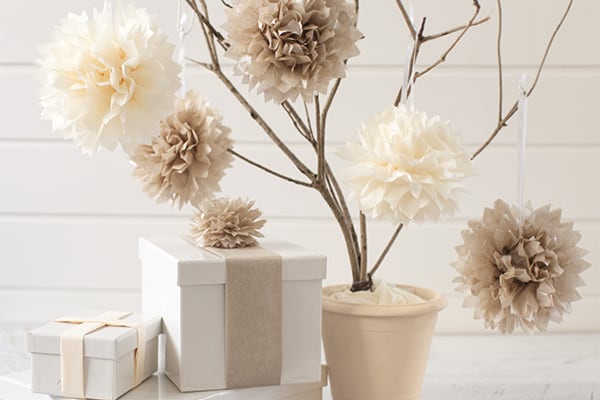
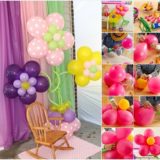
Are you hoping to include unique pom poms in your party decor but you need many of them and would prefer to do it more affordably than buy lots of yarn allows for, but you also don’t have that many old t-shirts lying around right now? Then tissue paper is definitely your answer. Tara Dennis shows you how to make them, fluff them up, and hang them around like lovely peonies.
15. The tulle pom pom
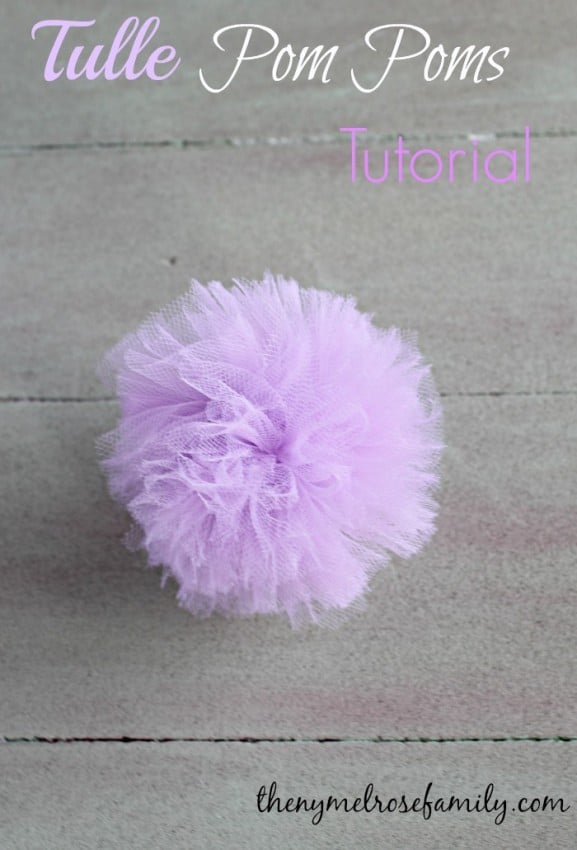
Perhaps you’re working on a particularly girly project that you really want to look whimsical and feminine? Then tulle is about to become your best friend! No matter what colour you make them in, your tulle pom poms will be nice and dense if you follow the tutorial on The Melrose Family.
Do you know someone who’s been trying to figure out the best way to make a pom pom but they haven’t really started practicing yet? Share this post with them so they know all their options before they waste any yarn!