VIEW IN GALLERY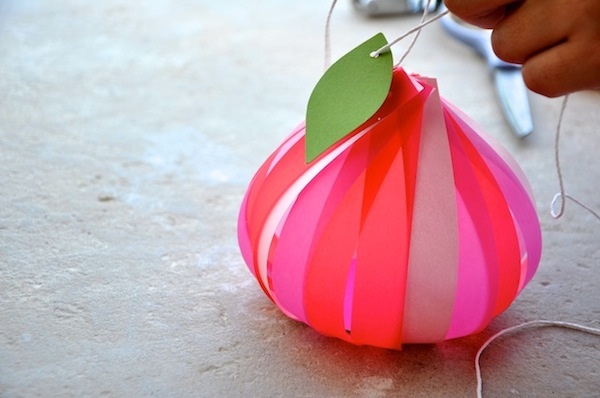 VIEW IN GALLERY
 VIEW IN GALLERY
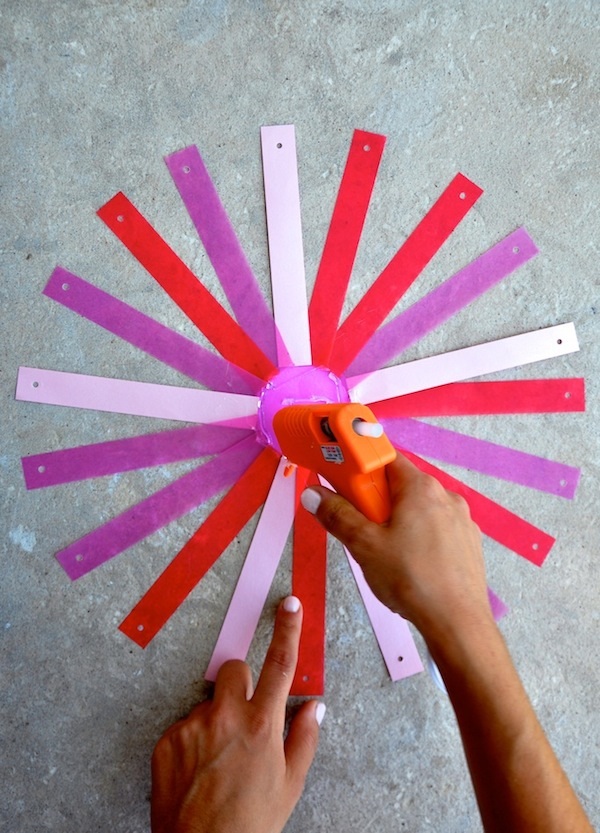 VIEW IN GALLERY
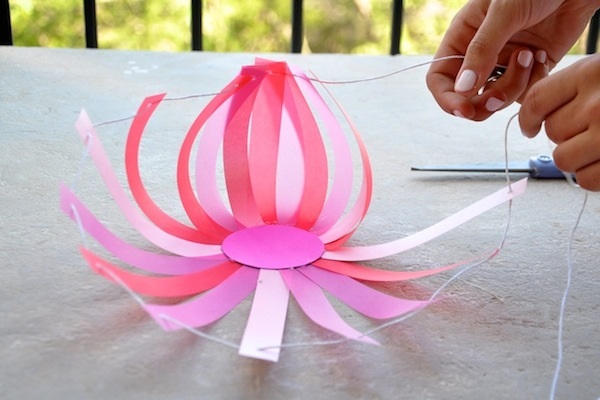 VIEW IN GALLERY
 VIEW IN GALLERY
 VIEW IN GALLERY
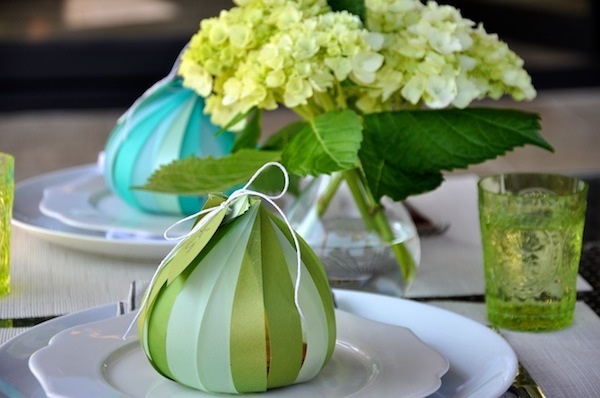
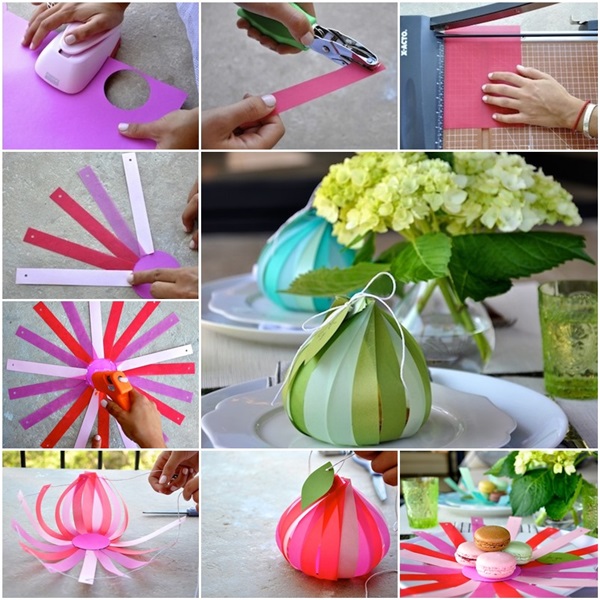
How beautiful is this blooming gift wrapper ! If you’re still stressing about last minute gifts, we are here to assist you in the form of DIY Gift wrapper. Not only is this DIY gift wrapper useful, they will also calm your nerves.
What you will need:
- Colorful translucent paper
- Card stock for the center of each wrapper
- White twine
- Hot glue
- Ruler
- 2 inch circle paper punch
- 1 cm hole punch
- Paper trimmer or scissors
Instructions:
- Cut 5 1/2 inch by 3/4 inch strips of paper in an ombre of shades (we needed about 20 strips per pouch).
- Punch a small hole in the center on one end of each strip.
- Cut out 2 circular pieces of card-stock with the large hole punch
- Pick up your first strip. On the end without the hole, draw a thin line of glue on the very edge of the paper. When gluing the strip down, glue the left bottom corner in line with the edge of the circle, while the right bottom corner is pressed 1/4 of an inch below the edge of the circle
- To continue the ripple effect, apply glue to each consecutive strip.
- Use hot glue to secure the second circle in the middle of the medallion.
- String white kitchen twine through the holes on the strips, and gently tug the drawstring to draw in the petals.
- String the leaf onto the twine & tie in a bow once it is sealedVIEW IN GALLERY